Beef stew is the ultimate comfort food. This hearty beef stew recipe brings tender chunks of beef, soft vegetables, and a rich savory broth together in one warm bowl. It’s cozy, flavorful, and perfect for chilly nights. With simple ingredients and slow cooking, it’s a recipe you’ll crave all winter.
Versatile: Works in stovetop, slow cooker, or Instant Pot.
Family-friendly: A dish everyone will enjoy.
Ingredients
Yields 6 servings
2 pounds beef chuck, cubed
3 tbsp olive oil
2 medium onions, chopped
3 cloves garlic, minced
4 medium carrots, sliced
3 celery stalks, chopped
3 medium potatoes, cubed
3 tbsp tomato paste
4 cups beef broth (low sodium)
1 cup red wine (or extra broth)
2 tbsp Worcestershire sauce
2 tsp salt
1 tsp black pepper
2 tsp dried thyme
2 bay leaves
2 tbsp flour (for thickening)
For Garnish
Fresh parsley, chopped
Extra black pepper
💡 Tip: Swap red wine with Guinness for a richer flavor or add mushrooms for extra depth.
Step-by-Step Instructions
Step 1: Prepare the Beef
Pat beef dry with paper towels. Season with salt and pepper. Heat 2 tablespoons of olive oil in a large pot or Dutch oven. Brown the beef in batches, about 4–5 minutes per side. Set aside.
Step 2: Sauté the Vegetables
Add remaining oil to the pot. Cook onions, carrots, and celery for 5 minutes until softened. Stir in garlic and tomato paste. Cook 1 minute more.
Step 3: Build the Base
Add wine (if using) and scrape up brown bits from the pot. Let simmer 2–3 minutes. Stir in broth, Worcestershire sauce, thyme, bay leaves, and browned beef.
Step 4: Simmer the Stew
Bring to a boil, then reduce heat. Cover and simmer 1½ to 2 hours, stirring occasionally. The beef should be tender.
Step 5: Add Potatoes
Stir in potatoes. Cook for another 30 minutes until potatoes are fork-tender.
Step 6: Thicken and Serve
Remove bay leaves. Mix flour with a few tablespoons of broth in a small bowl to create a slurry. Stir into stew. Simmer until thickened. Garnish with fresh parsley. Serve hot.
Slow Cooker Method
Brown beef as above.
Add beef, vegetables, broth, wine, and seasonings to the slow cooker.
Cook on LOW for 8–9 hours or HIGH for 4–5 hours.
Add slurry near the end to thicken.
Instant Pot Method
Brown beef on Sauté mode. Remove.
Sauté onions, carrots, and celery. Add garlic and tomato paste. Deglaze with wine.
Add beef back with broth, potatoes, and spices.
Pressure cook on High for 35 minutes. Natural release 10 minutes.
Chef’s Tips for Perfect Beef Stew
Use the right cut: Beef chuck has enough fat for tender results.
Brown well: Deep browning gives maximum flavor.
Don’t rush: Low and slow makes beef melt-in-your-mouth.
Deglaze: Scrape up browned bits — they’re flavor gold.
Rest time: Stew tastes even better the next day.
Variations to Try
Guinness Beef Stew: Replace wine with Guinness for rich depth.
Herb Boost: Add rosemary and bay leaves for earthy aroma.
Mushroom Stew: Stir in mushrooms during the last 30 minutes.
Gluten-Free: Skip flour and thicken with cornstarch slurry.
Serving Suggestions
Pair this hearty beef stew with:
Crusty bread or buttery rolls
Mashed potatoes for an extra cozy meal
A crisp green salad for balance
Storage and Freezing
Refrigerate: Up to 4 days in airtight container.
Freeze: Up to 3 months. Thaw overnight in the fridge.
Reheat: Warm gently on stovetop, adding a splash of broth if needed.
Nutrition (per serving)
Calories: ~420
Protein: 34 g
Fat: 20 g
Carbs: 28 g
Fiber: 4 g
Frequently Asked Questions
Everything you need to know about making the perfect beef stew.
What cut of beef is best for stew?
Beef chuck is ideal because it has the right balance of fat and connective tissue.
It becomes tender and flavorful after slow cooking. Brisket and short ribs also work well.
Can I make beef stew without wine?
Yes. Replace red wine with extra beef broth for a non-alcoholic version.
A splash of balsamic vinegar adds depth of flavor if desired.
How do I thicken my beef stew?
Mix 1–2 tablespoons of flour or cornstarch with cold water to make a slurry.
Stir it into the stew and simmer until thickened. You can also mash a few potatoes.
Can I freeze beef stew?
Yes. Beef stew freezes well for up to 3 months.
Cool completely before freezing. Reheat gently on the stovetop, adding broth if it thickens too much.
Why does stew taste better the next day?
Resting allows flavors to meld and deepen overnight.
Store it in the fridge and reheat slowly for the best results.
Final Thoughts
This hearty beef stew recipe is the perfect comfort food for winter nights. With tender beef, flavorful vegetables, and a rich broth, it’s a recipe that will warm your table and your heart.
Prefer something with bold and savory flavors? Try our Black Pepper Chicken recipe — it’s peppery, satisfying, and just as comforting as a classic beef stew.
White chicken chili soup is creamy, comforting, and lightly spicy. It relies on tender chicken, white beans, green chiles, aromatics, and warm spices. Unlike red chili, it uses chicken broth instead of tomatoes. The result is a hearty, soup-like bowl that still tastes like chili.
This soup blends chili technique with soup texture. You sweat onions and garlic. Then you bloom spices. Next you simmer shredded chicken with white beans and green chiles in broth. Finally, you finish with creaminess for body and balance.
Ingredients
Yields 6 hearty bowls
2 tbsp olive oil
1 medium onion, diced
3 cloves garlic, minced
2 cans (4 oz each) diced green chiles, mild
2 tsp ground cumin
1 tsp ground coriander
1 tsp dried oregano
1/2 tsp chili powder (or ancho)
4 cups low-sodium chicken broth
2 cans (15 oz each) cannellini or great northern beans, rinsed
3 cups cooked shredded chicken (rotisserie works)
1/2 tsp kosher salt, to taste
1/4 tsp black pepper
1/2 cup sour cream (or Greek yogurt)
4 oz cream cheese, softened (optional, for extra creaminess)
Juice of 1/2 lime
Toppings
Fresh cilantro, chopped
Sliced jalapeño (optional)
Shredded Monterey Jack or pepper Jack
Crushed tortilla chips
Avocado slices
Substitutions: Use navy beans for a thinner body, or add 1/2 cup corn for sweetness. Swap sour cream with Greek yogurt for higher protein.
Step-by-step instructions for White chicken chili soup
Sweat aromatics. Heat olive oil in a pot over medium heat. Add onion. Cook for 4–5 minutes. Stir in garlic. Cook 30 seconds.
Bloom spices. Add cumin, coriander, oregano, and chili powder. Stir 30–45 seconds until fragrant.
Build the base. Add green chiles and broth. Bring to a gentle boil.
Add beans and chicken. Stir in beans and shredded chicken. Reduce to a lively simmer. Cook 12–15 minutes.
Make it creamy. Lower heat. Whisk in sour cream and cream cheese until smooth. Do not boil after dairy goes in.
Balance. Stir in lime juice. Taste and adjust salt and pepper.
Serve. Ladle into bowls. Add toppings.
Slow cooker option
Add onion, garlic, spices, green chiles, beans, chicken, and broth to the slow cooker.
Cook on LOW 5–6 hours or HIGH 2.5–3 hours.
Stir in sour cream, cream cheese, and lime at the end. Heat 10 minutes more without boiling.
Instant Pot option
Sauté onion and garlic on Sauté. Bloom spices 30 seconds.
Add green chiles, beans, chicken, and broth. Seal and cook 8 minutes (Manual/Pressure). Natural release 10 minutes.
Switch to Sauté (Low). Stir in sour cream, cream cheese, and lime. Heat gently.
Chef’s tips
Do not boil dairy. Keep the finish silky by warming gently.
Thicker body. Mash 1 cup of beans and stir back in.
Spice control. Use hot green chiles or add cayenne for heat.
Deeper flavor. Add 1 tsp chicken bouillon powder if your broth is mild.
Freshness. Lime juice at the end brightens the pot.
Corn + cilantro. Stir in 1 cup corn during the last 5 minutes.
No-dairy light version. Skip dairy; blend 1 cup soup and return for body.
Turkey swap. Use leftover turkey after holidays.
Extra protein. Stir in 1 cup cooked quinoa at the end.
Serving ideas for White chicken chili soup
Serve with warm tortillas or cornbread.
Add a simple green salad with lime vinaigrette.
Offer a toppings bar for a crowd.
Love this cozy bowl? For another comforting classic, see
(Creamy Tortellini Soup).
It features tender cheese tortellini in a velvety broth—perfect alongside your White Chicken Chili Soup.
Storage and freezing
Fridge: 4 days in airtight containers.
Freeze: Up to 2 months. For best texture, freeze before adding dairy; add after reheating.
Reheat: Low heat on stove; add broth if too thick.
Nutrition (estimate per serving, 1/6 of recipe)
~390 kcal; 31 g protein; 18 g fat; 26 g carbs; 5 g fiber; 900 mg sodium (varies with broth, dairy, and toppings).
Troubleshooting
Too thin? Simmer uncovered 5–10 minutes or mash beans.
Too thick? Add warm broth in small splashes.
Grainy dairy? Heat gently and whisk; avoid boiling.
Flat flavor? Add 1/4 tsp salt and more lime.
Frequently Asked Questions
Quick answers to common questions.
Can I use raw chicken instead of cooked?
Yes. Simmer 1 lb raw chicken breasts in the broth for 12–15 minutes until 165°F (74°C). Rest, shred, and return to the pot before adding dairy.
How do I make it spicier?
Use hot green chiles, add 1 diced jalapeño with the onions, or stir in 1/8–1/4 tsp cayenne at the spice-blooming step.
Can I make it dairy-free?
Yes. Skip sour cream and cream cheese. Blend 1 cup of the soup and stir it back to thicken naturally. Finish with extra lime.
Will it freeze well?
Best practice is to freeze before adding dairy. Reheat gently, then add sour cream and cream cheese. If freezing leftovers with dairy, thaw in the fridge and reheat very gently to avoid curdling.
How can I thicken the soup?
Mash 1 cup beans and stir back, simmer uncovered 5–10 minutes, or add a small slurry (1 tsp cornstarch + 1 tbsp cold water), then simmer briefly.
Make-ahead plan
Cook up to step 4 the day before. Chill quickly. Reheat on low, then add dairy and lime right before serving to keep it silky.
Cost saver tips related to White chicken chili soup
Use dry beans you cook ahead.
Buy family-pack chicken and freeze in portions.
Swap pepper Jack with Monterey Jack on sale.
White Chicken Chili Soup
Prep:Cook:Total:Yield:6 servings
Ingredients
2 tbsp olive oil
1 medium onion, diced
3 cloves garlic, minced
2 cans (4 oz) diced green chiles, mild
2 tsp ground cumin
1 tsp ground coriander
1 tsp dried oregano
1/2 tsp chili powder (or ancho)
4 cups low-sodium chicken broth
2 cans (15 oz) white beans, rinsed
3 cups cooked shredded chicken
1/2 tsp kosher salt, to taste
1/4 tsp black pepper
1/2 cup sour cream (or Greek yogurt)
4 oz cream cheese, softened (optional)
Juice of 1/2 lime
Tip: For extra body, mash 1 cup of beans and stir back in.
Instructions
Warm oil in a pot over medium heat. Sauté onion 4–5 minutes. Add garlic 30 seconds.
Stir in cumin, coriander, oregano, and chili powder; bloom 30–45 seconds.
Add green chiles and broth; bring to a gentle boil.
Stir in beans and chicken. Simmer 12–15 minutes.
Lower heat. Whisk in sour cream and cream cheese until smooth. Do not boil.
Finish with lime juice, salt, and pepper. Serve hot with toppings.
Slow cooker: Add everything except dairy and lime; cook LOW 5–6 h or HIGH 2.5–3 h. Stir in dairy + lime to finish.
Chef’s Notes
Spice: Add diced jalapeño with onion, or a pinch of cayenne with the spices.
Thickness: Simmer uncovered a few minutes, or mash some beans.
Freezing: Best to freeze before adding dairy; stir dairy in after reheating.
Nutrition (per serving)
~390Calories
31 gProtein
18 gFat
26 gCarbs
5 gFiber
Estimates only. Values vary with ingredients and toppings.
Pumpkin bread is a fall favorite. Cinnamon swirl pumpkin bread mini loaves take the classic recipe to the next level. They are moist, flavorful, and perfectly portioned. These loaves make excellent snacks, gifts, or additions to holiday tables. The sweet cinnamon swirl inside adds a delightful surprise in every bite.
Why You’ll Love Cinnamon Swirl Pumpkin Bread Mini Loaves
Perfect for fall: The combination of pumpkin and cinnamon captures autumn’s essence.
Mini size: Great for portion control, gifting, or sharing.
Moist and tender: Pumpkin purée keeps the loaves soft for days.
Customizable: Add nuts, chocolate chips, or a glaze to make them unique.
Make-ahead friendly: Freeze them for quick treats later.
Ingredients You’ll Need
Here’s a complete list of ingredients for this recipe:
1 ¾ cups all-purpose flour
1 teaspoon baking soda
½ teaspoon baking powder
1 teaspoon ground cinnamon
½ teaspoon ground nutmeg
½ teaspoon ground ginger
½ teaspoon ground cloves
½ teaspoon salt
1 cup pumpkin purée (not pumpkin pie filling)
½ cup vegetable oil (or melted butter)
¾ cup granulated sugar
½ cup brown sugar, packed
2 large eggs
1 teaspoon vanilla extract
For the cinnamon swirl:
½ cup brown sugar
1 tablespoon ground cinnamon
Step-by-Step Directions
Preheat oven: Set to 350°F (175°C). Grease four mini loaf pans or line with parchment.
Mix dry ingredients: In a bowl, whisk flour, baking soda, baking powder, spices, and salt.
Combine wet ingredients: In another bowl, whisk pumpkin, oil, sugars, eggs, and vanilla until smooth.
Make batter: Gently fold dry ingredients into the wet mixture. Do not overmix.
Layer swirl: Pour half the batter into loaf pans. Sprinkle cinnamon-sugar mixture evenly. Top with remaining batter.
Swirl: Use a knife to gently swirl layers.
Bake: 25–30 minutes, or until a toothpick comes out clean.
Cool: Let loaves rest in the pan for 10 minutes, then transfer to a rack.
Cinnamon Swirl Pumpkin Bread Mini Loaves
Prep:15 minsCook:30 minsTotal:45 minsYield:4 mini loaves
Ingredients Loaf Batter
1 ¾ cups all-purpose flour
1 tsp baking soda
½ tsp baking powder
½ tsp salt
1 tsp ground cinnamon
½ tsp ground nutmeg
½ tsp ground ginger
½ tsp ground cloves
1 cup pumpkin purée
½ cup vegetable oil (or melted butter)
¾ cup granulated sugar
½ cup packed brown sugar
2 large eggs + 1 tsp vanilla
Cinnamon Swirl
½ cup brown sugar
1 tbsp ground cinnamon
Instructions
Preheat oven to 350°F (175°C). Grease 4 mini loaf pans or line with parchment.
Whisk flour, baking soda, baking powder, spices, and salt in a bowl.
In another bowl, whisk pumpkin, oil, sugars, eggs, and vanilla until smooth.
Fold dry ingredients into wet just until combined. Do not overmix.
Divide half the batter among pans. Sprinkle swirl mixture evenly. Top with remaining batter and gently swirl with a knife.
Bake 25–30 minutes, or until a toothpick comes out clean. Cool 10 minutes; transfer to a rack.
Tips: For add-ins, fold in ½ cup chocolate chips or chopped pecans.
For a crunchy top, finish with 1–2 tbsp cinnamon sugar before baking.
Loaves freeze well for up to 3 months.
Tips for the Best Pumpkin Bread Mini Loaves
Use fresh pumpkin purée for richer flavor.
Avoid overmixing the batter; it can make loaves dense.
For a crunchy topping, sprinkle cinnamon sugar on top before baking.
Mini loaves bake faster than a full loaf — check early!
Wrap cooled loaves in plastic to keep them moist.
Variations to Try
Chocolate Chip Pumpkin Loaves: Add ½ cup chocolate chips.
Glazed Loaves: Drizzle with cream cheese glaze.
Nutty Loaves: Stir in ½ cup chopped pecans or walnuts.
Spiced Loaves: Add extra ginger for warmth.
Vegan Version: Use flax eggs and coconut oil.
Storage and Freezing
Room temperature: Store in an airtight container up to 3 days.
Refrigerator: Keeps fresh up to 1 week.
Freezer: Wrap tightly and freeze for up to 3 months. Thaw overnight before serving.
FAQs
Q: Can I double this recipe? Yes, double it and bake 8 mini loaves or two large loaves.
Q: Can I make muffins instead? Absolutely! Divide into muffin tins and bake for 18–20 minutes.
Q: What’s the best topping? Cream cheese glaze or a cinnamon-sugar sprinkle works perfectly.
Final Thoughts
Cinnamon swirl pumpkin bread mini loaves are cozy, delicious, and versatile. They’re great for gifting, sharing, or enjoying with a warm drink. With a tender crumb and sweet swirl, these mini loaves are sure to become a seasonal favorite.
Creamy tortellini soup is one of the easiest and most comforting meals you can prepare in just 30 minutes. This recipe combines tender cheese-filled tortellini with a flavorful broth, aromatic vegetables, and a silky cream finish. It feels like a restaurant-quality soup but is simple enough for any busy weeknight dinner.
The best part is its flexibility. You can make it with Italian sausage for a heartier version, or keep it vegetarian with beans and extra greens. The rich broth balances creaminess with fresh spinach and Parmesan for a soup that satisfies without feeling heavy. It is also a one-pot recipe, which means minimal cleanup and a quick turnaround from stove to table.
In this guide, you will learn how to make creamy tortellini soup step by step. You will also discover variations, storage tips, and methods for making it in the slow cooker or Instant Pot.
Why You’ll Love This Creamy Tortellini Soup
Fast and easy: Ready in just 30 minutes, perfect for weeknights.
One-pot recipe: Everything cooks in a single pot, making cleanup simple.
Creamy but balanced: The broth keeps the soup light while cream adds richness.
Flexible: Works with Italian sausage, chicken, or vegetarian substitutions.
Family-friendly: Kids and adults love the cheesy tortellini and mild flavors.
Great leftovers: Easy to reheat for lunch or dinner the next day.
Ingredient Notes
Each ingredient in this creamy tortellini soup plays an important role. Below are the key components and why they matter:
Cheese tortellini: Refrigerated tortellini give the best texture, but frozen works with a few extra minutes of cooking.
Italian sausage (optional): Adds depth and savoriness. Sweet sausage gives a mild flavor, while hot sausage makes the soup spicier.
Aromatics: Onion, celery, and carrot form the classic Italian soffritto base, building sweetness and flavor.
Garlic & Italian seasoning: Essential herbs and spices for warmth and aroma.
Tomato paste: A small spoonful deepens color and brings umami.
Broth: Low-sodium chicken or vegetable broth gives you control over salt levels.
Heavy cream: Creates richness and body. Half-and-half can be used for a lighter texture.
Spinach or kale: Adds freshness and nutrients, balancing the creaminess.
Parmesan rind (optional): Simmering with a rind infuses deep umami flavor.
Lemon juice: Brightens the soup at the end, cutting through the richness.
Tip: This recipe makes about 6 servings (8 cups). Total cooking time is about 30 minutes.
Ingredients
Serves: 6Prep: 10 minCook: 20 min
Base
1 lb (450 g) Italian sausage, casing removed (optional)
2 tbsp olive oil (reduce if using sausage)
1 medium onion, finely diced
2 ribs celery, diced
2 medium carrots, diced
4 garlic cloves, minced
1 tbsp tomato paste
1 tsp Italian seasoning
1/2 tsp crushed red pepper flakes (optional)
Liquids & pasta
6 cups (1.4 L) low-sodium chicken or vegetable broth
1 parmesan rind (optional but excellent)
18–20 oz (500–560 g) refrigerated cheese tortellini
1 cup (240 ml) heavy cream
Greens & finish
4 cups baby spinach or 2 cups chopped kale
1 tbsp fresh lemon juice
1/3 cup finely grated Parmesan, plus more to serve
Kosher salt and black pepper, to taste
Substitutions: Use turkey sausage, rotisserie chicken, or white beans for protein. For a lighter soup, swap heavy cream with half-and-half plus 2 tsp cornstarch whisked into the broth.
Step-by-Step Instructions
Brown the sausage (if using): Heat a large pot over medium heat. Add the sausage and break it into small pieces. Cook until golden brown, about 5–6 minutes. Transfer to a plate, leaving about 1 tablespoon of fat in the pot. If skipping sausage, warm 2 tablespoons of olive oil instead.
Build the flavor base: Add onion, celery, and carrot to the pot. Season with a pinch of salt. Cook until the vegetables soften and become glossy, 6–8 minutes, stirring often.
Bloom aromatics: Stir in garlic, tomato paste, Italian seasoning, and red pepper flakes. Cook for 1–2 minutes until fragrant and the tomato paste darkens slightly.
Deglaze and simmer: Pour in the broth, scraping up any browned bits from the bottom. Drop in the Parmesan rind if using. Return sausage to the pot. Bring to a gentle boil, then reduce to a lively simmer. Cook for 8 minutes to meld the flavors.
Cook the tortellini: Add tortellini to the simmering broth. Cook gently until just tender—about 3–5 minutes for refrigerated tortellini or 6–7 minutes for frozen. Avoid overcooking as the pasta will continue to soften in hot broth.
Finish creamy: Reduce the heat to low. Stir in the heavy cream and spinach. Warm until the greens wilt, 1–2 minutes. Do not boil after adding cream to prevent curdling.
Balance and serve: Remove the Parmesan rind if used. Add lemon juice and grated Parmesan. Taste the soup and adjust with salt and black pepper as needed. Ladle into bowls and top with extra Parmesan and cracked pepper for serving.
Make-ahead tip: For best texture, cook tortellini separately if storing more than one day. Add freshly cooked pasta to the hot soup when serving.
Variations and Substitutions
Chicken & mushroom: Replace sausage with 2 cups sliced cremini mushrooms and add 2 cups shredded rotisserie chicken at the end of cooking.
Vegetarian: Skip sausage and add 1 can (15 oz) of cannellini beans, drained and rinsed. Use vegetable broth instead of chicken broth.
Tomato-cream (rosa) version: Stir in one 14-oz can of crushed tomatoes along with the broth for a blush-colored, tangy variation.
Tuscan-style: Use chopped lacinato kale instead of spinach and add 1/3 cup chopped sun-dried tomatoes for an earthy, rustic flavor.
Spicy kick: Use hot Italian sausage and double the red pepper flakes if you like heat.
Herb upgrade: Stir in fresh basil and parsley just before serving. Add 1 teaspoon fresh thyme with the aromatics for a woodsy note.
Cheese variation: Try spinach-ricotta or three-cheese tortellini for a different flavor profile.
Gluten-free option: If available, use gluten-free tortellini. Otherwise, substitute gluten-free gnocchi and reduce cooking time slightly.
Make It Dairy-Free or Lighter
Dairy-free: Replace heavy cream with 3/4 cup unsweetened oat creamer or cashew cream. Skip Parmesan or use a dairy-free alternative.
Lighter version: Use 1/2 cup half-and-half combined with 1/2 cup evaporated milk. For body, whisk 2 teaspoons cornstarch into the broth before adding the dairy.
Lower sodium: Choose low-sodium broth and adjust salt at the end. Keep in mind Parmesan is naturally salty, so taste before adding more.
Slow Cooker Directions
Brown the sausage (optional but recommended): In a skillet, cook sausage until golden, then transfer to the slow cooker.
Add vegetables and seasonings: Stir in onion, celery, carrot, garlic, tomato paste, Italian seasoning, red pepper flakes, and broth.
Cook the base: Cover and cook on LOW for 6–7 hours or HIGH for 3–4 hours.
Add tortellini: Turn the slow cooker to HIGH and stir in the tortellini. Cook for 15–25 minutes until just al dente. Check after 12 minutes to prevent mushy pasta.
Finish creamy: Stir in the cream and spinach. Warm through for 5 minutes. Add lemon juice and Parmesan before serving.
Tip: Every slow cooker is different. Always taste and test pasta for doneness a little earlier to avoid overcooking.
Instant Pot Directions
Sauté the base: Select Sauté and brown sausage in 1 tablespoon oil. Add onion, celery, and carrot. Cook for 3 minutes, stirring often. Stir in garlic, tomato paste, and Italian seasoning for 30 seconds until fragrant.
Deglaze: Pour in broth, scraping the bottom to prevent the “Burn” warning. Add the Parmesan rind if using.
Pressure cook: Seal the lid. Cook on High Pressure for 1 minute. Quick release the steam once the timer ends.
Add tortellini: Switch back to Sauté (Low). Stir in the tortellini and simmer gently for 3–5 minutes until al dente.
Finish: Stir in the cream and spinach. Heat gently without boiling. Add lemon juice and Parmesan. Taste and season with salt and pepper before serving.
What to Serve With Creamy Tortellini Soup
Garlic bread: Perfect for soaking up the creamy broth.
Simple green salad: A crisp salad with lemon vinaigrette balances the richness.
Roasted vegetables: Try broccoli, Brussels sprouts, or zucchini for extra nutrition.
Antipasto plate: Offer olives, cured meats, and marinated peppers as a starter.
Beverage pairing: A glass of Pinot Grigio or sparkling water with lemon complements the flavors.
Storage, Freezing, and Reheating
Refrigerator: Store the soup without tortellini for up to 4 days. Keep pasta in a separate container to avoid sogginess.
Freezer: Freeze the broth and vegetables without pasta or cream for up to 3 months. Add tortellini and dairy only after reheating.
Reheating: Warm gently on the stove over medium-low heat. Avoid boiling after cream is added. Add a splash of broth if the soup thickens too much.
Tip: For best texture, always cook tortellini fresh and add it to reheated soup just before serving.
Nutrition Snapshot
Approximate values per serving (1/6 of recipe, made with sausage and heavy cream). Actual values vary by brands and substitutions.
Calories~510
Protein~21 g
Carbohydrates~46 g
Fat~27 g
Fiber~3 g
Sugars~6 g
Sodium*varies
*Sodium depends heavily on broth, cheese, and tortellini brands. Use low-sodium broth and season to taste.
Troubleshooting & Pro Tips
Avoid mushy tortellini: Cook just until al dente. Remember, pasta continues cooking in hot broth.
Prevent curdling: Lower the heat before adding cream and never let it boil after dairy goes in.
Balance richness: A squeeze of lemon juice or a splash of vinegar brightens heavy cream.
Layer seasoning: Add a pinch of salt to vegetables early, then adjust at the end after adding Parmesan.
Boost flavor: Parmesan rinds simmered in broth add deep umami — keep them in your freezer for soups.
Make-ahead strategy: Cook the broth base first. Add tortellini and cream only when reheating to serve.
With these small adjustments, your creamy tortellini soup will turn out perfect every time.
Frequently Asked Questions
Can I use frozen tortellini?
Yes, frozen tortellini works fine. Add directly to the simmering broth and cook 2–3 minutes longer than refrigerated tortellini. Start tasting early to keep it al dente.
How do I stop the cream from curdling?
Lower the heat before adding cream and keep the soup below a boil. If using half-and-half, whisk 1–2 teaspoons cornstarch into it first to stabilize.
What protein can I use instead of sausage?
Shredded rotisserie chicken, leftover turkey, or a can of rinsed cannellini beans all work well. Add them at the end to avoid overcooking.
Can I make this soup ahead of time?
Yes. Prepare the broth and vegetables ahead and refrigerate. Add tortellini and cream only when reheating to keep the texture fresh.
Is there a gluten-free option?
Yes, use gluten-free tortellini if available. Alternatively, swap in gluten-free gnocchi and reduce the cooking time slightly.
Still have questions? Leave a comment below and I’ll be happy to help.
Craving bold takeout flavor at home? This Black Pepper Chicken recipe brings you the irresistible punch of freshly ground black pepper, savory sauce, and tender chicken—all in under 30 minutes. Popular in Asian-inspired kitchens, this dish is known for its rich, aromatic flavor and quick cooking time.
Instead of ordering takeout, you can recreate this restaurant classic with simple pantry ingredients. The combination of seared chicken, a glossy pepper sauce, and stir-fried veggies makes it perfect for busy weeknights or meal prep.
Whether you’re a spice lover or simply seeking a new go-to chicken dinner, this homemade black pepper chicken delivers a flavorful, healthier alternative that satisfies every time.
What Is Black Pepper Chicken?
Black Pepper Chicken is a flavorful stir-fry dish commonly found in Chinese-American cuisine. It’s made with tender chicken pieces sautéed with vibrant vegetables and coated in a bold black pepper sauce.
Unlike sweet or sticky Asian dishes, this one leans into savory and spicy flavors. The star ingredient—coarsely ground black pepper—gives the dish its signature kick, while soy sauce, garlic, and onions provide balance and umami depth.
Traditionally served over steamed rice or noodles, black pepper chicken is a fast, satisfying meal perfect for busy households. It’s especially loved for its combination of quick prep time, high protein, and bold flavor, making it a healthier alternative to deep-fried takeout options.
Ingredients You’ll Need for Black Pepper Chicken
To make Black Pepper Chicken at home, you’ll need simple ingredients commonly found in most kitchens. Here’s a breakdown of the essentials:
For the Chicken:
1 lb (450g) boneless, skinless chicken thighs or breasts, cut into bite-sized pieces
1 tablespoon cornstarch (for coating and tenderness)
1 tablespoon soy sauce
1 tablespoon vegetable oil (or sesame oil for extra flavor)
For the Stir-Fry Vegetables:
1 green bell pepper, sliced
1 red bell pepper, sliced
1 small onion, sliced
2 cloves garlic, minced
1-inch piece of fresh ginger, grated or finely chopped
For the Sauce:
2 tablespoons soy sauce (low-sodium preferred)
1 tablespoon oyster sauce (adds richness and umami)
1 teaspoon dark soy sauce (for color, optional)
1–1.5 teaspoons freshly ground black pepper (adjust to heat preference)
1/2 teaspoon sugar
1/4 cup chicken broth or water
1 teaspoon cornstarch mixed with 1 tablespoon water (slurry to thicken the sauce)
📝 Tip: Freshly cracked black pepper makes a big difference. Use a coarse grind for that bold, spicy kick.
How to Make Black Pepper Chicken (Step-by-Step)
Follow these simple steps to prepare flavorful and authentic Black Pepper Chicken at home:
1. Marinate the Chicken
In a bowl, combine the chicken pieces with soy sauce and cornstarch. Mix well until the chicken is evenly coated. Let it marinate for at least 15 minutes. This step ensures the chicken remains tender and absorbs flavor.
2. Prepare the Sauce
In a small bowl, whisk together soy sauce, oyster sauce, dark soy sauce (if using), black pepper, sugar, chicken broth, and the cornstarch slurry. Set this aside for later.
3. Cook the Chicken
Heat 1 tablespoon of oil in a large skillet or wok over medium-high heat. Add the marinated chicken in a single layer. Sear and cook until golden brown and cooked through, about 4–5 minutes. Remove from the skillet and set aside.
4. Stir-Fry the Vegetables
In the same pan, add a bit more oil if needed. Sauté the garlic and ginger for 30 seconds until fragrant. Add sliced onions and bell peppers. Stir-fry for 2–3 minutes until they are slightly tender but still crisp.
5. Combine Everything
Return the cooked chicken to the pan. Pour the sauce mixture over the chicken and vegetables. Toss everything together and cook for 2–3 minutes, allowing the sauce to thicken and coat the chicken evenly.
6. Serve
Turn off the heat. Serve hot over steamed white rice or noodles. Garnish with additional freshly ground black pepper if desired.
Why You’ll Love This Black Pepper Chicken Recipe
This Black Pepper Chicken is more than just a quick dinner idea—it’s a recipe you’ll want to make again and again. Here’s why:
1. Bold, Savory Flavor
The rich black pepper sauce delivers a deep, savory heat that wakes up your taste buds. The combination of soy sauce, oyster sauce, and fresh cracked pepper creates a layered flavor that’s both comforting and exciting.
2. Quick and Easy to Make
With just a few pantry staples and about 30 minutes of cooking time, this dish comes together fast. It’s ideal for busy weeknights when you need something fast but delicious.
3. Budget-Friendly
Chicken thighs or breasts are affordable, and the vegetables are flexible. You can easily swap ingredients based on what you already have—perfect for cutting costs without sacrificing flavor.
4. Healthier Than Takeout
Homemade Black Pepper Chicken uses fewer oils and no artificial additives. You’re in control of the ingredients, which means you can enjoy your meal with fewer calories and less sodium.
5. Versatile and Customizable
You can tailor this recipe to your liking. Prefer it spicier? Add chili flakes. Need it gluten-free? Use tamari instead of soy sauce. Want more veggies? Toss in snap peas or broccoli.
Tips for Perfect Black Pepper Chicken Every Time
Mastering Black Pepper Chicken is easy, but a few smart tips will make your dish restaurant-quality:
1. Use Freshly Cracked Black Pepper
Avoid pre-ground pepper. Freshly cracked black pepper gives the sauce its signature kick and aroma. It balances perfectly with the soy and oyster sauces.
2. Marinate the Chicken
Marinating the chicken for at least 15–20 minutes in soy sauce and cornstarch makes it more flavorful and tender. It also helps seal in juices during cooking.
3. High Heat Is Key
Cook over high heat to sear the chicken properly and lock in flavor. This technique helps achieve that characteristic wok-charred taste similar to your favorite takeout.
4. Cut the Chicken Evenly
Cut the chicken into bite-sized, uniform pieces. This ensures even cooking and makes every bite delicious and easy to eat.
5. Don’t Overcook the Vegetables
Add bell peppers and onions toward the end to keep them crisp. Overcooked vegetables will make the dish soggy and dull.
6. Use a Wok or Large Skillet
A wok distributes heat more evenly and gives you enough room to toss the ingredients quickly. If you don’t have one, use the largest skillet you own.
How to Make Black Pepper Chicken: Step-by-Step Instructions
Follow these simple steps to prepare delicious and flavorful Black Pepper Chicken at home.
Ingredients
Here’s everything you need:
For the Chicken:
1 lb (450g) boneless, skinless chicken thighs or breasts, cut into bite-sized pieces
1 tbsp soy sauce
1 tbsp cornstarch
1 tbsp oil (vegetable or sesame)
For the Sauce:
2 tbsp oyster sauce
1 tbsp dark soy sauce
1 tbsp light soy sauce
1 tsp sugar
2 tsp freshly ground black pepper
1 tsp rice vinegar or apple cider vinegar
1 tbsp water (to thin the sauce if needed)
Vegetables:
1 green bell pepper, sliced
1 red bell pepper, sliced
1 small onion, sliced
2–3 garlic cloves, minced
1-inch piece of ginger, grated
Instructions
Step 1: Marinate the Chicken In a medium bowl, mix the chicken pieces with soy sauce and cornstarch. Set aside for 15–20 minutes to marinate.
Step 2: Prepare the Sauce In a small bowl, whisk together oyster sauce, light soy sauce, dark soy sauce, sugar, vinegar, and black pepper. Set aside.
Step 3: Cook the Chicken Heat 1 tablespoon of oil in a wok or large skillet over medium-high heat. Add the marinated chicken and stir-fry until golden brown and fully cooked. Remove the chicken and set it aside.
Step 4: Sauté the Aromatics In the same pan, add a little more oil if needed. Add garlic and ginger, and stir-fry for 30 seconds until fragrant.
Step 5: Add Vegetables Add bell peppers and onions. Stir-fry for 2–3 minutes. Keep them slightly crisp.
Step 6: Combine Everything Return the cooked chicken to the pan. Pour in the prepared sauce. Stir everything together and cook for another 1–2 minutes until the sauce thickens and coats the chicken evenly.
Step 7: Serve Serve hot with steamed rice or noodles. Garnish with sliced green onions if desired.
Serving Suggestions and Flavorful Variations
Black Pepper Chicken is incredibly versatile and pairs well with many sides. Whether you’re serving it for lunch or dinner, these suggestions and variations will elevate your meal.
Serving Suggestions
With Steamed Rice: Classic and comforting. White jasmine rice or brown rice balances the bold flavors of the dish.
With Fried Rice: Combine with egg fried rice or vegetable fried rice for a full takeout-style meal.
With Noodles: Serve over lo mein, rice noodles, or soba for a flavorful fusion twist.
In Lettuce Wraps: Spoon the chicken into crisp lettuce leaves for a low-carb, fresh serving option.
Alongside Steamed Veggies: Broccoli, snap peas, or bok choy add extra nutrients and crunch.
Delicious Variations
Add Cashews or Peanuts: Stir in roasted nuts at the end for extra crunch and a nutty undertone.
Make it Spicier: Add sliced red chilies or a dash of chili oil to the sauce for extra heat.
Use Tofu or Mushrooms: Replace the chicken with crispy tofu or stir-fried mushrooms for a vegetarian version.
Try Different Proteins: Swap chicken for shrimp, beef strips, or pork for variety.
Add a Citrus Twist: A splash of lime juice or grated orange zest can brighten the overall flavor profile.
Storage and Reheating Tips
Proper storage and reheating ensure your Black Pepper Chicken remains just as flavorful the next day. Here’s how to keep it fresh and safe:
How to Store Leftovers
Refrigerator: Place cooled chicken in an airtight container. Store for up to 3–4 days in the fridge.
Freezer: For longer storage, freeze in a sealed freezer-safe container for up to 2 months. Tip: Freeze in portions to make reheating easier.
How to Reheat
On the Stovetop: Reheat in a skillet over medium heat with a splash of water or chicken broth. Stir occasionally until warmed through.
In the Microwave: Place in a microwave-safe dish, cover lightly, and heat in 30-second intervals, stirring between each, until hot.
From Frozen: Thaw overnight in the fridge, then reheat using one of the methods above.
Frequently Asked Questions (FAQs)
1. Can I make Black Pepper Chicken less spicy?
Yes, you can. Simply reduce the amount of freshly ground black pepper. You can also use sweet bell peppers and a milder chili sauce if your recipe includes one.
2. What is the best cut of chicken for this recipe?
Boneless, skinless chicken thighs are the most flavorful and tender. However, chicken breasts work well too if you prefer leaner meat.
3. Can I make this dish ahead of time?
Absolutely. You can prepare the sauce and chop the vegetables ahead. Cooked Black Pepper Chicken also reheats well, making it perfect for meal prep.
4. Is this recipe gluten-free?
It can be if you use gluten-free soy sauce or tamari. Always check the labels of all sauces and condiments used.
5. What vegetables go well with Black Pepper Chicken?
Bell peppers, onions, broccoli, snap peas, and carrots all complement the dish beautifully. Feel free to add your favorites.
6. How can I make the sauce thicker?
Mix a little cornstarch with cold water (a slurry) and add it at the end of cooking. Stir continuously until the sauce thickens.
Final Thoughts on Black Pepper Chicken
Black Pepper Chicken is more than just a quick meal—it’s a savory dish bursting with bold flavor and comforting spice. With its flexible ingredients and simple preparation, it fits perfectly into any weeknight dinner routine or even special occasions.
Whether you’re cooking for family or impressing guests, this recipe delivers satisfaction in every bite. Plus, it’s easy to customize based on your spice tolerance and pantry staples.
Ready to spice up your dinner tonight? Give this Black Pepper Chicken recipe a try and discover why it’s a favorite across cultures and kitchens. And if you loved it, don’t forget to share it, bookmark the recipe, and explore more chicken dishes on our blog.
Budgeting isn’t about restriction—it’s about control, freedom, and financial security. In this guide, you’ll learn: ✅ Why most budgets fail (and how to avoid those mistakes) ✅ Step-by-step instructions to build a budget that works ✅ Proven budgeting methods (pick the best one for your lifestyle) ✅ Tips to stick to your budget (without feeling deprived)
Do you feel like your money disappears before the month ends? Are you tired of living paycheck to paycheck? If so, you’re not alone—many people struggle with managing their finances. The good news? A well-structured budget can change everything.
✅ Fix: Create a “sinking fund” for unexpected or annual expenses.
4. No Emergency Fund
Without savings, emergencies force debt.
✅ Fix: Save $1,000 ASAP, then build 3-6 months’ expenses.
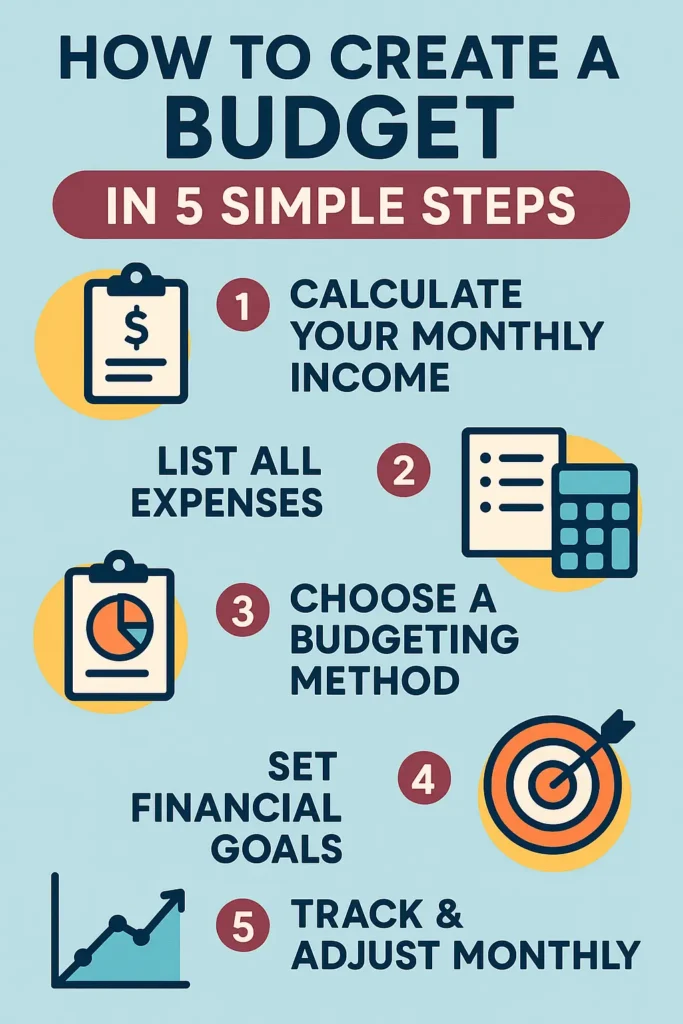
Section 2: How to Create a Budget in 5 Simple Steps
Step 1: Calculate Your Monthly Income
Begin by determining your total monthly income, which includes all sources such as your salary, bonuses, freelance work, and any passive income streams. This foundational step is crucial as it sets the stage for understanding how much money you have available to allocate towards expenses and savings.
Include:
Salary (after taxes)
Side hustles
Passive income
❌ Mistake: Budgeting with gross (pre-tax) income.
Step 2: List All Expenses
Next, compile a comprehensive list of all your expenses. Categorize them into fixed expenses, like rent or mortgage payments, and variable expenses, such as groceries and entertainment. This detailed overview will help you understand where your money is going each month.
Fixed Expenses:
Rent/mortgage
Utilities
Insurance
Variable Expenses:
Groceries
Entertainment
Dining out
Irregular Expenses:
Car maintenance
Gifts
Subscriptions
✅ Pro Tip: Review 3 months of bank statements to catch hidden spending.
Step 3: Choose a Budgeting Method
After identifying your income and expenses, select a budgeting method that suits your lifestyle. Popular approaches include the envelope system, zero-based budgeting, or the 50/30/20 rule. Each method has its own advantages, so choose one that aligns with your financial goals and habits.
Pick one that fits your lifestyle:
A. 50/30/20 Budget
50% Needs (rent, bills, groceries)
30% Wants (dining, hobbies)
20% Savings/Debt
✅ Best for: Beginners who want flexibility.
B. Zero-Based Budget
Every dollar has a job (even savings).
Example: If you earn 3,000∗∗,allocateall∗∗3,000∗∗,allocateall∗∗3,000.
✅ Best for: Detail-oriented planners.
C. Cash Envelope System
Use cash only for categories like groceries and entertainment.
✅ Best for: Overspenders (forces discipline).
Step 4: Set Financial Goals
Establish clear financial goals to guide your budgeting process. Whether you aim to save for a vacation, pay off debt, or build an emergency fund, having specific targets will motivate you to stick to your budget and make informed spending decisions.
Examples:
Short-term: Save $500 emergency fund
Mid-term: Pay off $2,000 credit card debt
Long-term: Save for a house down payment
✅ Pro Tip: Use SMART goals (Specific, Measurable, Achievable, Relevant, Time-bound).
Step 5: Track & Adjust Monthly
Finally, make it a habit to track your spending and adjust your budget monthly. Regularly reviewing your financial situation allows you to identify areas for improvement and adapt to any changes in income or expenses, ensuring that your budget remains effective and relevant.
Weekly check-ins (avoid surprises)
Monthly reviews (adjust categories as needed)
✅ Tool Recommendation:YNAB (You Need a Budget) helps with real-time adjustments.
Section 3: How to Stick to Your Budget (Without Going Crazy)
1. Automate Savings & Bills
Set up auto-transfers to savings.
Use auto-pay for bills to avoid late fees.
2. Use the “24-Hour Rule” for Non-Essential Purchases
Wait 24 hours before buying—avoid impulse spending.
3. Reward Yourself (Responsibly)
Example: If you stay under budget for 3 months, treat yourself to a small splurge.
4. Try a No-Spend Challenge
7-day no-spend challenge (only essentials).
Helps reset spending habits.
5. Find an Accountability Partner
Share goals with a friend or spouse—motivation boosts success.
Section 4: Advanced Budgeting Tips
1. Negotiate Bills
Call providers (internet, insurance) to lower rates.
Budgeting isn’t about deprivation—it’s about making your money work for you. By following these steps, you’ll: ✔ Stop living paycheck to paycheck ✔ Build savings & crush debt ✔ Gain peace of mind
Action Step: Start today—open a spreadsheet or budgeting app and track your last month’s spending. Small steps lead to big wins!
It is not simple to save for kids college without sacrificing retirement. Many parents face the challenge of finding a balance between saving for their children’s college education and ensuring their own retirement. It is essential to develop a strategic approach that allows you to contribute to both goals without compromising your financial future. But is it really possible?
Yes, with the right financial planning, you can help your kids avoid student debt while securing your own retirement. This guide offers step-by-step strategies to reach both goals without compromise.
Why Parents Struggle to Balance College and Retirement Savings
To save for kids college without sacrificing retirement, finding an optimal balance with these goals is more convenient. Parents often find themselves in a challenging position when it comes to managing their financial priorities, particularly when it involves the dual responsibilities of funding their children’s college education and securing their own retirement savings.
The pressure to provide for their children’s future can lead to difficult decisions. Many parents feel compelled to invest heavily in college funds, often at the expense of their long-term financial security. Rising tuition costs and the increasing burden of student debt exacerbate this struggle, creating a sense of urgency to save for education.
Simultaneously, the reality of retirement looms, with many parents aware that neglecting their savings could jeopardize their financial stability later. Balancing these two significant financial goals requires careful planning and prioritization. Yet, the emotional weight of wanting to support their children can cloud judgment, making it even more challenging to strike the right balance.
Step 1: Set Clear Priorities
Begin by identifying what matters most to you. Ensure that your retirement and your children’s education are given appropriate weight in your financial planning.
Priority
Timeline
Importance
Retirement
20–30 years
Essential
Kids’ College
10–18 years
Very Important
While both are critical, retirement lacks borrowing options. Your child can get scholarships, grants, or loans, but you can’t take a loan for retirement.
Assess the total amount you need for your child’s college education, including tuition, fees, and living expenses, to create a comprehensive savings target.
🔹 Estimate Retirement Needs
Use a retirement calculator. Most people need 70–80% of their pre-retirement income annually.
Once you have both targets, you can set monthly savings goals.
Planning for two major financial goals requires a broader perspective. Check out Mastering Finances for Families to get a holistic view of managing your household’s money more effectively.
Step 3: Maximize Retirement Contributions First
Focus on maximizing your retirement savings first, as this will secure your financial future and provide a stable foundation before allocating funds for college. Before contributing to college savings, prioritize these:
401(k) or 403(b): Get the full employer match—it’s free money
Traditional or Roth IRA: Tax-advantaged growth for retirement
Health Savings Account (HSA): If eligible, offers triple tax advantages
Building retirement early allows compounding to work in your favor.
Want to know how much you can safely withdraw later in life? Learn more about the Four Percent Rule, a key retirement strategy.
Step 4: Choose the Right College Savings Account
After securing retirement contributions, explore these college savings options:
✅ 529 College Savings Plan
Tax-free growth and withdrawals for education
High contribution limits
May qualify for state tax deductions
Some plans allow you to change the beneficiary, so leftover funds can be used for another child or even your own continuing education.
✅ Coverdell ESA
Tax-free for qualified expenses
Annual contribution cap: $2,000 per child
Income limits apply
✅ Custodial Accounts (UGMA/UTMA)
No restriction on how funds are used
Could impact financial aid eligibility
Less tax-advantaged
Step 5: Encourage Your Child to Contribute
Encourage your child to contribute a portion of their earnings from part-time jobs or allowances to education funding, fostering a sense of responsibility. Saving for college should be a shared responsibility.
Encourage your child to apply for scholarships and grants
Suggest they work part-time or during the summer
Involve them in the budgeting process
Teach them financial literacy early
This builds ownership and reduces your financial burden.
Step 6: Balance Your Monthly Budget
Review your monthly expenses and income to ensure you can allocate retirement and college savings funds without compromising your financial stability. Use a zero-based budget to allocate every dollar.
Fund retirement accounts
Pay essential living expenses
Allocate monthly savings for college
Avoid unnecessary expenses
Look for small cuts in lifestyle inflation. Instead of skipping retirement contributions, reduce discretionary spending like travel, subscriptions, or dining out.
Step 7: Use Windfalls and Bonuses Wisely
When you receive bonuses, tax refunds, or other unexpected financial windfalls, consider directing some funds towards your college savings to boost your progress. Any extra income should support your top financial priorities.
Tax refunds
Work bonuses
Inheritance or gifts
Split these between retirement and college savings. For instance, 70% of the budget should be allocated to retirement, and 30% to college.
Step 8: Avoid These Common Mistakes
Steer Clear of Common Pitfalls: Educate yourself about frequent mistakes in saving for college, such as underestimating costs or neglecting to take advantage of available financial aid options.
Mistake
Why It’s Harmful
Prioritizing college over retirement
You risk being dependent in old age
Stopping retirement contributions
You lose compound growth
Using home equity loans
Adds risk if housing values drop
Co-signing large student loans
You become legally responsible if your child defaults
Step 9: Explore Other Ways to Pay for College
Investigate Alternative Funding Sources: Look into scholarships, grants, and work-study programs that can help alleviate the financial burden of college expenses, providing additional support beyond your savings. Not all the burden should fall on your savings. Consider:
Financial aid: Complete the FAFSA early
Community college: Start with lower-cost education
Employer tuition assistance: Some jobs offer educational benefits
Student loans (with caution): As a last resort
Step 10: Reassess Your Plan Annually
Review and Adjust Your Strategy Annually: Regularly evaluate your savings plan to ensure it remains aligned with your financial goals and make necessary adjustments based on changes in income, expenses, or educational costs.
Have your income or expenses changed?
Are investment returns aligned with expectations?
Is your child choosing a more or less expensive college?
Getting a handle on how to build credit from scratch is an essential financial skill that everyone should learn. Whether you’re a young adult just starting out, a recent immigrant finding your way, or someone embarking on a fresh chapter in life, establishing a strong credit profile can open doors to better loan options, housing opportunities, and even job prospects. This guide will walk you through the steps to create credit from the ground up, even if you don’t have any credit history at the moment.
Why Learning How to Build Credit From Scratch Matters
Before moving to the steps, let’s cover why building credit from scratch is necessary. Understanding the importance of building credit is essential because it creates a world of benefits. When you establish a solid credit history, you can enjoy lower interest rates on loans and credit cards, making it easier on your wallet when you need to borrow. Plus, having good credit can significantly improve your chances of getting approved for rentals and mortgages, as landlords and lenders often look at your creditworthiness.
On top of that, a strong credit profile can lead to better job opportunities, especially in the finance industry, where trust is key. As you work on building a positive credit history, you might also find yourself eligible for higher credit limits, which shows lenders that they can count on you to handle your finances responsibly. Ultimately, your credit score is a vital sign of your reliability, demonstrating your ability to manage money wisely and helping you secure loans with more favorable terms.
In summary, Build Credit effectively helps to:
✅ Approval for Loans/Apartments – Landlords and lenders check credit first ✅ Save Thousands on Interest – Good credit = lower rates on mortgages/car loans ✅ Financial Security – Emergencies become easier to handle with credit access
A strong credit score helps you avoid common money mistakes in your 20s by giving you access to better financial tools and lower interest rates early in life.
Step 1: Understand the Basics of Credit
Before building credit, understand these essential terms:
Term
Meaning
Credit Score
A number (300–850) indicating your creditworthiness
Credit Report
A detailed history of your credit activities
FICO Score
The most common credit scoring model
Credit Bureau
Agencies (Equifax, Experian, TransUnion) that report your credit data
What Affects Your Credit Score:
Factor
Weight
Payment History
35%
Amounts Owed
30%
Length of Credit History
15%
New Credit
10%
Credit Mix
10%
Step 2: Review Your Current Credit History
Many beginners assume they’re starting from zero when learning how to build credit from scratch, but you might have hidden history from:
Student loans
Being an authorized user
Utility bills (in some cases)
How to check:
Use AnnualCreditReport.com (free weekly reports until 2023)
Sign up for Credit Karma (free VantageScore)
Step 3: Open a Secured Credit Card
A secured credit card is one of the easiest ways to build credit from scratch.
Requires a refundable deposit (usually $200–$500)
The deposit becomes your credit limit
You must use it responsibly and pay the full balance each month
Tip: Choose a card that reports to all three credit bureaus. You may qualify for an unsecured credit card after 6–12 months of on-time payments.
Step 4: Become an Authorized User
Ask a parent, relative, or trusted friend to add you as an authorized user on their existing credit card.
Their credit history will be added to your report
You don’t need to use the card
You benefit from their responsible credit habits
Note: Ensure the primary cardholder has good credit and low utilization.
Step 5: Apply for a Credit-Builder Loan
A credit-builder loan is specifically designed to help people build credit.
You borrow a small amount (e.g., $500–$1000)
The bank holds the money in a savings account
You make fixed monthly payments
At the end, you receive the money and a positive credit history
For more on how these loans work, read What Is a Personal Loan? to explore different types of personal loans and how to apply.
Look for credit-builder loans from credit unions or community banks. Credit-builder loans work similarly to small personal loans. If you’re considering one, check out our guide to personal loan rates to understand how interest rates vary across lenders.
Step 6: Use a Co-Signer
If you’re having trouble qualifying for a loan or credit card, a co-signer with good credit can help.
They guarantee the loan or credit card
You build credit through regular, on-time payments
If you default, the co-signer is responsible
Use this option carefully and only with mutual trust.
Step 7: Make On-Time Payments – Always
Payment history is the most important factor in your credit score.
Pay all credit card bills and loan installments on or before the due date
Set up automatic payments or calendar reminders
Even one late payment can drop your score significantly.
Step 8: Keep Credit Utilization Low
Your credit utilization ratio is the percentage of available credit you’re using.
Aim to use less than 30% of your limit
For example, if your limit is $500, keep your balance under $150
Lower utilization = higher score
Step 9: Don’t Apply for Too Much Credit at Once
Each credit application triggers a hard inquiry, which slightly lowers your score.
Limit credit card or loan applications
Only apply for what you genuinely need
Too many inquiries signal risk to lenders
Step 10: Be Patient and Stay Consistent
Credit building takes time. There are no shortcuts.
Continue using your secured card or credit-builder loan
Pay all bills on time
Avoid maxing out your card
After 6–12 months, your credit score will start to reflect your responsible habits
Step 11: Monitor and Improve
Track your credit-building progress with:
Experian’s free dashboard
CreditWise from Capital One
NerdWallet’s score simulator
Step 12: Grow Your Credit Profile
After 6 months of building credit from scratch, add:
A second credit card
A small installment loan
Rent reporting via services like RentTrack
Warning: Space applications 6+ months apart to avoid hard inquiry damage.
Common Mistakes to Avoid
Mistake
Why It Hurts
Missing payments
Lowers score, adds late fees
Maxing out cards
Increases credit utilization
Closing old accounts
Shortens credit history
Applying too often
Results in multiple hard inquiries
Ignoring your credit report
Errors go unnoticed and uncorrected
Final Thoughts: You Now Know How to Build Credit From Scratch
By following this step-by-step guide to build credit from scratch, you’ll go from no credit to good credit (670+) within 12-24 months. Remember:
Start with secured cards or credit-builder loans
Always pay on time
Grow your profile slowly and steadily
Need help managing money while building credit? Pair this guide with our Ultimate Budgeting Blueprint for complete financial success!
FAQs About Building Credit from Scratch
How long does it take to build credit from scratch?
Usually 3 to 6 months to generate a score, but longer to reach a good score (700+).
Can I build credit without a credit card?
Yes. Use credit-builder loans, report rent/utility payments, or become an authorized user.
Does paying rent help build credit?
Only if your rent payments are reported to credit bureaus through services like RentTrack or Experian Boost.
What credit score do I start with?
You don’t start with a score. It begins generating once you have credit activity for 3–6 months.
Managing money in your 20s can be challenging, but avoiding common financial pitfalls sets the foundation for long-term success. Many young adults make money mistakes in your 20s that lead to debt, poor credit, or missed investment opportunities. By recognizing these errors early, you can build wealth, secure your future, and achieve financial freedom.
In this comprehensive guide, we’ll explore the 10 money mistakes in your 20s and provide detailed, actionable tips on how to avoid them. We’ll cover everything from emergency funds to retirement planning, giving you the tools you need to make smart financial decisions that will benefit you for decades to come.
1. Not Building an Emergency Fund
One of the biggest money mistakes in your 20s is failing to save for emergencies. Without a financial safety net, unexpected expenses like medical bills, car repairs, or sudden job loss can force you into debt that takes years to repay.
Why It’s a Problem:
40% of Americans can’t cover a $400 emergency expense
Without savings, you may rely on high-interest credit cards
Financial stress can impact mental health and decision-making
How to Avoid This Mistake:
Determine your target amount: Aim for 3-6 months of living expenses
Start small: Even $50 per month adds up over time
Automate savings: Set up automatic transfers to a dedicated account
Choose the right account: Use a high-yield savings account (HYSA) to earn interest while keeping funds accessible
Rebuild after use: If you dip into your emergency fund, prioritize replenishing it
Real-World Example:
Sarah, a 24-year-old graphic designer, avoided financial disaster when her car needed 1,200inrepairsbecauseshehadbuilta1,200inrepairsbecauseshehadbuilta5,000 emergency fund over two years. Without it, she would have had to put the repairs on a credit card with 22% interest.
2. Money mistakes in your 20s: Living Beyond Your Means
Overspending on luxuries like dining out, expensive gadgets, or premium apartments is a common money mistake in your 20s that leads to financial stress and prevents wealth building.
Why It’s a Problem:
Lifestyle inflation keeps you from saving
Can lead to credit card debt
Delays in important financial milestones
How to Avoid such money mistakes in your 20s
Follow the 50/30/20 rule:
50% on needs (rent, groceries, utilities)
30% on wants (entertainment, dining out)
20% on savings/debt repayment
Track spending: Use apps like Mint or YNAB
Wait 24 hours before big purchases
Find affordable alternatives:
Cook at home instead of daily takeout
Use public transportation instead of expensive car payments
Set spending limits for discretionary categories
Case Study:
Mike, a 26-year-old engineer, was spending $800/month on food delivery and entertainment. He cut this to $300/month by meal prepping and finding free activities, freeing up $6,000 annually for investments.
Sticking to a budget is crucial—learn how to create one for every life stage in our complete budgeting guide.
3. Ignoring Your Credit Score
Your credit score affects loans, rentals, insurance rates, and job opportunities. Neglecting it is a major money mistake in your 20s with long-term consequences.
Why It Matters:
Good credit (700+) saves thousands in interest
Landlords often require 650+ scores
Some employers check credit for certain positions
How to Build Good Credit:
Pay all bills on time (set up autopay)
Keep credit utilization below 30% (ideally under 10%)
Don’t close old accounts (lengthens credit history)
Limit hard inquiries (space out credit applications)
Credit Score Breakdown:
35% Payment history
30% Amounts owed
15% Length of credit history
10% New credit
10% Credit mix
4. Not Investing Early
Waiting to invest is one of the most costly money mistakes in your 20s due to the power of compound interest. Even small, regular investments can grow significantly over decades.
The Power of Starting Early:
200/monthat7200/monthat7402,000 in 40 years
Waiting 10 years to start could cost you $200,000+ in potential growth
Tax-advantaged accounts multiply your returns
How to Start Investing:
Maximize employer retirement matches (free money)
Open a Roth IRA (tax-free growth)
Invest in low-cost index funds (VTI, VOO)
Automate contributions (set it and forget it)
Increase contributions with raises
Investment Comparison:
Age Started
Monthly Investment
Total by Age 65 (7% return)
25
$200
$402,000
35
$200
$189,000
Difference
Same Investment
$213,000
5. Taking on Too Much Student Loan Debt
Excessive student loans can cripple your finances—another money mistake in your 20s with decades-long consequences.
The Student Debt Crisis:
Average 2023 graduate owes $37,000
Payments can exceed $400/month for 10+ years
Debt delays home ownership, marriage, and retirement savings
Smart Strategies:
Exhaust free money first (scholarships, grants)
Work part-time during school
Consider community college for gen eds
Choose federal over private loans
Explore income-driven repayment plans
Repayment Options:
Standard: Fixed payments for 10 years
Graduated: Payments increase over time
Income-Driven: Payments based on earnings
Refinancing: Lower rates but lose federal protections
Before taking out loans, optimize your cash flow. Our college budget template shows students exactly how to:
Uses actionable anchor text (“college budget template”)
6. Not Negotiating Salary
Underestimating your worth is a common money mistake in your 20s that can cost you hundreds of thousands over your career.
The Negotiation Gap:
70% of managers expect negotiation
Only 37% of young professionals negotiate
Not negotiating first salary can mean $1 million+ in lost earnings
How to Negotiate Successfully:
Research market rates (Glassdoor, Payscale)
Highlight specific achievements
Practice with a friend
Consider total compensation (bonuses, stock, flexibility)
Have a walk-away number
Negotiation Script:
“Thank you for the offer. Based on my research and [specific accomplishments], I was expecting something in the range of XtoXtoY. Is there flexibility in the offer?”
7. Relying Too Much on Credit Cards
Misusing credit cards is a dangerous money mistake in your 20s that leads to high-interest debt and financial stress.
The Credit Card Trap:
Average APR: 20-25%
Minimum payments barely cover interest
Can take decades to pay off
Smart Credit Card Use:
Pay balance in full each month
Use <30% of available credit
Choose cards with rewards you’ll actually use
Avoid cash advances (higher fees/interest)
Set up balance alerts
Debt Payoff Strategies:
Avalanche Method: Pay the highest interest first
Snowball Method: Pay the smallest balances first
Balance transfer cards (0% intro APR)
Credit card debt can spiral quickly—if you’re already struggling, our step-by-step debt payoff planner helps you escape the cycle with proven strategies like the avalanche method.
8. Skipping Insurance
Thinking you don’t need insurance is a risky money mistake in your 20s—one accident or illness can cause financial ruin.
Essential Coverage:
Health Insurance:
Employer plans
Marketplace options
Catastrophic plans for young adults
Renters Insurance:
Covers theft/damage
Often <$20/month
Auto Insurance:
Liability coverage required
Comprehensive for newer cars
Insurance Tips:
Compare quotes annually
Bundle policies for discounts
Increase deductibles to lower premiums
Understand what’s covered
9. Not Setting Financial Goals
Wandering without a plan is a major money mistake in your 20s—clear goals keep you focused and motivated.
Goal-Setting Framework:
Short-Term (1 year):
Save an emergency fund
Pay off the credit card
Medium-Term (2-5 years):
Save for a down payment
Pay off student loans
Long-Term (10+ years):
Retirement savings
Financial independence
SMART Goals:
Specific: “Save $5,000”
Measurable: Track progress
Achievable: Realistic timeline
Relevant: Aligns with values
Time-bound: Deadline
10. Falling for Get-Rich-Quick Schemes
Scams and risky investments are tempting but often lead to loss—another money mistake in your 20s.
Red Flags:
“Guaranteed” high returns
Pressure to act fast
Complex strategies
Unregistered sellers
Legitimate Alternatives:
Index fund investing
Real estate (REITs if no capital)
Side hustles with real demand
Career advancement
The Rule of 72:
Divide 72 by your expected return to see how long it takes money to double:
7% return = doubles every ~10 years
10% return = doubles every ~7 years
Final Thoughts: Building Financial Health in Your 20s
Avoiding these 10 money mistakes in your 20s puts you on the path to financial security. Remember:
Start small but start now – Compound growth needs time
Automate good habits – Savings, investments, payments
Educate yourself – Read books, take courses
Seek advice – Financial planners, mentors
Be patient – Wealth building takes decades
30-Day Challenge:
Week 1: Track every expense
Week 2: Open HYSA and retirement account
Week 3: Negotiate one bill/service
Week 4: Set 1/3/5 year financial goals
By making smart choices now, you’ll avoid regret later. Your future self will thank you for the financial foundation you build today.
If you are always running out of money and want to save some money, but you don’t know how it is time to start learning how to budget.
In this guide, we’ll discuss the essentials of budgeting for every stage of life.
Why Budgeting is Essential
Budgeting is more than just tracking expenses—it’s about taking control of your financial future. Here’s why budgeting matters:
Budgeting helpsAchieve Financial Goals
By developing a comprehensive spending plan, you can manage your resources effectively and ensure that each dollar contributes to your long-term aspirations.
Right budgeting canReduce Stress
Effective budgeting is a valuable resource for reducing financial stress. It offers a clear picture of income and expenses, allowing individuals to feel more in command of their financial circumstances.
Budgeting HelpsAvoid Debt
Effective budgeting is a crucial tool in preventing debt accumulation. By meticulously tracking income and expenses, individuals can better understand their financial landscape, allowing them to allocate funds wisely and prioritize essential expenditures. This proactive approach fosters responsible spending habits and creates a safety net for unexpected costs, reducing the likelihood of resorting to credit or loans. Ultimately, a well-structured budget empowers individuals to live within their means, paving the way for financial stability and peace of mind.
Budgeting is a factor in the Building Wealth
Effective budgeting is a crucial tool for building wealth. Individuals can pinpoint opportunities to save and invest more wisely by carefully monitoring income and expenses. This disciplined method enhances awareness of financial behaviors and enables people to make better choices regarding their spending and savings. With time, regular budgeting can result in substantial financial growth, helping individuals create a strong financial future and reach their long-term wealth objectives.
If you’re ready to take the first step toward financial freedom, this guide will show you how to budget effectively at every stage of life.
How Budgeting Can Turn You Into a Millionaire
Many people believe that becoming a millionaire requires a high income, but the truth is that smart budgeting plays a crucial role. By learning how to budget effectively, you can free up extra money to invest and let compound interest work its magic.
At just 18, Alex received a $100 birthday gift from his grandmother. Instead of spending it, he budgeted wisely and invested in a simple index fund, earning an 8% annual return. Inspired by his initial gain, Alex decided to invest just $200 per month, which he set aside through careful budgeting.
Fast forward to age 65—Alex’s investments have grown to an astonishing $2.1 million!
Meanwhile, his friend Chris, who didn’t learn how to budget early, waited until he was 30 to start investing the same $200 per month. By 65, Chris had only $650,000—less than a third of Alex’s wealth.
The difference? Budgeting for financial goals. Alex’s decision to prioritize investing through smart budgeting allowed compounding to do the heavy lifting. The key lesson: You don’t need a fortune to build wealth—just a solid budget and consistency.
What is a Budget?
A budget is a plan for your money. It outlines your income, expenses, and savings goals, helping you allocate funds wisely. Think of it as a roadmap that guides your spending decisions and ensures you live within your means.
Steps to Create a Budget
Creating a budget doesn’t have to be complicated. Follow these steps to build a budget that works for you:
1. Calculate Your Income
Start by determining your total monthly income. Include all sources, such as:
Salary or wages
Side hustles or freelance work
Pensions or Social Security
Scholarships or grants (for students)
Tip: If your income varies, calculate an average based on the past 3-6 months.
2. List Your Expenses
Next, categorize your expenses into fixed and variable:
Tip: Use bank statements or budgeting apps to track your spending accurately.
3. Set Financial Goals
Identify your short-term and long-term goals:
Short-Term: Saving for a vacation, paying off a credit card.
Long-Term: Buying a home, retiring comfortably.
Tip: Make your goals SMART—Specific, Measurable, Achievable, Relevant, and Time-bound.
4. Allocate Funds
Effective budgeting involves strategically allocating funds to ensure that resources are focused on the most important areas of need. This process requires evaluating different financial priorities and deciding how much money to assign to each category, including operational expenses, project investments, and contingency reserves. By thoroughly reviewing past spending and predicting future requirements, organizations can develop a balanced budget that addresses immediate obligations while also supporting long-term objectives. This careful distribution of financial resources is crucial for maintaining fiscal health and achieving overall success. See a paragraph below about the 50/30/20 rule.
5. Track and Adjust
Review your budget regularly to ensure you’re staying on track. Use budgeting tools or apps to monitor your spending and adjust as needed.
There’s no one-size-fits-all approach to budgeting. Here are some popular techniques to help you how to budget effectively:
1. The 50/30/20 Rule
This simple method divides your income into three categories:
50% Needs: Essential expenses.
30% Wants: Discretionary spending.
20% Savings/Debt Repayment: Future goals and debt reduction.
Tip: This method is ideal for beginners or those with a steady income.
Learning how to budget effectively can feel overwhelming, but online tools can simplify the process. A great resource is NerdWallet’s Budget Calculator, which helps you break down your income, expenses, and savings goals. By using a budgeting calculator, you can see where your money goes and make adjustments to ensure you’re on the right financial path.
2. Zero-Based Budgeting
With this method, every dollar has a purpose. Your income minus expenses should equal zero, ensuring you’re allocating funds efficiently.
Tip: Zero-based budgeting is great for detail-oriented individuals.
3. The Envelope System
Use cash envelopes for different spending categories (e.g., groceries, entertainment). Once the cash is gone, you can’t spend more in that category.
Tip: This method helps curb overspending and encourages mindful spending.
4. Pay Yourself First
Prioritize savings by setting aside money before paying bills or spending. This ensures you’re building wealth consistently.
Tip: Automate your savings to make this process effortless.
Not Tracking Expenses: Failing to monitor spending can lead to overspending.
Setting Unrealistic Goals: Be honest about what you can achieve.
Ignoring Irregular Expenses: Plan for annual or semi-annual expenses.
Failing to Review: Regularly update your budget to reflect changes.
Conclusion
Learning how to budget is the first step toward financial freedom. Whether you’re a student, young professional, parent, or retiree, a well-crafted budget can help you achieve your goals and reduce financial stress. Start today by following the steps in this guide, and don’t forget to explore our other resources for more tips and tools.
Call-to-Action:
“Download our free budgeting template to get started!”
“Explore our other family finance, student finance, and retirement planning articles.”
Frequently Asked Questionsabout Budgeting
1. How Do I Budget for Unexpected Expenses?
Unexpected expenses, like car repairs or medical bills, can derail your budget. To prepare:
Build an Emergency Fund: Aim to save 3-6 months’ worth of living expenses.
Include a Buffer: Allocate a small percentage of your income to a “miscellaneous” category.
Review Insurance: Ensure you have adequate coverage for health, auto, and home.
2. What’s the Best Way to Budget for Holidays and Special Occasions?
Holidays and special occasions can strain your budget. Here’s how to plan:
Set a Spending Limit: Decide how much you can afford to spend.
Start Saving Early: Set aside a small amount each month in a “holiday fund.”
Use Cash or Debit: Avoid overspending by using cash or a debit card instead of credit.
3. How Can I Budget if I Have a Lot of Debt?
Budgeting with debt requires a strategic approach:
Prioritize High-Interest Debt: Focus on paying off credit cards or loans with the highest interest rates first.
Use the Debt Snowball Method: Pay off smaller debts first to build momentum.
Adjust Your Budget: Cut back on non-essential expenses to free up more money for debt repayment.
4. How Do I Budget for Retirement While Still Paying Bills?
Balancing current expenses with retirement savings can be challenging:
Start Small: Even saving 5-10% of your income can make a difference over time.
Take Advantage of Employer Plans: Contribute to a 401(k) or similar plan, especially if your employer offers a match.
Automate Savings: Set up automatic transfers to a retirement account each month.
5. How Can I Stick to a Budget When My Income is Low?
Budgeting on a low income requires careful planning:
Focus on Essentials: Prioritize housing, utilities, and groceries.
Cut Non-Essentials: Reduce spending on entertainment, dining out, and subscriptions.
Look for Additional Income: Consider side hustles or part-time work to supplement your income.
This article discusses simple budgeting techniques for busy families. In fact, balancing work, kids, school, and household responsibilities can leave little time for managing finances. For busy families, budgeting often takes a backseat, leading to financial stress and missed opportunities to save. However, you can simplify your finances and reach your goals without overwhelming yourself by following the appropriate simple budgeting techniques for busy families.
This guide is specifically designed for busy families. It offers practical, time-saving strategies to help you manage your money. From automating savings to involving kids in the process, these techniques are tailored to fit your hectic lifestyle.
Why Busy Families Need Simple Budgeting Techniques
Busy families face unique financial challenges:
Time Constraints: With packed schedules, there’s little time to track expenses or plan budgets.
Variable Expenses: Costs like childcare, extracurricular activities, and last-minute groceries can fluctuate.
Multiple Priorities: Balancing immediate needs (like bills) with long-term goals (like saving for college) can feel overwhelming.
Simple budgeting techniques for busy families address these challenges by focusing on efficiency, automation, and flexibility. By implementing these strategies, you can reduce financial stress and create a clear path toward your family’s financial goals.
1. Automate Everything
One of the most effective simple budgeting techniques for busy families is automation. Automating your finances saves time and ensures consistency, even on your busiest days.
How to Automate:
Bill Payments: Set up automatic payments for utilities, rent, and subscriptions to avoid late fees.
Savings: Schedule automatic transfers to your savings account on payday.
Investments: Use apps or employer-sponsored plans to automate retirement contributions.
Automation eliminates the need for constant oversight, allowing you to focus on your family while your finances run smoothly in the background.
2. Use a Family Budgeting App
Busy families need tools that simplify budgeting. Family-friendly budgeting apps like YNAB (You Need a Budget), Goodbudget, or Honeydue can help you track expenses, set goals, and manage shared budgets with your partner.
Benefits of Budgeting Apps:
Real-Time Tracking: See where your money is going without manual input.
Shared Access: Sync the app with your partner to stay on the same page.
Custom Categories: Create categories for family-specific expenses like childcare or school supplies.
These apps are designed for busy lifestyles, making them one of the best simple budgeting techniques for busy families.
3. Create a Weekly Meal Plan
Food is one of the largest expenses for families, and busy schedules often lead to costly takeout meals. Meal planning is a time-saving and budget-friendly solution.
Steps to Effective Meal Planning:
Plan Ahead: Dedicate 30 weekly minutes to plan meals and create a shopping list.
Batch Cooking: Prepare meals in bulk and freeze portions for busy nights.
Involve the Family: Get kids involved in choosing meals to reduce resistance and teach them about budgeting.
By planning meals, you can save money, reduce food waste, and avoid the stress of last-minute decisions.
4. Set Up a Family Emergency Fund
Unexpected expenses—like car repairs or medical bills—can derail even the best budgets. For busy families, having an emergency fund is essential.
How to Build an Emergency Fund:
Start Small: Aim for $500 initially, then work toward 3-6 months’ worth of living expenses.
Automate Contributions: Set up automatic transfers to your emergency fund.
Use Windfalls: Allocate bonuses, tax refunds, or gifts to boost your fund.
An emergency fund provides peace of mind, knowing you’re prepared for life’s surprises.
5. Simplify Spending with Cash Envelopes
For busy families, overspending can be a common issue. The cash envelope system is one of the most effective simple budgeting techniques for busy families to control discretionary spending.
How It Works:
Allocate Cash: Assign a set amount of cash to categories like groceries, entertainment, and dining out.
Use Envelopes: Place the cash in labeled envelopes and only spend what’s inside.
Track Progress: Once the cash is gone, stop spending in that category until the next budget cycle.
This method is simple and visual and helps curb impulse purchases.
6. Prioritize Family Financial Goals
Busy families often juggle multiple financial goals, from saving for vacations to paying off debt. Prioritizing these goals ensures you’re making progress without feeling overwhelmed.
Steps to Prioritize Goals:
List Your Goals: Write down short-term (e.g., holiday gifts) and long-term (e.g., college savings) goals.
Rank by Importance: Decide which goals are most urgent or impactful.
Allocate Funds: Assign a portion of your budget to each goal based on priority.
Focusing on one goal at a time can help you make steady progress without wasting resources.
Teaching kids about money is a valuable life skill and can also make budgeting easier for busy families.
Ways to Involve Kids:
Allowance with Purpose: Give kids a small allowance and help them budget for toys or activities.
Savings Challenges: Encourage kids to save for a special purchase, teaching them delayed gratification.
Grocery Shopping: Let kids compare prices and choose budget-friendly options.
Involving kids lightens your load and instills financial responsibility from a young age.
8. Cut Unnecessary Subscriptions
Busy families often accumulate subscriptions they don’t use, from streaming services to gym memberships. Regularly reviewing and canceling unused subscriptions can free up significant funds.
How to Manage Subscriptions:
Audit Your Subscriptions: List all active subscriptions and their costs.
Evaluate Usage: Cancel services you no longer use or need.
Share Accounts: Consider sharing streaming services with family or friends to reduce costs.
This simple step can add hundreds of dollars to your budget each year.
9. Schedule Regular Budget Check-Ins
For busy families, setting aside time for regular budget reviews ensures your finances stay on track.
Tips for Effective Check-Ins:
Monthly Reviews: Spend 15-30 minutes each month reviewing expenses and adjusting your budget.
Family Meetings: Involve your partner and older kids to discuss progress and goals.
Celebrate Wins: Acknowledge milestones, like paying off debt or reaching a savings goal.
Regular check-ins keep everyone accountable and motivated.
10. Outsource When Necessary
Busy families often feel overwhelmed trying to do everything. Outsourcing certain tasks can save time and reduce stress, freeing up energy for budgeting and family time.
Tasks to Outsource:
Cleaning: Hire a cleaning service for deep cleaning or occasional help.
Meal Prep: Use meal delivery services for busy weeks.
Financial Planning: Consult a financial advisor for personalized advice.
While outsourcing comes at a cost, the time and stress savings can be worth it for busy families.
Conclusion
Budgeting doesn’t have to be complicated or time-consuming, even for the busiest families. By implementing these simple budgeting techniques for busy families, you can take control of your finances, reduce stress, and work toward your financial goals.
From automating savings to involving kids in the process, these strategies are designed to fit seamlessly into your hectic lifestyle. Remember, the key to success is consistency and flexibility. Start small, make adjustments as needed, and celebrate your progress along the way.
With these simple budgeting techniques for busy families, you can create a financial plan that works for your unique needs and sets the stage for a brighter, more secure future.
Debt can feel overwhelming, but with a clear plan and the right tools, you can take control of your financial situation and work towards becoming debt-free. A debt payoff planner is an essential tool that helps you organize your debts, create a repayment strategy, and track your progress. By using a debt payoff planner, you can prioritize your debts, save on interest, and accelerate your journey to financial freedom.
This comprehensive guide will walk you through the steps of using a debt payoff planner to get out of debt faster. We’ll cover the different types of debt, the key inputs required, and how to interpret the results. Additionally, we’ll provide tips on using this information to make better financial decisions and stay committed to your debt repayment plan.
Understanding Debt Payoff Planners
What is a Debt Payoff Planner?
A debt payoff planner is an online tool or spreadsheet that helps you create a strategy for paying off your debts. It considers factors such as your outstanding balances, interest rates, and monthly payments to create a customized repayment plan. A debt payoff planner can help you stay disciplined and focused on your debt-free goal by providing a clear roadmap.
Types of Debt
There are several types of debt, each requiring a different approach and strategy. Here are some of the most common ones:
Credit Card Debt: Typically, high-interest debt can quickly accumulate if not managed properly.
Student Loans: These are loans taken out to fund education, often with lower interest rates but longer repayment terms. For more details about such loans, see our Ultimate Guide to Student Loans.
Personal Loans: These are unsecured loans that can be used for various purposes, such as consolidating debt or funding a major purchase.
Mortgages are loans taken out to purchase a home, usually with lower interest rates and longer repayment terms.
Auto Loans: These are loans taken out to purchase a vehicle, often with moderate interest rates and shorter repayment terms.
Key Inputs Required
To use a debt payoff planner effectively, you must provide certain key inputs. The planner uses these inputs to create a customized repayment strategy. Here are the most common inputs required:
Outstanding Balances: This is the total amount you owe on each debt.
Interest Rates: This is the annual interest rate charged on each debt. It is expressed as a percentage.
Minimum Monthly Payments: This is the minimum amount you must pay each month on each debt.
Extra Monthly Payment: Any additional amount you can afford to pay towards your monthly debts.
Payment Frequency: This refers to how often you plan to make payments (e.g., monthly, bi-weekly, weekly).
Start Date: This is the date when you will start your debt repayment plan.
How Debt Payoff Planners Work
Debt payoff planners use a mathematical formula to estimate how long it will take to pay off your debts and how much interest you will pay. The most common strategies used by debt payoff planners are the debt snowball method and the debt avalanche method.
Debt Snowball Method: This strategy involves paying off your smallest debts first while making minimum payments on larger debts. Once the smallest debt is paid off, you move on to the next smallest debt, and so on. This method provides psychological motivation as you see debts being eliminated quickly.
Debt Avalanche Method: This strategy involves paying off your debts with the highest interest rates first while making minimum payments on lower-interest debts. Once the highest-interest debt is paid off, you move on to the next highest-interest debt, and so on. This method saves you the most money on interest over time.
Step-by-Step Guide to Using a Debt Payoff Planner
Step 1: Choose the Right Debt Payoff Planner
The first step is to choose the right debt payoff planner for your needs. There are different types of debt payoff planners, including online tools, spreadsheets, and mobile apps. Make sure you select one that matches your specific debt situation and repayment goals.
Step 2: Enter Your Outstanding Balances
Once you’ve selected the appropriate debt payoff planner, the next step is to enter your outstanding balances. This is the total amount you owe on each debt. Be accurate and include all your debts to get a comprehensive view of your financial situation.
Step 3: Input Your Interest Rates
The interest rate is critical in determining how much you need to pay each month. Enter the annual interest rate for each debt. If you’re unsure what interest rate you’re being charged, check your loan statements or contact your lender.
Step 4: Specify Your Minimum Monthly Payments
Enter the minimum monthly payment required for each debt. You must pay this amount each month to avoid late fees and penalties. Ensure you include all minimum payments to understand your monthly obligations accurately.
Step 5: Add Any Extra Monthly Payments
If you can afford to pay more than the minimum monthly payment, enter the extra amount you plan to pay each month. This will help you pay off your debts faster and save on interest.
Step 6: Select the Payment Frequency
Most debt repayment plans require monthly payments, but some may offer other payment frequencies, such as bi-weekly or weekly. Select the payment frequency that works best for you.
Step 7: Review the Results
The debt payoff planner will generate the results once you’ve entered all the required inputs. These typically include:
Monthly Payment: The total amount you’ll need to pay each month, including minimum payments and extra payments.
Total Interest: The total amount of interest you’ll pay over the life of the debt.
Payoff Date: The date when you will be completely debt-free.
Amortization Schedule: A detailed breakdown of each payment, showing how much goes toward principal and interest.
Step 8: Adjust the Inputs (if necessary)
If the results are not what you expected, or if you want to explore different scenarios, you can adjust the inputs. For example, you can try different extra payment amounts, interest rates, or payment frequencies to see how they affect your payoff date and total interest.
Step 9: Make an Informed Decision
After reviewing the results, you’ll better understand the financial commitment involved in paying off your debts. Use this information to make an informed decision about allocating your resources and staying committed to your debt repayment plan.
Interpreting the Results
Monthly Payment
The monthly payment is the total amount you’ll need to pay each month to stay on track with your debt repayment plan. It includes both minimum payments and any extra payments you can afford. This is the most important figure to consider when budgeting for debt repayment, as it directly impacts your monthly cash flow.
Total Interest
The total interest is the amount of interest you’ll pay over the life of your debts. It is calculated based on your outstanding balances, interest rates, and repayment terms. The higher the interest rate or the longer the repayment term, the more interest you’ll pay.
Payoff Date
The payoff date is the date when you will be completely debt-free. Aiming for this key milestone can motivate you to stay committed to your debt repayment plan.
Amortization Schedule
The amortization schedule is a detailed breakdown of each payment over the life of your debts. It shows how much of each payment goes toward the principal and how much goes toward interest. In the early years of the debt, a larger portion of each payment goes toward interest, while in the later years, a larger portion goes toward the principal.
Understanding the amortization schedule can help you see how your debt balance decreases over time and how much interest you’ll pay at different stages of the repayment process.
Tips for Using a Debt Payoff Planner Effectively
1. Use Realistic Inputs
When using a debt payoff planner, it’s important to use realistic inputs. Be honest about how much you can afford to pay each month and the time frame you have to pay off your debts. Overestimating your ability to pay can lead to financial stress and potential failure to stick to your plan.
2. Compare Different Scenarios
One of the advantages of using a debt payoff planner is that you can compare different scenarios. Adjust the extra payment amounts, interest rates, or payment frequencies to see how they affect your payoff date and total interest. This can help you find the best repayment strategy for your financial situation.
3. Consider the Impact of Interest
While the monthly payment is important, it’s also crucial to consider the impact of interest on your debts. A higher interest rate can significantly increase the total amount you’ll pay over time. Use the debt payoff planner to compare the impact of different interest rates on your repayment plan.
4. Factor in Additional Costs
In addition to the outstanding balances and interest rates, consider any additional costs associated with your debts. These may include fees, penalties, or insurance. Including these costs in your calculation will give you a more accurate estimate of the total amount you need to pay.
5. Plan for the Future
When using a debt payoff planner, think about your future financial situation. Will your income increase or decrease? Are there any major expenses on the horizon? Planning for the future can help you choose a repayment plan you can comfortably commit to over the long term.
6. Use Multiple Planners
Different debt payoff planners may use slightly different formulas or assumptions. Consider using multiple planners and comparing the results to get a more accurate estimate. This can help you identify any discrepancies and ensure that you’re getting a reliable estimate.
7. Consult a Financial Advisor
If you’re unsure about how to use a debt payoff planner or how to interpret the results, consider consulting a financial advisor. A financial advisor can help you understand the implications of your repayment plan and provide personalized advice based on your financial situation.
Special Section: Debt Payoff Strategies for Students
Unique Financial Challenges and Opportunities
Students often face unique financial challenges and opportunities when it comes to debt. Balancing tuition fees, living expenses, and student loans can be daunting, but it’s also a great time to develop good financial habits. Here are some tips for students on how to use a debt payoff planner effectively:
1. Set Clear Financial Goals
As a student, it’s important to set clear financial goals. Whether paying off student loans, credit card debt, or personal loans, having a clear target will help you stay focused and motivated.
2. Create a Budget
Creating a budget is essential for managing your finances as a student. Use a debt payoff planner to determine how much you must pay each month to stay on track with your debt repayment. Include all sources of income, such as part-time jobs, scholarships, and parental support, and track your expenses to ensure you stay within your budget.
3. Take Advantage of Student Discounts
Many businesses offer discounts to students, so take advantage of these opportunities to save money. Use the extra savings to contribute towards your debt repayment.
4. Start an Emergency Fund
Unexpected expenses can arise at any time, so it’s important to start an emergency fund. Use a debt payoff planner to determine how much you need to save regularly to build a safety net. Aim to save at least three to six months’ worth of living expenses.
5. Explore Debt Consolidation Options
If you have multiple debts, consider exploring debt consolidation options. This involves combining multiple debts into a single loan with a lower interest rate. Use a debt payoff planner to compare the impact of different consolidation options on your repayment plan.
6. Plan for Student Loans
If you have student loans, it’s important to plan for repayment. Use a debt payoff planner to estimate how much you’ll need to pay each month to pay off your loans after graduation. Consider making small contributions towards your loans while you’re still in school to reduce the overall interest.
7. Stay Committed
Staying committed to your debt repayment plan can be challenging, especially with the many demands of student life. Use a debt payoff planner to track your progress and stay motivated. Celebrate small milestones along the way to keep yourself motivated.
Conclusion
A debt payoff planner is an invaluable tool for anyone looking to get out of debt faster. It helps you organize your debts, create a repayment strategy, and track your progress. By effectively using a debt payoff planner, you can prioritize your debts, save on interest, and accelerate your journey to financial freedom.
Remember to use realistic inputs, consider the impact of interest, and plan for the future. Whether you’re paying off credit card debt, student loans, or a mortgage, a debt payoff planner can help you navigate the complexities of debt repayment and ensure you choose the best strategy for your needs.
In conclusion, a debt payoff planner is not just a tool for estimating payments; it’s a tool for financial empowerment. By using it wisely, you can take control of your financial future and achieve your goal of becoming debt-free. For students, developing good financial habits early on can set the foundation for a lifetime of financial success.
Setting and achieving financial goals is more important than ever in today’s fast-paced world. Whether you’re saving for a dream vacation, a down payment on a house, or building an emergency fund, having a clear plan is essential. A savings goal calculator is a powerful tool to help you map your financial journey, track your progress, and stay motivated. By using a savings goal calculator, you can break down your financial targets into manageable steps, ensuring that you stay on track to achieve your goals.
This comprehensive guide will walk you through the steps of using a savings goal calculator to plan and achieve your financial targets. We’ll cover the different types of savings goals, the key inputs required, and how to interpret the results. Additionally, we’ll provide tips on using this information to make better financial decisions and stay committed to your savings plan.
Understanding Savings Goal Calculators
What is a Savings Goal Calculator?
A savings goal calculator is an online tool that helps you determine how much you need to save regularly to reach a specific financial target. It considers factors such as your current savings, the amount you want to save, the time frame, and the interest rate on your savings. A savings goal calculator can help you stay disciplined and focused on your financial objectives by providing a clear roadmap.
Types of Savings Goals
There are several types of savings goals, each requiring a different approach and strategy. Here are some of the most common ones:
Short-Term Goals: These are goals you aim to achieve within a year or two, such as saving for a holiday, buying a new gadget, or building an emergency fund.
Medium-Term Goals: These goals typically have a time frame of 2 to 5 years. Examples include saving for a down payment on a car, funding a wedding, or taking a sabbatical.
Long-Term Goals: These goals take more than 5 years to achieve, such as saving for a down payment on a house, funding your child’s education, or building a retirement nest egg.
Key Inputs Required
You need to provide certain key inputs to use a savings goal calculator effectively. The calculator uses these inputs to estimate how much you need to save regularly to reach your goal. Here are the most common inputs required:
Savings Goal Amount: This is the total amount of money you aim to save.
Current Savings: This is the amount you have already saved towards your goal.
Time Frame: This is the length of time you have to achieve your savings goal, usually expressed in months or years.
Interest Rate: This is the annual interest rate you expect to earn on your savings. It is expressed as a percentage.
Savings Frequency: This refers to how often you plan to save (e.g., monthly, bi-weekly, weekly).
Start Date: This is the date when you will start saving.
How Savings Goal Calculators Work
Savings goal calculators use a mathematical formula to estimate how much you need to save regularly to reach your financial target. The most common formula used is the future value of a series formula, which calculates the regular savings amount based on the goal amount, current savings, time frame, and interest rate.
The formula for calculating the regular savings amount (PMT) is:
Where:
FV = Future value (savings goal amount)
PV = Present value (current savings)
r= Periodic interest rate (annual interest rate divided by the number of periods per year)
n = Total number of periods (time frame multiplied by the number of periods per year)
This formula calculates the fixed amount you need to save regularly to reach your savings goal, including the interest earned on your savings.
Step-by-Step Guide to Using a Savings Goal Calculator
Step 1: Choose the Right Savings Goal Calculator
The first step is to choose the right savings goal calculator for your needs. There are different types of savings goal calculators for different types of goals. Make sure you select the one that matches your specific savings objective.
Step 2: Enter the Savings Goal Amount
Once you’ve selected the appropriate savings goal calculator, the next step is to enter the savings goal amount. This is the total amount of money you aim to save. Be realistic about how much you need, and consider any additional costs associated with your goal.
Step 3: Input Your Current Savings
Enter the amount you have already saved towards your goal. This will help the calculator determine how much more you need to save to reach your target.
Step 4: Specify the Time Frame
The time frame is the length of time you have to achieve your savings goal. It is usually expressed in months or years. A shorter time frame will require higher regular savings, while a longer time frame will allow for smaller, more manageable savings amounts.
Step 5: Enter the Interest Rate
The interest rate is critical in determining how much you need to save regularly. Enter the annual interest rate you expect to earn on your savings. If you’re unsure what interest rate you’ll earn, you can use an estimated rate based on current market rates.
Step 6: Select the Savings Frequency
Most savings plans require monthly contributions, but some may offer other benefits, such as bi-weekly or weekly. Select the savings frequency that works best for you.
Step 7: Review the Results
Once you’ve entered all the required inputs, the savings goal calculator will generate the results. These typically include:
Regular Savings Amount: The amount you’ll need to save regularly to reach your goal.
Total Savings: The total amount you’ll save, including your current savings and regular contributions.
Interest Earned: The total amount of interest you’ll earn on your savings.
Projected Savings Growth: A detailed breakdown of your savings growth over time.
Step 8: Adjust the Inputs (if necessary)
You can adjust the inputs if the results are not what you expected or if you want to explore different scenarios. For example, you can try different savings goal amounts, time frames, or interest rates to see how they affect your regular savings amount and total interest earned.
Step 9: Make an Informed Decision
After reviewing the results, you’ll better understand the financial commitment to reaching your savings goal. Use this information to make an informed decision about allocating your resources and staying committed to your savings plan.
Interpreting the Results
Regular Savings Amount
The regular savings amount is the amount you’ll need to save regularly to reach your goal. It includes both your contributions and the interest earned on your savings. This is the most important figure to consider when budgeting for your savings goal, as it directly impacts your monthly cash flow.
Total Savings
The total savings is the sum of your current savings and the regular contributions you’ll make over time. It represents the overall amount you’ll have saved by the time you reach your goal.
Interest Earned
The interest earned is the amount of interest you’ll earn on your savings over the time frame. It is calculated based on your current savings, regular contributions, and the interest rate. The higher the interest rate or the longer the time frame, the more interest you’ll earn.
Projected Savings Growth
The projected savings growth is a detailed breakdown of your savings growth over time. It shows how your savings will increase with each contribution and the interest earned. Understanding the projected savings growth can help you see how your savings will accumulate over time and how much interest you’ll gain at different stages.
Tips for Using a Savings Goal Calculator Effectively
1. Use Realistic Inputs
When using a savings goal calculator, it’s important to use realistic inputs. Be honest about how much you can afford to save regularly and the time frame you have to achieve your goal. Overestimating your ability to save can lead to financial stress and potential failure to reach your goal.
2. Compare Different Scenarios
One advantage of using a savings goal calculator is comparing different scenarios. Adjust the savings goal amount, time frame, and interest rate to see how they affect your regular savings amount and total interest earned. This can help you find the best savings strategy for your financial situation.
3. Consider the Impact of Interest
While the regular savings amount is important, it’s also crucial to consider the impact of interest on your savings. A higher interest rate can significantly reduce the amount you need to save regularly, while a lower interest rate may require higher contributions. Use the savings goal calculator to compare the impact of different interest rates on your savings plan.
4. Factor in Additional Costs
In addition to the savings goal amount, consider any additional costs associated with your goal. These may include taxes, fees, or inflation. Including these costs in your calculation will give you a more accurate estimate of the total amount you need to save.
5. Plan for the Future
When using a savings goal calculator, think about your future financial situation. Will your income increase or decrease? Are there any major expenses on the horizon? Planning for the future can help you choose a savings plan you can comfortably commit to over the long term.
6. Use Multiple Calculators
Different savings goal calculators may use slightly different formulas or assumptions. Consider using multiple calculators and comparing the results for a more accurate estimate. This can help you identify any discrepancies and ensure you get a reliable estimate.
7. Consult a Financial Advisor
If you’re unsure about how to use a savings goal calculator or how to interpret the results, consider consulting a financial advisor. A financial advisor can help you understand the implications of your savings plan and provide personalized advice based on your financial situation.
Special Section: Savings Goals for Students
Unique Financial Challenges and Opportunities
Students often face unique financial challenges and opportunities. Balancing tuition fees, living expenses, and social activities can be daunting, but it’s also a great time to develop good financial habits. Here are some tips for students on how to use a savings goal calculator effectively:
1. Set Clear Financial Goals
As a student, it’s important to set clear financial goals. Whether it’s saving for tuition, a study abroad program, or a post-graduation trip, having a clear target will help you stay focused and motivated.
2. Create a Budget
Creating a budget is essential for managing your finances as a student. Use a savings goal calculator to determine how much you need to save regularly to reach your goals. Include all sources of income, such as part-time jobs, scholarships, and parental support, and track your expenses to ensure you stay within your budget.
3. Take Advantage of Student Discounts
Many businesses offer discounts to students, so take advantage of these opportunities to save money. Use the extra savings to contribute towards your financial goals.
4. Start an Emergency Fund
Unexpected expenses can arise at any time, so it’s important to start an emergency fund. Use a savings goal calculator to determine how much you need to save regularly to build a safety net. Aim to save at least three to six months’ worth of living expenses.
5. Explore High-Interest Savings Accounts
As a student, you may not have a lot of money to save, but you can still make the most of what you have by exploring high-interest savings accounts. Use a savings goal calculator to compare the impact of different interest rates on your savings plan.
6. Plan for Student Loans
If you have student loans, it’s important to plan for repayment. Use a savings goal calculator to estimate how much you’ll need to save to pay off your loans after graduation. Consider making small contributions towards your loans while you’re still in school to reduce the overall interest.
7. Stay Committed
Staying committed to your savings plan can be challenging, especially with the many demands of student life. Use a savings goal calculator to track your progress and stay motivated. Celebrate small milestones along the way to keep yourself motivated.
Conclusion
A savings goal calculator is invaluable for anyone seeking financial targets. It helps you estimate how much you need to save regularly, track your progress, and stay motivated. By understanding how to use a savings goal calculator effectively, you can break down your financial goals into manageable steps, ensuring that you stay on track to achieve them.
Remember to use realistic inputs, consider the impact of interest, and plan for the future. Whether you’re saving for a short-term or a long-term objective, a savings goal calculator can help you navigate the complexities of saving and ensure that you choose the best strategy for your needs.
In conclusion, a savings goal calculator is not just a tool for estimating savings; it’s a tool for financial empowerment. By using it wisely, you can take control of your financial future and confidently achieve your goals.
In today’s financial landscape, loans have become an integral part of personal and business finance. Whether you’re planning to buy a home, finance a car, or fund a business venture, understanding how much you’ll need to repay is crucial. This is where a loan calculator comes into play. A loan calculator is a powerful tool that helps you estimate your monthly payments, total interest, and the overall loan cost. By using a loan calculator, you can make informed decisions, plan your budget, and avoid financial pitfalls.
This comprehensive guide will walk you through the steps of using a loan calculator to estimate your loan payments. We’ll cover the different types of loan calculators, the key inputs required, and how to interpret the results. Additionally, we’ll provide tips on how to use this information to make better financial decisions.
Understanding Loan Calculators
What is a Loan Calculator?
A loan calculator is an online tool that helps you estimate the monthly payments, total interest, and overall loan cost. It uses a mathematical formula to calculate these figures based on the loan amount, interest rate, loan term, and other factors. Loan calculators are widely available on financial websites, banking portals, and mobile apps.
Types of Loan Calculators
There are several types of loan calculators, each designed for specific types of loans. Here are some of the most common ones:
Mortgage Loan Calculator: This calculator is designed for home loans. It helps you estimate your monthly mortgage payments, including principal, interest, property taxes, and insurance.
Auto Loan Calculator: This calculator is used for car loans. It estimates your monthly car payments, including interest and any additional fees.
Student Loan Calculator: This calculator is designed for student loans. It helps you estimate your monthly payments, total interest, and the time it will take to pay off your student debt.
Business Loan Calculator: This calculator is for business loans. It helps you estimate your monthly payments, total interest, and the overall cost of financing your business.
Debt Consolidation Loan Calculator: This calculator is used for debt consolidation loans. It helps you estimate your monthly payments and total interest when consolidating multiple debts into a single loan.
Key Inputs Required
To use a loan calculator effectively, you need to provide certain key inputs. These inputs are used by the calculator to estimate your loan payments. Here are the most common inputs required:
Loan Amount: This is the total amount of money you plan to borrow. It is also known as the principal.
Interest Rate: This is the annual interest rate charged by the lender. It is expressed as a percentage.
Loan Term: This is the length of time over which you will repay the loan. It is usually expressed in months or years.
Payment Frequency: This refers to how often you will make payments (e.g., monthly, bi-weekly, weekly).
Start Date: This is the date when you will start making payments.
Additional Fees: Some loans may have additional fees, such as origination fees, closing costs, or prepayment penalties. These should be included in the calculation if applicable.
How Loan Calculators Work
Loan calculators use a mathematical formula to estimate your loan payments. The most common formula used is the amortization formula, which calculates the monthly payment based on the loan amount, interest rate, and loan term.
The formula for calculating the monthly payment (PMT) on an amortizing loan is:
Where:
P = Loan amount (principal)
r = Monthly interest rate (annual interest rate divided by 12)
n = Total number of payments (loan term in months)
This formula calculates the fixed monthly payment required to pay off the loan over the specified term, including both principal and interest.
Step-by-Step Guide to Using a Loan Calculator
Step 1: Choose the Right Loan Calculator
The first step is to choose the right loan calculator for your needs. As mentioned earlier, there are different types of loan calculators for different types of loans. Make sure you select the one that matches the type of loan you’re considering.
Step 2: Enter the Loan Amount
Once you’ve selected the appropriate loan calculator, the next step is to enter the loan amount. This is the total amount of money you plan to borrow. Be realistic about how much you need, and consider your ability to repay the loan.
Step 3: Input the Interest Rate
The interest rate is a critical factor in determining your loan payments. Enter the annual interest rate offered by the lender. If you’re not sure what interest rate you’ll qualify for, you can use an estimated rate based on your credit score and current market rates.
Step 4: Specify the Loan Term
The loan term is the length of time over which you will repay the loan. It is usually expressed in months or years. A longer loan term will result in lower monthly payments but higher total interest costs. Conversely, a shorter loan term will result in higher monthly payments but lower total interest costs.
Step 5: Select the Payment Frequency
Most loans require monthly payments, but some lenders may offer other payment frequencies, such as bi-weekly or weekly. Select the payment frequency that works best for you.
Step 6: Include Additional Fees (if applicable)
If your loan has additional fees, such as origination fees or closing costs, make sure to include them in the calculation. These fees can significantly impact the total cost of the loan.
Step 7: Review the Results
Once you’ve entered all the required inputs, the loan calculator will generate the results. These typically include:
Monthly Payment: The amount you’ll need to pay each month.
Total Interest: The total amount of interest you’ll pay over the life of the loan.
Total Payment: The total amount you’ll pay, including both principal and interest.
Amortization Schedule: A detailed breakdown of each payment, showing how much goes toward principal and interest.
Step 8: Adjust the Inputs (if necessary)
If the results are not what you expected, or if you want to explore different scenarios, you can adjust the inputs. For example, you can try different loan amounts, interest rates, or loan terms to see how they affect your monthly payments and total interest.
Step 9: Make an Informed Decision
After reviewing the results, you’ll have a better understanding of the financial commitment involved in taking out the loan. Use this information to make an informed decision about whether the loan is right for you and how it fits into your overall financial plan.
Interpreting the Results
Monthly Payment
The monthly payment is the amount you’ll need to pay each month to repay the loan. It includes both principal and interest. This is the most important figure to consider when budgeting for a loan, as it directly impacts your monthly cash flow.
Total Interest
The total interest is the amount of interest you’ll pay over the life of the loan. It is calculated based on the loan amount, interest rate, and loan term. The higher the interest rate or the longer the loan term, the more interest you’ll pay.
Total Payment
The total payment is the sum of the loan amount and the total interest. It represents the overall cost of the loan. This figure is important to consider when comparing different loan options, as it gives you a clear picture of the total financial commitment.
Amortization Schedule
The amortization schedule is a detailed breakdown of each payment over the life of the loan. It shows how much of each payment goes toward the principal and how much goes toward interest. In the early years of the loan, a larger portion of each payment goes toward interest, while in the later years, a larger portion goes toward the principal.
Understanding the amortization schedule can help you see how your loan balance decreases over time and how much interest you’ll pay at different stages of the loan.
Tips for Using a Loan Calculator Effectively
1. Use Realistic Inputs
When using a loan calculator, it’s important to use realistic inputs. Be honest about how much you can afford to borrow and repay. Overestimating your ability to repay the loan can lead to financial stress and potential default.
2. Compare Different Scenarios
One advantage of using a loan calculator is that you can compare different scenarios. Try adjusting the loan amount, interest rate, and term to see how they affect your monthly payments and total interest. This can help you find the best loan option for your financial situation.
3. Consider the Total Cost of the Loan
While the monthly payment is important, it’s also crucial to consider the total cost of the loan. A loan with a lower monthly payment but a longer term may end up costing more in total interest. Use the loan calculator to compare the total payment for different loan options.
4. Factor in Additional Costs
In addition to the loan amount and interest rate, consider any additional costs associated with the loan. These may include origination fees, closing costs, prepayment penalties, and insurance. Including these costs in your calculation will give you a more accurate estimate of the total cost of the loan.
5. Plan for the Future
When using a loan calculator, think about your future financial situation. Will your income increase or decrease? Are there any major expenses on the horizon? Planning for the future can help you choose a loan that you can comfortably repay over the long term.
6. Use Multiple Calculators
Different loan calculators may use slightly different formulas or assumptions. To get a more accurate estimate, consider using multiple calculators and comparing the results. This can help you identify any discrepancies and ensure that you’re getting a reliable estimate.
7. Consult a Financial Advisor
If you’re unsure about how to use a loan calculator or how to interpret the results, consider consulting a financial advisor. A financial advisor can help you understand the implications of taking out a loan and provide personalized advice based on your financial situation.
Conclusion
A loan calculator is an invaluable tool for anyone considering taking out a loan. It helps you estimate your monthly payments, total interest, and overall cost, allowing you to make informed financial decisions. By understanding how to use a loan calculator effectively, you can compare different loan options, plan your budget, and avoid financial pitfalls.
Remember to use realistic inputs, consider the total cost of the loan, and plan for the future. Whether you’re buying a home, financing a car, or funding a business, a loan calculator can help you navigate the complexities of borrowing and ensure that you choose the best loan option for your needs.
In conclusion, a loan calculator is not just a tool for estimating payments; it’s a tool for financial empowerment. By using it wisely, you can take control of your financial future and achieve your goals with confidence.
Retirement is a time to enjoy the fruits of your labor, but it also comes with the challenge of making your savings last. One of the most widely discussed strategies for managing retirement funds is the 4% rule. This rule provides a straightforward approach to withdrawing money from your retirement accounts while minimizing the risk of running out of funds. In this article, we’ll explore what the 4% rule is, how it works, its pros and cons, and how you can apply it to your retirement planning.
What Is the 4% Rule?
The 4% rule is a retirement withdrawal strategy designed to help retirees sustainably manage their savings. It suggests withdrawing four percent of your retirement portfolio in the first year of retirement and adjusting the amount each subsequent year for inflation.
For example, if you have a 1 million portfolio, you would withdraw 1 million portfolios, and you would withdraw 40,000 in the first year. If inflation is 2% the following year, you will withdraw 40,800(40,800(40,000 + 2%). This approach aims to provide a steady income stream while preserving your savings for 30 years or more.
Financial advisor William Bengen popularized the rule in the 1990s based on historical market data and retirement scenarios. While it’s not a one-size-fits-all solution, it remains a useful starting point for retirement planning.
Portfolio Composition: A balanced portfolio of 50% stocks and 50% bonds.
Time Horizon: A retirement period of 30 years.
Inflation Adjustment: Annual withdrawals adjusted for inflation.
By following these guidelines, the 4% rule aims to balance the need for income with the goal of preserving your savings. It’s designed to withstand market fluctuations and ensure your money lasts throughout retirement.
Pros of the 4 percent Rule
Simplicity: The 4% rule is easy to understand and implement, making it accessible for most retirees.
Predictability: It provides a clear withdrawal framework, helping you plan your retirement budget.
Historical Success: Based on past market performance, the rule has a high success rate for 30-year retirements.
Flexibility: You can adjust the rule to suit your needs, such as withdrawing less during market downturns.
Cons of the percent Rule
Market Dependency: The rule assumes average market returns, which may not hold true in the future.
Inflation Risks: High inflation can erode your purchasing power over time.
Longevity Risk: If you live longer than 30 years, you may outlast your savings.
One-Size-Fits-All: The rule doesn’t account for individual circumstances, such as healthcare costs or lifestyle changes.
How to Apply the 4% Rule to Your Retirement
Calculate Your Portfolio Size: Determine the total value of your retirement savings, including 401(k)s, IRAs, and other investments.
Determine Your Withdrawal Amount: Multiply your portfolio value by 4% to find your first-year withdrawal amount.
Adjust for Inflation: Increase your withdrawals annually to account for inflation.
Monitor Your Portfolio: Regularly review your investments and adjust your strategy as needed.
For example, if you have 1.5 million in retirement savings, your first−year withdrawal would be 1.5 million in retirement savings, and your first-year withdrawal would be 60,000. If inflation is 3% the next year, you would withdraw $61,800.
When the 4 percent Rule Might Not Work
While the 4% rule is a helpful guideline, it may not be suitable for everyone. Here are some scenarios where you might need to adjust your approach:
Early Retirement: If you retire before age 65, you may need to withdraw less to make your savings last longer.
High Healthcare Costs: Retirees with significant medical expenses may need to reduce withdrawals to cover these costs.
Market Volatility: During economic downturns, consider withdrawing less to protect your portfolio.
Luxury Lifestyle: If you plan to travel extensively or pursue expensive hobbies, you may need to save more or withdraw less.
Alternatives to the 4% Rule
If the 4% rule doesn’t align with your goals, consider these alternatives:
Dynamic Withdrawals: Adjust your withdrawals based on market performance. For example, withdraw less during downturns and more during upswings.
Bucket Strategy: Divide your portfolio into “buckets” for short-term, medium-term, and long-term needs.
Annuities: Use annuities to provide a guaranteed income stream, reducing reliance on market performance.
Hybrid Approach: Combine the 4% rule with other strategies to create a customized plan.
Conclusion: Is the 4% Rule Right for You?
The 4% rule is a valuable tool for retirement planning, offering a simple and effective way to manage your savings. However, it’s not a one-size-fits-all solution. Your retirement needs, lifestyle, and financial goals will determine whether this strategy works for you.
To make the most of the 4% rule, regularly review your portfolio, stay informed about market trends, and adjust your plan as needed. By combining the 4% rule with other strategies, you can achieve retirement financial security and confidently enjoy your golden years.
FAQs About the 4% Rule
1. Can I withdraw more than 4% in retirement?
Withdrawing more than 4% increases the risk of running out of money, especially if markets underperform. Stick to 4% or less for long-term sustainability.
2. What if my portfolio grows significantly after I retire?
If your portfolio grows, you can reassess your withdrawals. Some retirees increase their spending or leave a larger legacy for their heirs.
3. Does the 4% rule work for early retirees?
Early retirees may need to withdraw less than 4% to ensure their savings last longer. Consider a 3% or 3.5% withdrawal rate for extended retirements.
4. How does the 4% rule account for taxes?
The 4% rule doesn’t factor in taxes. Be sure to account for taxes when calculating your withdrawals to avoid unexpected shortfalls.
Many of us eagerly look forward to retirement. However, without proper planning, it can turn into a source of anxiety. Achieving retirement financial security involves more than merely saving money; it requires creating a sustainable plan that guarantees peace of mind and stability during your golden years.
This comprehensive guide proposes practical strategies for managing your finances during retirement, enhancing your income, and protecting your wealth. It is addressed to those nearing retirement or already enjoying it.
1. Assessing Your Financial Situation: The Foundation of Retirement Financial Security
The first step toward retirement financial security is understanding where you stand financially. Start by evaluating your current savings, investments, and expenses. How much have you saved in your 401(k), IRA, or other retirement accounts? What are your monthly expenses, and how might they change after retirement?
Next, identify your sources of retirement income. This could include Social Security benefits, pensions, annuities, or rental income. Calculate how much you’ll receive from each source and compare it to your projected expenses. If there’s a gap, don’t panic—this is the time to address it.
Finally, consider your debt. Carrying high-interest debt into retirement can erode your savings. Create a plan to pay off credit cards, loans, or mortgages before you retire. By assessing your financial situation early, you’ll have a clear picture of what steps to take next.
2. Creating a Retirement Budget: Your Blueprint for Financial Stability
A well-crafted budget is the cornerstone of retirement financial security. Start by estimating your post-retirement expenses. These typically fall into three categories:
Essential Expenses: Housing, utilities, groceries, and healthcare.
Discretionary Expenses: Travel, hobbies, and entertainment.
Unexpected Costs: Home repairs, medical emergencies, or helping family members.
Once you’ve estimated your expenses, look for ways to reduce unnecessary spending. For example, downsizing your home or cutting back on dining out can free up significant funds. Use budgeting tools or apps like Mint or YNAB (You Need A Budget) to track your spending and stay on track.
Remember, a retirement budget isn’t set in stone. Review it annually to account for changes in your lifestyle or financial situation.
3. Maximizing Retirement Income: Stretch Your Dollars Further
To achieve retirement financial security, you need to make the most of your income streams. Start by optimizing your Social Security benefits. Delaying benefits until full retirement age (or even age 70) can significantly increase your monthly payments. If you’re married, explore spousal benefits to maximize your combined income.
Consider supplementing your income with part-time work or passive income opportunities. Many retirees find fulfillment in consulting, freelancing, or turning hobbies into income streams. Rental properties, dividend-paying stocks, or peer-to-peer lending can also provide steady cash flow.
When it comes to withdrawing from retirement accounts, follow the 4% rule as a general guideline. This means withdrawing no more than 4% of your savings annually to ensure your money lasts. Work with a financial advisor to create a withdrawal strategy tailored to your needs.
4. Managing Healthcare Costs: A Key to Retirement Financial Security
Healthcare is one of the biggest expenses in retirement, and planning for it is essential for retirement financial security. Start by understanding Medicare and its various parts (A, B, C, and D). Consider supplemental insurance (Medigap) to cover gaps in Medicare coverage.
Long-term care is another critical consideration. The cost of nursing homes or in-home care can quickly deplete your savings. Look into long-term care insurance or hybrid life insurance policies that include long-term care benefits.
Finally, adopt healthy habits to reduce medical expenses. Regular exercise, a balanced diet, and preventive care can help you avoid costly health issues down the road.
5. Protecting Your Wealth: Safeguarding Your Financial Future
Protecting your wealth is just as important as growing it. Start with estate planning. Create a will to ensure your assets are distributed according to your wishes. Consider setting up a trust to avoid probate and minimize estate taxes.
Be vigilant against financial scams targeting seniors. Fraudsters often use tactics like phishing emails, fake investment schemes, or impersonation scams. Never share personal information with unsolicited callers or emails.
Insurance is another crucial component of retirement financial security. Ensure you have adequate coverage for life, health, and long-term care. Review your policies regularly to make sure they align with your current needs.
6. Investing Wisely in Retirement: Balancing Risk and Reward
Investing doesn’t stop when you retire—it just changes. The goal is to balance risk and reward to ensure your money lasts. Diversification is key. Spread your investments across stocks, bonds, real estate, and other assets to reduce risk.
Consider working with a financial advisor to create a retirement portfolio tailored to your goals and risk tolerance. They can help you navigate market fluctuations and adjust your strategy as needed.
Don’t forget about inflation. Over time, rising prices can erode your purchasing power. Include inflation-protected securities like TIPS (Treasury Inflation-Protected Securities) in your portfolio to safeguard against this risk.
7. Adapting to Changing Financial Needs: Staying Flexible
Life is unpredictable, and your financial plan should be flexible enough to adapt. Regularly revisit your financial goals and strategies to ensure they align with your current situation.
Stay informed about changes in retirement policies, tax laws, and economic trends. For example, changes in Social Security or Medicare could impact your income or healthcare costs. Being proactive will help you stay ahead of potential challenges.
Finally, don’t hesitate to seek professional advice. A financial advisor can provide valuable insights and help you make informed decisions.
Conclusion: Take Control of Your Retirement Financial Security
Achieving retirement financial security is within your reach. By assessing your financial situation, creating a budget, maximizing income, and protecting your wealth, you can enjoy a stress-free retirement. Remember, the key is to start early, stay informed, and adapt as needed.
Your golden years should be a time of joy and fulfillment, not financial worry. Take the first step today toward mastering senior finances and securing your future.
FAQs: Retirement Financial Security
Here are some frequently asked questions about achieving retirement financial security and mastering senior finances.
Retirement financial security means having enough income and savings to cover your expenses and maintain your desired lifestyle throughout retirement. It’s important because it ensures peace of mind, reduces stress, and allows you to enjoy your golden years without worrying about money.
The amount you need depends on your lifestyle, expenses, and retirement goals. A common rule of thumb is to aim for 25 times your annual expenses. For example, if you spend $40,000 a year, you’ll need approximately $1 million in savings.
The earlier, the better! Ideally, start in your 20s or 30s to take advantage of compound interest. However, it’s never too late to begin. Even if you’re in your 50s or 60s, creating a solid plan can significantly improve your retirement financial security.
To maximize Social Security, consider delaying benefits until full retirement age (66–67) or age 70. This can increase your monthly payments by up to 8% per year. Explore spousal benefits if you’re married, as they can provide additional income.
Enroll in Medicare and consider supplemental insurance (Medigap). Invest in long-term care insurance, adopt a healthy lifestyle, and compare prescription drug plans for affordability.
Estimate your post-retirement expenses, including housing, healthcare, and leisure. Compare this to your expected income from Social Security, pensions, and savings. Use budgeting apps to track your spending and adjust as needed.
Increase contributions to retirement accounts like a 401(k) or IRA. Delay retirement, downsize your home, reduce expenses, and explore part-time work or passive income streams.
Never share personal information with unsolicited callers or emails. Be cautious of “too good to be true” investment offers, work with trusted financial advisors, and regularly monitor your accounts.
Yes, a financial advisor can offer personalized advice and help with investing, withdrawing from accounts, and estate planning. Choose a certified professional experienced in retirement planning.
Review your retirement plan annually or after major life events such as job loss, illness, or inheritance. This ensures your plan aligns with your goals and adapts to changing circumstances.