

Chocolate Eclairs with Vanilla Cream
When the choux dough hits the hot pan, it turns from a buttery liquid into a soft ball, and a thin film appears on the saucepan bottom. That change is…
Tip: save now, read later.
When the choux dough hits the hot pan, it turns from a buttery liquid into a soft ball, and a thin film appears on the saucepan bottom. That change is easy to miss if you stir too briefly, but it sets up the hollow shells that make chocolate eclairs with vanilla cream worth the effort. I watch for the dough to pull together cleanly before I move it to a bowl.
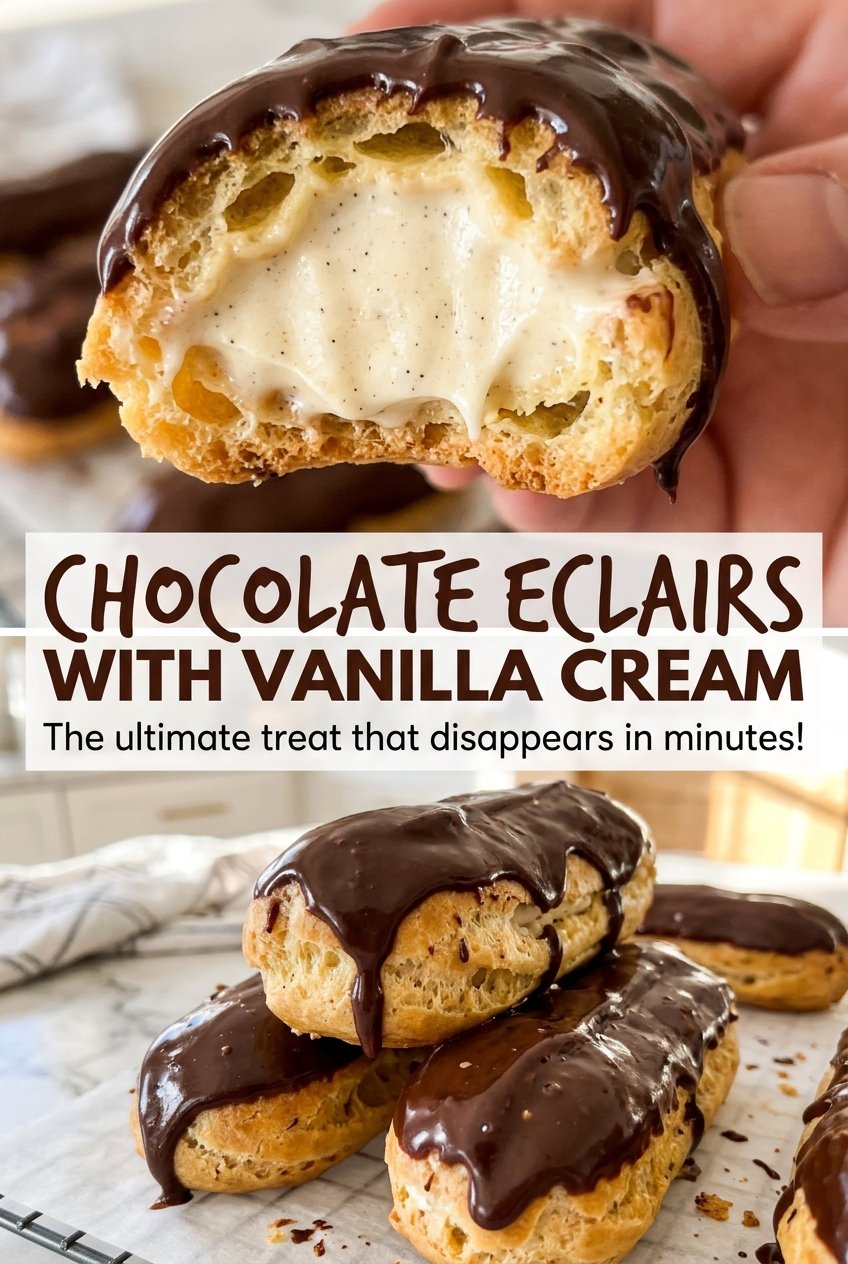
These eclairs depend on a few distinct textures: a glossy dough that holds its shape, shells baked until firm, and vanilla cream chilled until completely cold. The filling is a classic stovetop custard thickened with cornstarch, so it slices neatly when you fill the shells. Let the chocolate glaze cool until it clings to a spoon but still dips smoothly, and you’ll get a glossy finish instead of a runny puddle.
Kitchen Note
After the shells are baked, pierce one end of each and let them sit in the turned-off oven with the door propped open for 10 minutes. That pause lets steam escape before the shells cool, so the centers are less likely to turn damp.
Save these chocolate eclairs with vanilla cream for a bake with crisp, airy shells and a glossy semisweet chocolate top.
Why the Hot Milk Needs to Go Into the Yolks First
Custard can go from silky to scrambled in a hurry when egg yolks meet hot milk. Whisking about half of the steaming milk into the yolk mixture first gently warms the yolks, so they can go back into the saucepan without cooking into bits. Pouring all the hot milk in at once is the shortcut that often causes trouble.
Once the mixture is back in the pan, keep your whisk moving over medium heat. The cornstarch helps the cream thicken, but it needs to reach a full bubble and keep cooking for one minute to lose its raw, starchy taste. The cream will look thicker while warm and firm up more as it chills, so don’t judge its final texture straight from the saucepan. Pressing plastic wrap directly onto the surface keeps a skin from forming while it cools.
What the Flour, Eggs, and Chocolate Each Bring to These Eclairs

- Egg yolks and cornstarch — Together, they give the vanilla cream its rich color and sliceable body. Fresh yolks and properly measured cornstarch matter more than buying a premium brand; whisk them until smooth before adding any hot milk.
- Whole milk — Its fat gives the custard a rounder, creamier texture than a leaner milk. Use it straight from the carton; there’s no need to warm it before heating it in the saucepan.
- All-purpose flour — It gives the choux dough enough structure to hold its shape as it puffs. Spoon it into the measuring cup and level it rather than packing the cup, which can leave the dough too stiff.
- Large eggs — The eggs loosen the cooked flour-and-butter dough and help the shells rise. Add them one at a time so you can see the dough turn glossy and assess its consistency before the next egg goes in.
- Semisweet chocolate and heavy cream — Finely chopped semisweet chocolate melts evenly into the warm cream and keeps the glaze balanced against the sweet filling. A good-quality baking bar is easy to chop and melts smoothly; heavy cream gives the glaze its dip-able texture.
- Unsalted butter — Butter adds richness to the shells and melts evenly into the water. Since the dough’s salt is measured separately, unsalted butter keeps that seasoning predictable.
The Three Textures to Watch as You Make the Eclairs
Thickening the Vanilla Cream
Whisk the egg yolks, granulated sugar, and cornstarch until the mixture is smooth, with no dry pockets of starch. Heat the milk in a 2-quart saucepan over medium heat until it’s steaming and small bubbles form around the edge. Whisk about half of the hot milk into the yolks, then pour the warmed mixture back into the saucepan. Keep whisking over medium heat until it thickens and bubbles, then whisk for one more minute before taking it off the heat and stirring in the vanilla.
Cooking the Choux Dough Before Adding Eggs
Bring the water, butter, and fine salt to a boil in a medium saucepan, then take the pan off the heat and add all the flour at once. Stir vigorously until the mixture forms a dough, then return the pan to medium-low heat. Keep stirring for 1 to 2 minutes, until a thin film forms on the bottom of the pan. Transfer the dough to a bowl and give it 5 minutes to cool; adding eggs while it’s too hot can make them cook on contact.
Adding Eggs and Piping Even Logs
Beat in the eggs one at a time, fully incorporating each before adding the next. The finished dough should look glossy and hold its shape, not run like batter; stop and check its consistency as you go. Fit a piping bag with a 1/2-inch plain tip and pipe 12 logs, each about 4 inches long, onto a parchment-lined 18×13-inch rimmed baking sheet. Leave about 2 inches between logs so they have room to puff without crowding.
Baking Until the Shells Feel Firm
Heat the oven to 425°F and bake the logs for 15 minutes. Without opening the oven door, reduce the temperature to 375°F and bake for 20 to 25 minutes more, until the shells are deep golden and firm. Turn off the oven, pierce one end of each shell with a small knife, and leave them inside with the door propped open for 10 minutes. Move the shells to a rack and cool them completely before filling; warm shells will soften the chilled cream.
Filling and Dipping Without a Mess
Put the finely chopped semisweet chocolate in a heatproof bowl, heat the heavy cream in a small saucepan until steaming, and pour it over the chocolate. Let it stand for 2 minutes, then stir until smooth and leave it for 10 to 15 minutes, until it’s thick but still easy to dip. Slice the cooled shells lengthwise with a serrated knife and divide the chilled cream among the bottom halves. Replace the tops, dip each one in glaze, and let the eclairs sit on a rack for about 20 minutes until the chocolate sets.
Two Useful Swaps and the Best Way to Store Eclairs
Use Bittersweet Chocolate for a Less-Sweet Finish
Swap bittersweet chocolate for the semisweet chocolate in the glaze, using the same amount. The topping will taste more intense and less sweet beside the vanilla cream, while the warm cream still makes a smooth ganache.
Make the Custard with 2% Milk
Replace the whole milk with the same amount of 2% milk for a slightly lighter, less rich vanilla cream. The cornstarch still thickens it, though the custard won’t taste quite as full-bodied.
Storage and Reheating
- Refrigerator: Keep filled eclairs covered in the refrigerator for up to 2 days. The shells soften as they sit with the cream, but the filling stays chilled.
- Freezer: Freeze the cooled, unfilled shells in an airtight container for up to 1 month; thaw them at room temperature before filling. Filled eclairs don’t freeze well because the custard’s texture can change.
- Reheating: Don’t reheat filled eclairs; warmth softens the cream and glaze. Serve them chilled, or let an unfilled frozen shell thaw before you add the cream.
Questions That Come Up When Making Chocolate Eclairs
Chocolate Eclairs with Vanilla Cream
Ingredients
Equipment
Method
- In a medium bowl, whisk the egg yolks, sugar, and cornstarch until smooth.
- Heat the milk in a 2-quart saucepan over medium heat until steaming, with small bubbles forming around the edge.
- Slowly whisk about half of the hot milk into the yolk mixture, then pour it back into the saucepan.
- Cook over medium heat, whisking constantly, until thick and bubbling; continue whisking for 1 minute.
- Remove the pan from the heat and stir in the vanilla.
- Transfer the cream to a shallow bowl, press plastic wrap directly onto its surface, and refrigerate until cold, at least 2 hours.
- Heat the oven to 425°F and line an 18x13-inch rimmed baking sheet with parchment paper.
- Bring the water, butter, and salt to a boil in a medium saucepan.
- Remove the pan from the heat, add the flour all at once, and stir vigorously until a dough forms.
- Return the pan to medium-low heat and stir for 1 to 2 minutes, until a thin film forms on the bottom of the pan.
- Transfer the dough to a bowl and let it cool for 5 minutes.
- Beat in the eggs one at a time, fully incorporating each before adding the next, until the dough is glossy and holds its shape.
- Transfer the dough to a piping bag fitted with a 1/2-inch plain tip and pipe 12 logs, each about 4 inches long, onto the baking sheet, spacing them about 2 inches apart.
- Bake for 15 minutes, then reduce the oven to 375°F without opening the door and bake for 20 to 25 minutes more, until the shells are deep golden and firm.
- Turn off the oven, pierce one end of each shell with a small knife to release steam, and leave the shells inside with the oven door propped open for 10 minutes.
- Transfer the shells to a rack and cool completely.
- Put the chopped chocolate in a heatproof bowl.
- Heat the heavy cream in a small saucepan until steaming, pour it over the chocolate, and let stand for 2 minutes.
- Stir the chocolate and cream until smooth, then let the glaze cool for 10 to 15 minutes, until thick but still dip-able.
- Slice each cooled shell lengthwise with a serrated knife.
- Divide the chilled vanilla cream among the bottom halves, replace the tops, and dip each top into the chocolate glaze.
- Set the eclairs on a rack until the glaze is set, about 20 minutes.
