

Halloween Mummy Apple Hand Pies with Pie Crust Bandages
The apples turn glossy in the skillet, then their juices thicken enough to cling to a spoon; that’s the cue I watch for before these Halloween mummy apple hand pies…
Tip: save now, read later.
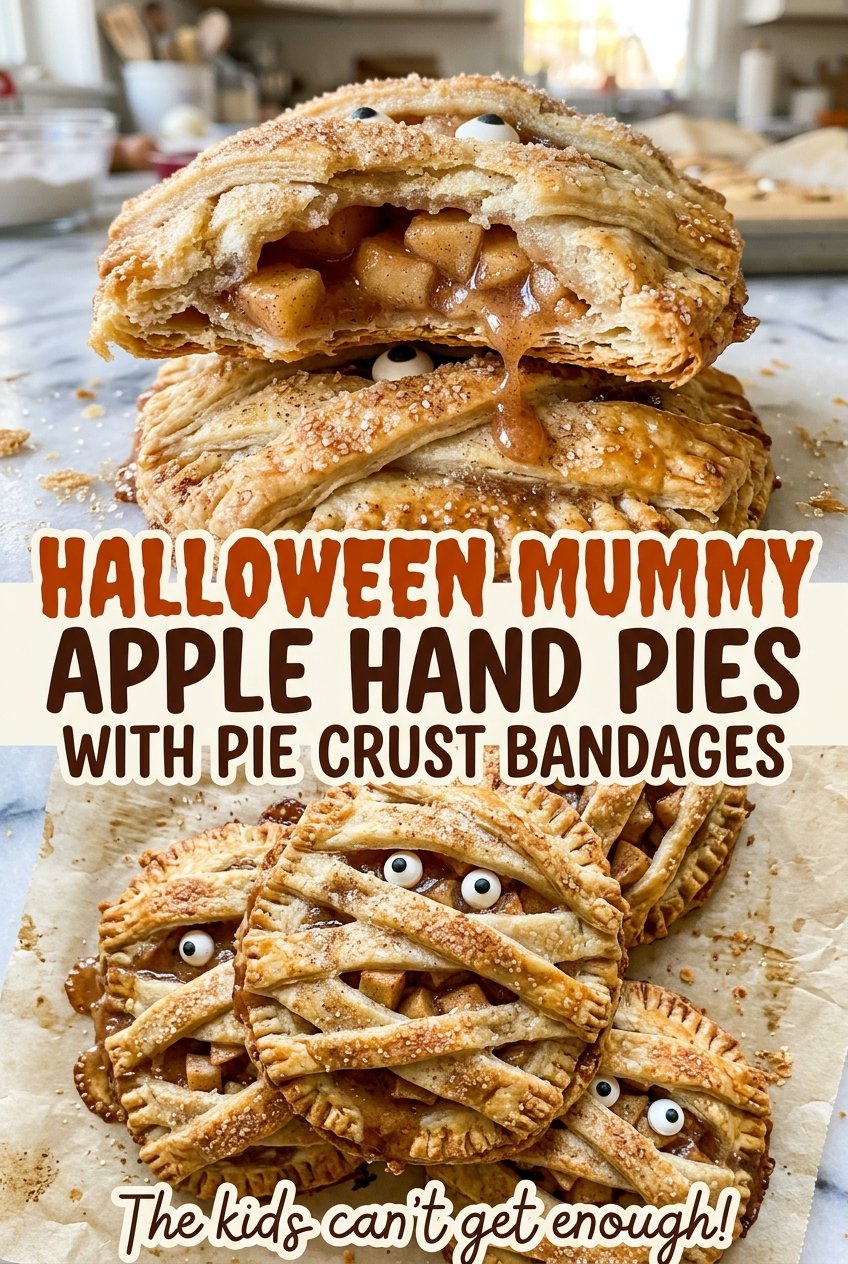
The apples turn glossy in the skillet, then their juices thicken enough to cling to a spoon; that’s the cue I watch for before these Halloween mummy apple hand pies with pie crust bandages ever meet the pastry. The filling has cinnamon warmth and a little brightness from lemon, tucked inside a flaky crust that’s easy to cut and fold. Each hand pie gets a few pastry-strip bandages and a small open patch for candy eyes, so they look festive without needing fussy decorating.
I cook the apples first instead of putting them raw into the crust. That gives the juices time to thicken and the apple pieces a head start, which helps keep the pastry from turning soggy while the pies bake. Letting the filling cool completely matters, too: warm filling softens the dough and makes the edges harder to seal. Once the crusts are ready, the little pies come together with a fork, an egg wash, and a sprinkle of coarse sugar. They bake up golden, with bubbling apple tucked behind crisp pastry bandages.
Kitchen Note
I let the apple filling cool completely in a shallow bowl before portioning it. If it still feels warm, it can soften the pastry before the edges are sealed.
Save these Halloween mummy apple hand pies for a festive bake: flaky pastry bandages, cinnamon apples, and candy eyes.
Why the Mummy Bandages Need a Bare Patch
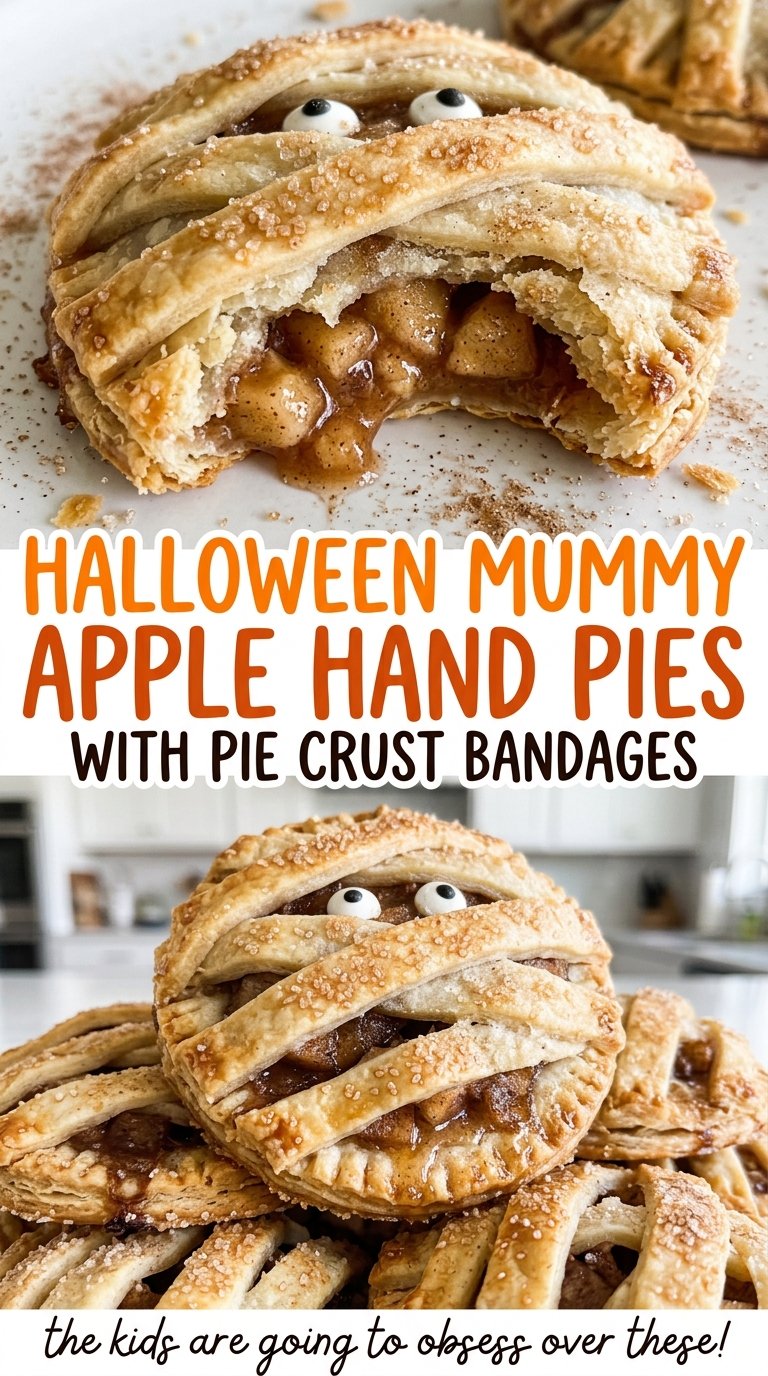
The uncovered patch isn’t a missed spot; it gives the candy eyes a place to sit where they’re easy to see. Cover the entire top and the eyes have nowhere to attach neatly. Leave the opening near one edge, and the pies read as little mummies even if the pastry strips aren’t perfectly straight.
Keep the strips narrow enough to look like bandages rather than a solid top crust. The scraps cut from the rounds work well for this, and their slightly uneven edges add to the wrapped look. Three or four strips across each pie are enough to create that layered effect while leaving the opening visible. There’s no need to weave them or line them up; a little variation looks natural. The exposed patch also makes the last step easier, because you can dab icing directly where the eyes need to go without lifting or shifting a baked strip.
What Keeps the Apple Filling Thick and the Pastry Easy to Handle
- Apples — Choose apples that hold their shape as they cook, so the filling stays pleasantly chunky rather than turning to puree. A tart baking apple gives a sharper contrast to the sugar; a sweeter firm apple makes a milder filling. The variety can change, but very soft apples are more likely to collapse during the skillet cook.
- All-purpose flour — The small amount stirred into the apples helps thicken their released juices. For a gluten-free batch, a gluten-free 1:1 flour blend is the most direct replacement. Don’t leave the thickener out; thin filling is more likely to run toward the seams.
- Refrigerated pie crusts — A two-crust package keeps the rounds and bandage strips simple to cut, and room-temperature dough is less likely to crack when unrolled. A homemade rolled pie crust can work in the same format, though the dough’s handling and flakiness will depend on the crust you use.
- Lemon juice and cinnamon — Lemon brightens the cooked apples, while cinnamon gives the filling its familiar warm note. Fresh lemon juice is a good choice when you have it; bottled juice works here, too. The cinnamon doesn’t need to be an expensive specialty spice, but an old jar will taste muted.
- Coarse sugar and candy eyeballs — Coarse sugar gives the brushed pastry a crisp, sparkly finish that regular granulated sugar won’t quite match. Candy eyeballs are the easiest way to get the mummy expression; powdered sugar and milk make the thick icing that holds them in place.
From Skillet Apples to Golden Mummy Hand Pies
Cook the apples until the juices cling
Melt the butter in a 10-inch skillet over medium heat, then stir in the diced apples, granulated sugar, flour, lemon juice, cinnamon, and salt. Cook for 6–8 minutes, stirring often, until the apples begin to soften and the juices thicken. You’re looking for glossy pieces and syrup that coats them, not a pool of thin liquid at the bottom. Transfer the filling to a shallow bowl and let it cool completely, about 20–30 minutes.
Cut the rounds and save the scraps
Heat the oven to 400°F and line an 18×13-inch rimmed baking sheet with parchment paper. Let the pie crusts stand at room temperature for 15 minutes, then unroll them and cut eight 3 1/2-inch rounds, rerolling the scraps once if needed. Cut the remaining scraps into 1/4-inch-wide strips 2–3 inches long. If a round cracks as you handle it, press the dough gently back together before filling rather than stretching it thin.
Seal each pie before adding its bandages
Beat the egg and water in a small bowl, then brush a little egg wash around the edge of each round. Put 2 tablespoons of cooled filling on one side, fold the dough over it, and press the edges firmly with a fork. A weak seal gives the filling a path out, so press all the way around the curved edge. Arrange 3–4 pastry strips over each pie, leaving a small uncovered patch near one edge for the eyes.
Bake until golden, then attach the eyes
Brush the pies and pastry strips with the remaining egg wash and sprinkle them with coarse sugar. Bake for 18–22 minutes, until the crusts are golden brown and the filling bubbles at the edges. Let the pies cool on the baking sheet for 10 minutes. Stir the powdered sugar and milk into a thick icing, dab a little onto each candy eyeball, and press two onto the uncovered patch of each pie.
Simple Ways to Change These Mummy Apple Pies
Make the pies gluten-free
Use rolled refrigerated gluten-free pie crust and replace the all-purpose flour in the filling with a gluten-free 1:1 flour blend. The dough may be more delicate to handle, but the apple filling and mummy-style assembly stay the same.
Choose a tarter apple filling
Use firm tart apples instead of sweeter ones for a brighter, less candy-sweet center. They keep the filling’s apple flavor more pronounced alongside the cinnamon and coarse-sugar topping.
Skip the coarse-sugar finish
Leave off the coarse sugar if you prefer a less-sweet top. The egg wash will still help the pastry brown, but you’ll lose the extra crunch and sparkle.
Storage and Reheating
- Refrigerator: Store cooled pies in an airtight container for 3–4 days; the crust will soften a little as it sits.
- Freezer: Freeze baked pies without the candy eyes, wrapped well, for up to 2 months. Thaw in the refrigerator, then add the icing and eyes after reheating.
- Reheating: Warm in a 300°F oven for about 8–10 minutes. The microwave is quicker, but it softens the crust instead of bringing back its crisp edges.
Questions That Come Up While Making Mummy Hand Pies
Halloween Mummy Apple Hand Pies with Pie Crust Bandages
Ingredients
Equipment
Method
- Melt the butter in a 10-inch skillet over medium heat.
- Stir in the apples, granulated sugar, flour, lemon juice, cinnamon, and salt.
- Cook for 6–8 minutes, stirring often, until the apples begin to soften and the juices thicken.
- Transfer the filling to a shallow bowl and let it cool completely, about 20–30 minutes.
- Heat the oven to 400°F.
- Line an 18x13-inch rimmed baking sheet with parchment paper.
- Let the pie crusts stand at room temperature for 15 minutes.
- Unroll the pie crusts and cut eight 3 1/2-inch rounds, rerolling scraps once as needed.
- Cut the remaining scraps into 1/4-inch-wide strips 2–3 inches long.
- Beat the egg and water in a small bowl.
- Brush a little egg wash around the edge of each round.
- Place 2 tablespoons filling on one side of each round, fold the dough over the filling, and press the edges firmly with a fork to seal.
- Arrange 3–4 pastry strips over each pie like bandages, leaving a small uncovered patch near one edge for the eyes.
- Brush the pies and strips with the remaining egg wash and sprinkle with coarse sugar.
- Bake for 18–22 minutes, until the crusts are golden brown and the filling bubbles at the edges.
- Let the pies cool on the baking sheet for 10 minutes.
- Stir the powdered sugar and milk into a thick icing.
- Dab a little icing onto each candy eyeball and press two onto the uncovered patch of each pie.
