

Homemade Garlic Herb Butter Yeast Rolls
The yeast starts to foam in the warm milk, and that little change tells me the rolls are off to a good start. I used to focus on the clock…
Tip: save now, read later.
The yeast starts to foam in the warm milk, and that little change tells me the rolls are off to a good start. I used to focus on the clock and worry when the dough needed a little longer; now I watch how it looks instead. These homemade garlic herb butter yeast rolls rise until doubled, then get another rest after shaping so they bake up tender rather than tight.
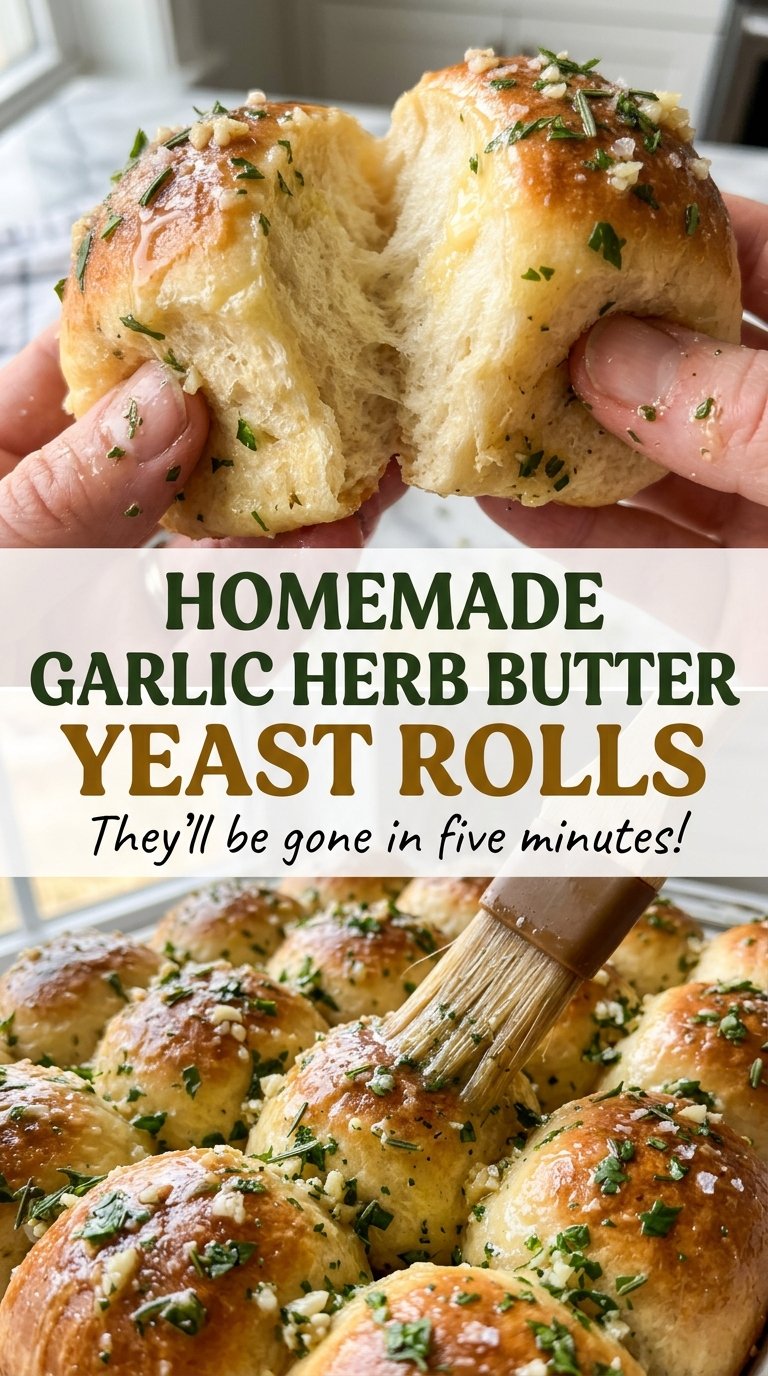
The dough is soft and buttery, but it’s the finish that makes these hard to leave alone: melted butter with fresh garlic and parsley brushed over the tops while they’re still hot. I keep the garlic over low heat just until fragrant, never browned, so it stays mellow instead of bitter. Pull one apart and you’ll find a fluffy center with a savory, buttery top.

Kitchen Note
Set the butter aside in two portions before you start: four tablespoons need to be softened for the dough, while the remaining three are for the topping. Keeping them separate saves a last-minute scramble when the rolls come out of the oven.
Save these homemade garlic herb butter yeast rolls for a dinner that needs warm, fluffy bread with a buttery garlic finish.
Why These Rolls Need Two Rises, Not One Long One
Yeast dough changes as it rests, and the two rises each have a different job. The first gives the dough time to expand before it’s handled. Shaping it into individual balls presses out some of that gas, so a second rise gives the rolls a chance to puff again in the baking dish. Skipping that rest can leave you with rolls that feel dense, even if the dough looked lively earlier.
Use the dough itself as your guide instead of treating the rise times as a deadline. A warm, draft-free spot helps it move along; a cool kitchen can slow things down. For the first rise, look for dough that has doubled. After shaping, look for rounded, puffy rolls nestled together in the dish. That second visual check matters because the rolls go into the oven as individual portions, not as one large dough mass. Giving them room to expand before baking is what helps create that soft, pull-apart texture.
What the Butter, Garlic, and Herbs Bring to These Rolls
- Whole milk — It gives the dough richness and helps keep the baked rolls tender. If whole milk isn’t available, 2% milk works in the same volume, though the crumb will be a little less rich.
- Active dry yeast — Fresh yeast matters more than a particular brand. The warm-milk foam gives you an early visual check that the yeast is active before you mix in the rest of the dough.
- All-purpose flour — It gives these rolls a soft, familiar dinner-roll texture. Bread flour can be used in the same volume, but the rolls will have a chewier bite; all-purpose flour is the better choice if you want a tender crumb.
- Unsalted butter — Butter enriches the dough and carries the garlic and parsley across the tops. Unsalted butter also lets the salt in the dough and topping stay in balance.
- Fresh garlic — Finely minced cloves give the topping a round, savory flavor. Fresh garlic is worth using here; powdered garlic won’t have the same mellow aroma after a brief cook in butter.
- Fresh parsley — Chopped parsley adds a clean, green note against the garlic butter. Dried parsley can stand in at about one-third the amount, but the topping won’t taste as fresh.
From Foamy Yeast to Buttery, Golden Tops
Wake Up the Yeast
Warm the milk in a microwave-safe measuring cup in 15-second bursts until it reaches 105–110°F. Whisk the yeast and sugar into the milk in a large mixing bowl, then leave it for 5–10 minutes. The surface should look foamy, not flat. If it hasn’t foamed, give it a little more time before adding the egg and butter.
Knead Until Smooth, Then Let the Dough Rise
Whisk the egg and softened butter into the yeast mixture, then stir in the flour and 3/4 teaspoon salt until a shaggy dough forms. Knead on a clean countertop for 8–10 minutes, until the dough feels smooth and elastic instead of rough and ragged. Coat the bowl with cooking spray, return the dough, cover it, and let it rise in a warm, draft-free spot for 60–90 minutes, until doubled. If it hasn’t doubled yet, let it keep rising rather than moving on by the clock.
Shape, Proof, and Bake the Rolls
Heat the oven to 375°F and coat a 9×13-inch baking dish with cooking spray. Divide the dough into 12 equal pieces, shape each piece into a ball, and arrange them in the dish. Cover and let the rolls rise for 30–45 minutes, until puffy; the dough should look noticeably softer and fuller. Bake for 18–22 minutes, until the tops are golden brown.
Cook the Garlic Gently and Finish While Hot
While the rolls bake, melt the remaining butter in a small saucepan over low heat. Add the garlic and cook for 30–60 seconds, stopping when it smells fragrant and before it takes on color. Take the pan off the heat, then stir in the parsley and remaining salt. Brush the mixture over the rolls as soon as they come out of the oven, then let them rest in the pan for 5 minutes before serving.
Easy Ways to Adapt the Garlic Herb Rolls
Make the rolls dairy-free
Use unsweetened oat milk in place of the whole milk and dairy-free butter in place of the butter, keeping the same amounts. The dough will still rise and bake into rolls, though the flavor will be a little less buttery and rich.
Keep the parsley, skip the garlic
Leave the minced garlic out of the topping and stir the parsley and salt into the melted butter instead. You’ll still get a buttery herb finish, but without the sharper, savory garlic note.
Serve the garlic butter on the side
Make the garlic herb butter as usual, but transfer it to a small serving dish instead of brushing it over the rolls. This keeps the tops less buttery and lets everyone add as much topping as they like.
Storage and Reheating
- Refrigerator: Keep the rolls in an airtight container for up to 3 days. The cold will make the crumb firmer and less soft.
- Freezer: Freeze fully cooled rolls in an airtight freezer bag for up to 2 months. Thaw at room temperature before warming.
- Reheating: Warm them briefly in a low oven or microwave until just warm. Long or high-heat reheating dries out the bread, so stop as soon as the centers are warm.
Questions That Come Up When Baking These Rolls
Homemade Garlic Herb Butter Yeast Rolls
Ingredients
Equipment
Method
- Warm the milk in a microwave-safe measuring cup in 15-second bursts until it reaches 105–110°F.
- Whisk the yeast and sugar into the warm milk in a large mixing bowl.
- Let the mixture stand for 5–10 minutes, until foamy.
- Whisk in the egg and 4 tablespoons softened butter.
- Stir in the flour and 3/4 teaspoon salt until a shaggy dough forms.
- Knead the dough on a clean countertop for 8–10 minutes, until smooth and elastic.
- Coat the bowl with cooking spray and return the dough to it.
- Cover the dough and let it rise in a warm, draft-free spot for 60–90 minutes, until doubled.
- Preheat the oven to 375°F.
- Coat a 9x13-inch baking dish with cooking spray.
- Divide the dough into 12 equal pieces.
- Shape each piece into a ball.
- Arrange the dough balls in the prepared dish.
- Cover the rolls and let them rise for 30–45 minutes, until puffy.
- Bake for 18–22 minutes, until the tops are golden brown.
- While the rolls bake, melt the remaining 3 tablespoons butter in a small saucepan over low heat.
- Add the garlic and cook for 30–60 seconds, until fragrant but not browned.
- Remove the saucepan from the heat.
- Stir in the parsley and remaining 1/4 teaspoon salt.
- Brush the garlic herb butter over the hot rolls as soon as they come out of the oven.
- Let the rolls rest in the pan for 5 minutes before serving.
