Patriotic Sugar Cookies
Patriotic sugar cookies earn their place on the table because they stay soft in the middle, hold a clean shape, and give you that bakery-style decorated look without turning finicky.…
Tip: save now, read later.
Patriotic sugar cookies earn their place on the table because they stay soft in the middle, hold a clean shape, and give you that bakery-style decorated look without turning finicky. The cookie itself is sturdy enough for stars, rounds, and flag shapes, but it still bakes up with tender centers and crisp edges. That balance matters, because the best decorated sugar cookies aren’t dry. They’re the kind that disappear fast even before the icing sets.
The dough comes together with the usual sugar cookie basics, but the method makes all the difference. Softened butter gets beaten with the sugar until it looks pale and fluffy, which gives the cookies lift and that light bite. A short chill keeps the cutouts sharp, and the bake time stops when the centers still look a little underdone. That’s what keeps them chewy after cooling. The royal icing is built thick enough to pipe clean outlines, then loosened just enough to flood without running off the edges.
Below you’ll find the exact baking cues I use, plus the best way to get smooth icing that dries hard enough for stacking. If you want cookies that look polished on the tray and still taste like a real homemade treat, this is the version to keep.
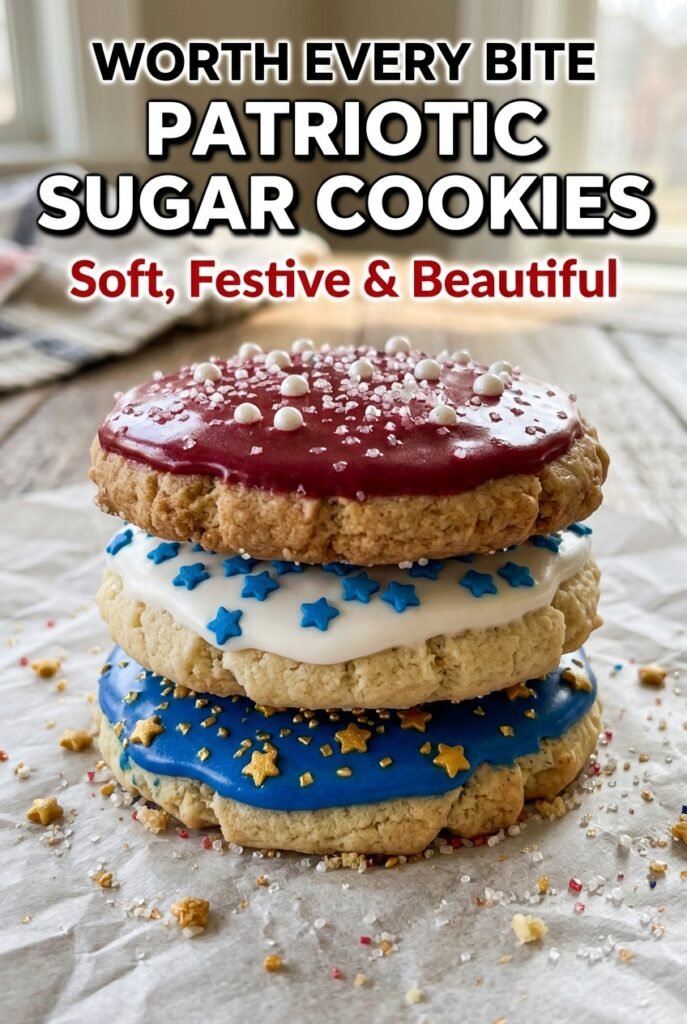
The cookies held their star shape perfectly, and the icing dried smooth enough that I could stack them for the party without smudging. My kids kept grabbing the ones with the pearl sprinkles first.
Save these red, white, and blue sugar cookies for the next time you want sharp cutouts, soft centers, and icing that dries clean for decorating.
The Chill Time That Keeps Sugar Cookie Cutouts from Spreading
The biggest reason cutout sugar cookies lose their shape is warm dough. Once the butter softens too much, the cookies spread before the structure has time to set, and those clean stars turn into rounded blobs. A solid chill gives the flour time to hydrate and firms the butter back up, which is what keeps the edges crisp and the shapes readable after baking.
If the dough cracks when you roll it out, it has been chilled too long or it needs a few minutes on the counter. If it feels sticky, it has gone the other direction and needs more time in the fridge. Roll it between lightly floured surfaces and work quickly. The less the dough warms up in your hands, the better the cookies hold their lines.
What Each Ingredient Is Doing in the Cookie and Icing

- All-purpose flour — This gives the cookies their structure and keeps them sturdy enough for cutouts. Weighing the flour is the cleanest way to avoid dry dough, but if you measure by cups, spoon it in and level it off so you don’t pack in too much.
- Butter — Softened unsalted butter is what makes the cookies taste rich and bake with a tender center. Salted butter works in a pinch, but skip the added salt or the dough can taste sharper than you want.
- Granulated sugar — Sugar sweetens the dough and helps create those lightly crisp edges. The long beating time with butter also traps air, which gives the cookies a little lift before they set in the oven.
- Eggs — Eggs bind the dough and add enough moisture to keep the cookies from baking up crumbly. Add them one at a time so the mixture stays smooth instead of looking curdled.
- Vanilla and almond extract — Vanilla gives the familiar sugar cookie base, while almond extract adds that classic bakery note people notice even if they can’t name it. If you leave out the almond extract, the cookies still work, but they lose a little depth.
- Meringue powder — This is what helps the royal icing dry firm and glossy. There isn’t a true substitute that behaves the same way, so this is one ingredient worth using as written if you want clean decorating and stackable cookies.
- Gel food coloring — Gel coloring gives bold red and blue tones without thinning the icing. Liquid coloring can make the icing too loose, which turns piped edges sloppy and makes the flood icing spread farther than it should.
Building the Dough, Baking the Cookies, and Flooding the Icing
Mixing the Dough Without Toughening It
Beat the butter and sugar until the mixture turns pale and fluffy, usually 3 to 4 minutes. That step matters because it gives the cookies tenderness before any flour goes in. Once you add the dry ingredients, mix only until the dough comes together. If you keep going after that, the cookies can bake up dense and a little bready instead of soft.
Rolling and Cutting Clean Shapes
Roll the chilled dough to about 1/4-inch thickness on a lightly floured surface. Thinner cookies bake faster and can get brittle, while thicker ones keep a softer bite and hold icing better. Dip the cutters in flour if the dough starts sticking. If the dough warms and drags, slide it back into the fridge for a few minutes before cutting more shapes.
Baking Until the Centers Still Look Soft
Watch the edges, not the clock alone. The cookies are done when the edges are just set and the centers still look a touch underbaked. They’ll finish setting on the hot pan as they cool, and that carryover heat is what keeps them chewy. If they go fully golden in the oven, they’ll end up dry once they cool.
Making Royal Icing That Pipes Cleanly
Beat the powdered sugar, meringue powder, and water until the icing turns thick, glossy, and able to hold a firm line. If it’s too stiff, add water by the teaspoon. If it’s too loose, keep beating for another minute before adding more powdered sugar. The goal is a texture that outlines without slumping but still spreads smoothly when you flood the center.
Decorating Before the Icing Sets
Pipe an outline first, then flood the center and nudge the icing into place with the tip of the piping bag or a small offset spatula. Let each base layer dry for about 30 minutes before adding stripes, dots, or star details. Sprinkles and pearl decorations need to go on while the surface is still slightly tacky, or they’ll slide right off instead of settling in.
How to Adapt These Cookies for Different Crowds and Different Kitchens
Dairy-Free Version
Swap the butter for a high-quality plant-based baking stick that comes in a block, not a tub. The dough will still roll and cut well, though the flavor is a little less rich and the edges may brown a touch faster. Keep the chill time the same so the shapes stay sharp.
Gluten-Free Option
Use a 1:1 gluten-free baking flour that includes xanthan gum. The dough may feel slightly softer, so chill it well before rolling and cut the shapes a little thicker. The texture is still tender, but the cookies will be a bit more delicate when warm.
Make the Designs Simpler for a Busy Day
If you don’t want to pipe multiple colors, flood the cookies with white icing and finish with sprinkles while the surface is wet. You still get the festive look, but with less waiting between layers. This is the fastest route when you need a tray of cookies that looks polished without turning into an all-afternoon project.
Storage and Reheating
- Refrigerator: Store in an airtight container for up to 5 days. The icing stays firm, but the cookies are best in the first 2 to 3 days for the softest texture.
- Freezer: Freeze the baked, undecorated cookies for up to 2 months, or freeze fully decorated cookies in a single layer until firm and then stack with parchment between layers. Royal icing freezes better than soft buttercream, but avoid sealing them while they still feel damp.
- Reheating: No reheating needed. Let frozen cookies thaw at room temperature in the container so condensation forms on the outside of the box instead of on the icing. If you warm them, the decorations can dull and the icing may soften.
Questions I Get Asked About This Recipe

Patriotic Sugar Cookies
Ingredients
Equipment
Method
- Whisk the all-purpose flour, baking powder, baking soda, and salt in a medium bowl, then set aside.
- In a large bowl, beat the softened unsalted butter and granulated sugar on medium-high speed for 3–4 minutes until light and fluffy.
- Add the eggs one at a time, beating well after each addition, then mix in the pure vanilla extract and almond extract.
- Reduce speed to low and gradually mix in the flour mixture until a soft dough forms, stopping as soon as the dry flour disappears.
- Divide the dough into two discs, wrap in plastic wrap, and refrigerate for at least 1 hour (or overnight).
- Preheat the oven to 350°F (175°C) and line baking sheets with parchment paper.
- Roll the dough on a lightly floured surface to 1/4-inch thickness, then cut into stars, rounds, and flag shapes.
- Place cookies 2 inches apart on the baking sheets.
- Bake for 9–11 minutes, until the edges are just set and the centers look barely done with a slight softness.
- Cool on the baking sheet for 5 minutes, then transfer to a wire rack to cool completely before decorating.
- Beat the powdered sugar, meringue powder, and 6 tbsp warm water on medium-high speed for 4–5 minutes until stiff and glossy.
- Add the last tbsp of warm water if needed to reach a thick but pipeable consistency.
- Divide the icing into three bowls and tint one bowl red gel food coloring and another blue gel food coloring, keeping one bowl white.
- Transfer the icings to piping bags or squeeze bottles for outlining and flooding.
- Outline and flood the cookies with the red and blue icings, leaving the remaining sections white if desired.
- Let the base coat dry for 30 minutes before adding detail layers.
- Add red, white, and blue sprinkles, star-shaped sugar sprinkles, and white pearl sprinkles while the icing is still slightly tacky.
- Let cookies dry fully for at least 2 hours before stacking so the icing sets hard.