
Red White and Blue Deviled Eggs
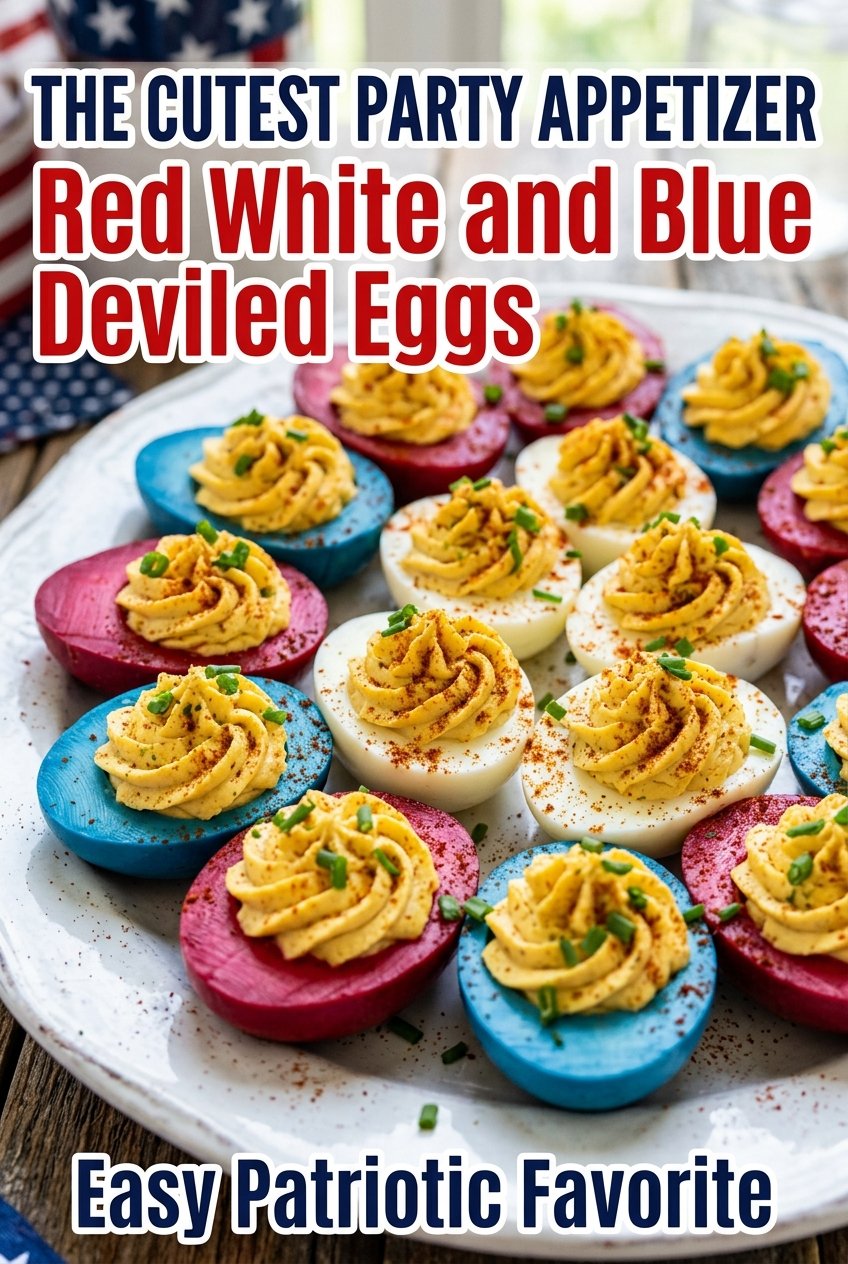
Red white and blue deviled eggs turn a familiar party platter into something people notice before they even take a bite. The filling stays classic and creamy, but the egg…
Tip: save now, read later.
Red white and blue deviled eggs turn a familiar party platter into something people notice before they even take a bite. The filling stays classic and creamy, but the egg whites get a bright patriotic finish that makes the whole tray feel festive without turning the flavor into a gimmick. They’re the kind of appetizer that disappears fast because the look gets people curious, and the taste keeps them coming back.
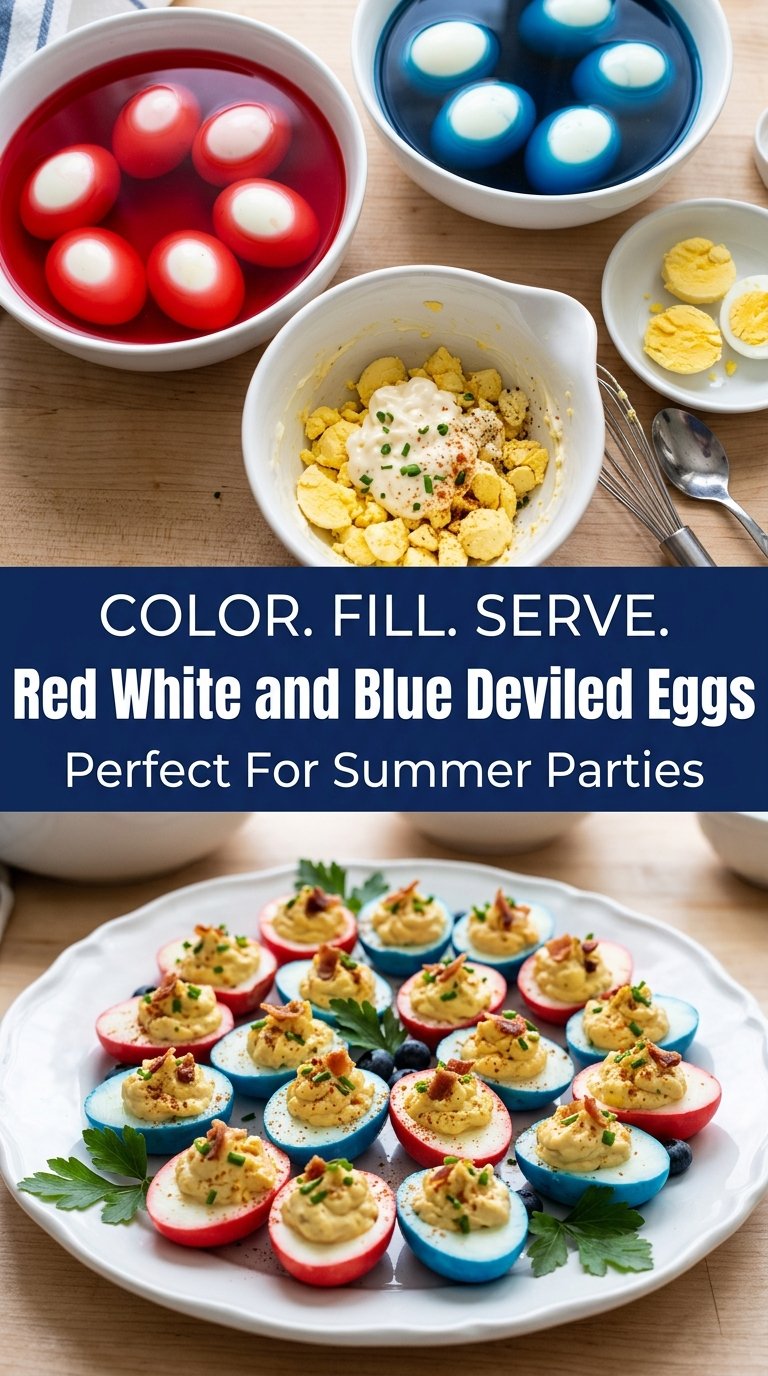
The key is treating the color bath like a quick dye step, not a long soak. A little vinegar in the water helps the color cling to the whites, and patting the eggs dry after they come out keeps the filling from sliding around later. The yolk mixture stays simple on purpose: mayonnaise for richness, mustard for sharpness, and just enough vinegar to keep the filling from tasting flat.
Below, I’ll walk you through the part that matters most: how to get clean color on the egg whites without wrecking the texture, plus the small piping and chilling details that help the eggs hold up on a buffet table.
The red and blue egg whites colored up evenly in just about 10 minutes, and the filling piped in neatly after I dried them well. I made them for a cookout and people kept asking how I got the colors so bright without the eggs tasting weird.
Patriotic red white and blue deviled eggs for the Fourth of July table, with creamy filling and bright colored whites.
The Secret to Bright Colored Egg Whites Without Rubbery Edges
Egg whites pick up color fast, and that’s good news here. The mistake is letting them sit in the dye bath too long, which can make the surface feel a little bouncy and leave the color deeper than you want. Ten to fifteen minutes is enough for a strong festive look once the eggs are peeled and split.
Another detail that matters: the eggs need to be fully dry before you fill them. Water left on the surface thins the filling and makes the paprika streak instead of sit neatly on top. If you want clean halves with the best contrast, keep the colored whites moving from bath to towel to filling station without delay.
What Each Ingredient Is Actually Doing in This Dish
- Eggs — The fresher the eggs, the harder they can be to peel, so eggs that have sat in the fridge for a few days usually give cleaner results. That matters here because torn whites don’t take color as evenly and look rough once you cut them.
- Mayonnaise — This is what gives the filling its smooth, pipeable body. A full-fat mayo works best because it stays stable and gives the yolks a richer texture; lighter versions tend to loosen the filling.
- Yellow mustard — This adds the familiar deviled egg bite and keeps the filling from tasting heavy. Dijon can work if that’s what you have, but the flavor will be sharper and a little less classic.
- White vinegar — A small amount in the filling wakes up the yolks, and the vinegar in the color bath helps the dye cling to the egg whites. Don’t skip it in the bath if you want the red and blue to show quickly and evenly.
- Food coloring — Liquid coloring does the job, but gel coloring gives deeper color with less liquid in the bath. If you use gel, start with a tiny amount and build up until the water looks vivid.
- Chives and paprika — These are the finishing touches that make the platter look intentional. Paprika adds color and a little warmth; chives give a fresh, oniony bite that cuts through the richness.
Building the Filling and Coloring the Whites in the Right Order
Cooking and Chilling the Eggs
Start the eggs in cold water, bring them to a boil, then pull the pan off the heat and cover it for 12 minutes. That method gives you cooked yolks without the dry, chalky ring that happens when eggs boil hard the whole time. Move them straight into an ice bath so they stop cooking and peel more cleanly once they’re cool.
Splitting the Whites Into Three Clean Groups
Peel the eggs, cut them in half lengthwise, and pop the yolks into a bowl. Separate the whites into three groups so one stays plain, one gets red, and one gets blue. If the whites are torn or dented, they’ll still taste fine, but the color looks best when the cut edges stay neat.
Coloring Without Overdoing the Soak
Stir a few drops of red or blue food coloring into water with a little vinegar, then submerge the whites for 10 to 15 minutes. The goal is a bright outer color, not a dyed-through egg, so don’t leave them in long enough to get mushy. Pull them out once the shade looks even, then blot them dry on paper towels until the surface feels dry to the touch.
Mashing and Filling the Yolks
Mash the yolks with mayonnaise, mustard, vinegar, salt, and pepper until the mixture is smooth and creamy. If the filling looks grainy, it needs a little more mixing before it goes into the piping bag. Pipe or spoon it into the centers of the egg whites, then finish with paprika and chopped chives.
How to Adjust These for a Different Crowd or a Different Pantry
Dairy-Free and Naturally Gluten-Free
This recipe already works for gluten-free eaters as written, which makes it an easy party platter. For dairy-free needs, nothing has to change because the filling relies on mayonnaise instead of cream or cheese. Check the mustard and food coloring label if you’re serving someone with a strict allergy.
Using Gel Food Coloring for Deeper Color
Gel coloring gives a stronger red and blue without watering down the bath. That means the whites color faster and more evenly, which helps if you’re making a big batch for a crowd. Start with less than you think you need, since it’s easy to go darker than the rest of the platter.
Making Them a Day Ahead
You can hard-boil and peel the eggs a day in advance, then store the whites and yolks separately. Assemble them closer to serving time so the colored whites stay bright and the filling keeps its smooth texture. Once filled, they hold better chilled than at room temperature.
Storage and Reheating
- Refrigerator: Store covered for up to 2 days. The whites stay fine, but the garnish can soften, so add chives right before serving if you want them bright.
- Freezer: Don’t freeze deviled eggs. The whites turn watery and rubbery once thawed, and the filling separates.
- Reheating: These are meant to be served cold. If they’ve been chilled hard, let them sit at room temperature for 10 to 15 minutes before serving so the filling tastes creamier and the paprika aroma comes through.
Answers to the Questions Worth Asking
Red White and Blue Deviled Eggs
Ingredients
Equipment
Method
- Place the eggs in a saucepan and cover with water, ensuring the eggs are fully submerged. Bring to a boil over medium-high heat.
- Remove the saucepan from heat, cover, and let the eggs sit for 12 minutes. The whites should fully set while the yolks remain firm.
- Transfer the eggs to an ice bath immediately and cool until fully chilled, about 5 minutes. A steady chill helps the eggs peel cleanly.
- Peel the eggs and slice them in half lengthwise, keeping the halves intact. Set the whites cut-side up so they can be dyed and filled later.
- Remove the yolks and place them in a bowl. Keep the egg white halves separate and ready for color.
- Divide the egg white halves into three groups and leave one group white. This creates the red, white, and blue layers when assembled.
- Soak one group of egg whites in red-colored water and soak another group in blue-colored water. Let the colored egg whites sit for 10–15 minutes until the dye looks vibrant.
- Soak the remaining egg whites in their color bath until evenly tinted, then pat all egg whites dry thoroughly. Completely dry surfaces prevent diluted filling and watery spots.
- Mash the yolks with mayonnaise, yellow mustard, white vinegar, salt, and black pepper until smooth. The filling should be creamy with no yolk lumps.
- Pipe the yolk filling into the egg whites. Fill each half generously and level off the tops for a clean look.
- Garnish the deviled eggs with paprika and fresh chives, finely chopped. A light dusting of paprika gives the patriotic contrast.
- Chill the deviled eggs before serving. Keep them refrigerated until ready so the filling firms up and the whites stay crisp.