Tender Beef Tips and Gravy
Tender beef tips and gravy hit that sweet spot between weeknight practical and Sunday dinner comfort. The beef turns soft enough to cut with a fork, and the gravy settles…
Tip: save now, read later.
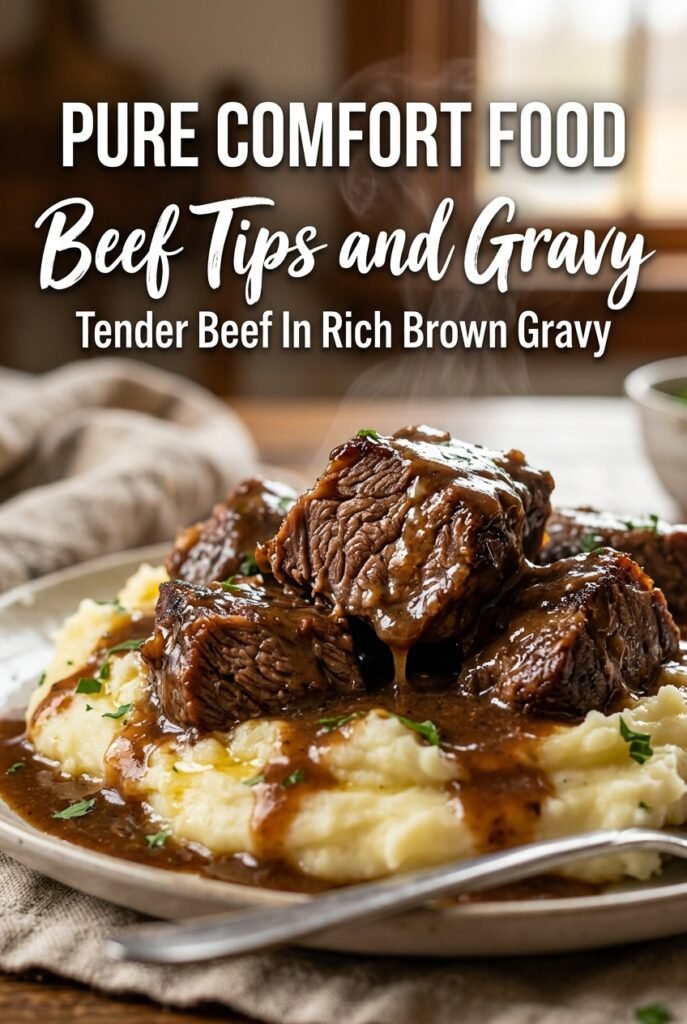
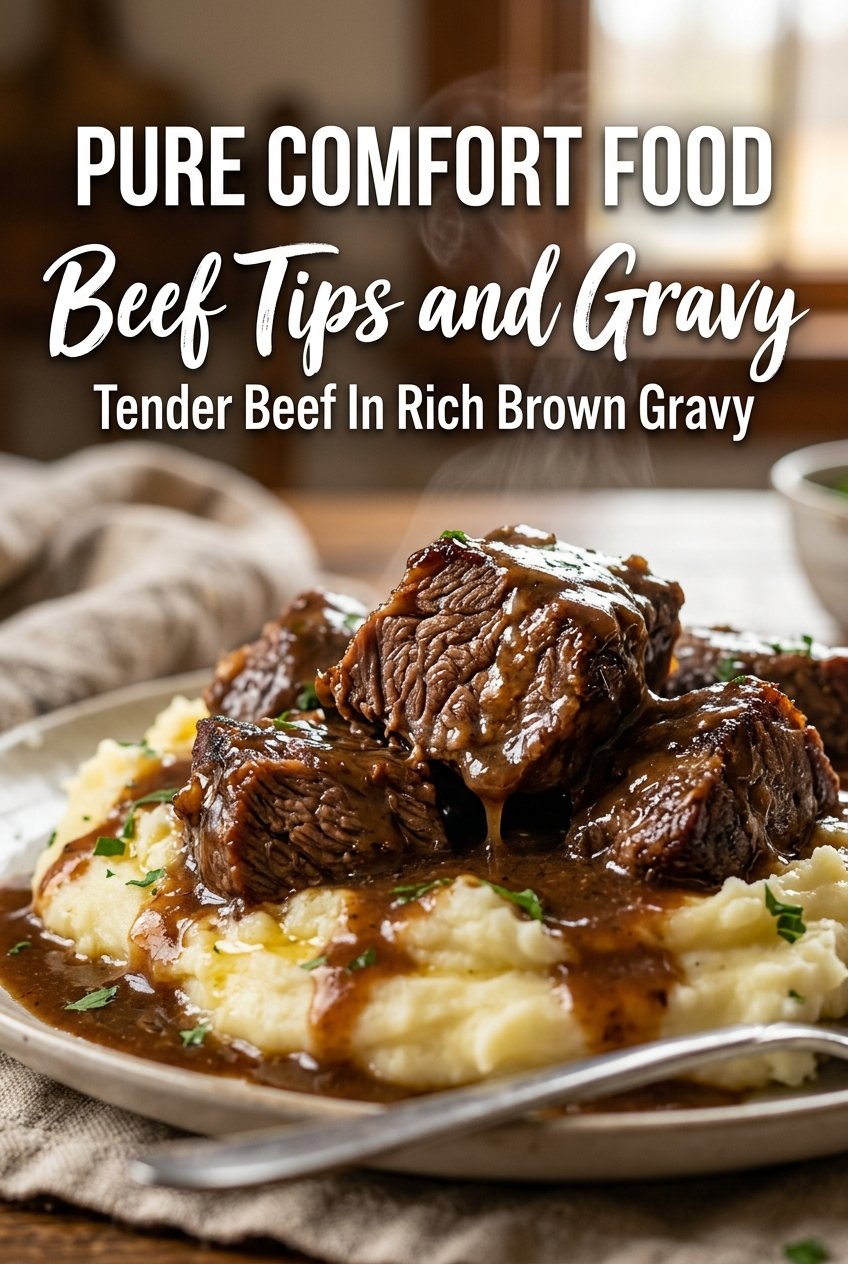
Tender beef tips and gravy hit that sweet spot between weeknight practical and Sunday dinner comfort. The beef turns soft enough to cut with a fork, and the gravy settles into a deep, savory coating that clings to mashed potatoes, rice, or egg noodles instead of running off the plate. This version keeps the flavor grounded and old-school, with enough body in the sauce to feel rich without turning gluey.
The key is giving the beef time. A quick simmer won’t break down stew meat into that spoon-tender texture people want here, and rushing the gravy thickening too early can leave you with a sauce that tastes flat or tight. Browning the meat first builds the base, and the Worcestershire, onion, garlic, and thyme do the heavy lifting once the pot starts simmering. The cornstarch slurry goes in at the end, after the beef is already tender, so the gravy thickens cleanly instead of reducing into something pasty.
Below you’ll find the timing that matters, the ingredient swap that still works when you don’t have sirloin tips, and a few practical ways to serve this so it feels complete without extra fuss.
The beef got meltingly tender and the gravy thickened up exactly right after the slurry went in. I served it over egg noodles and my husband went back for seconds before I even sat down.
Save these tender beef tips and gravy for the kind of dinner that needs slow simmering, a rich brown gravy, and almost no extra effort at the table.
The Difference Between Tender Beef and Tough, Chewy Tips
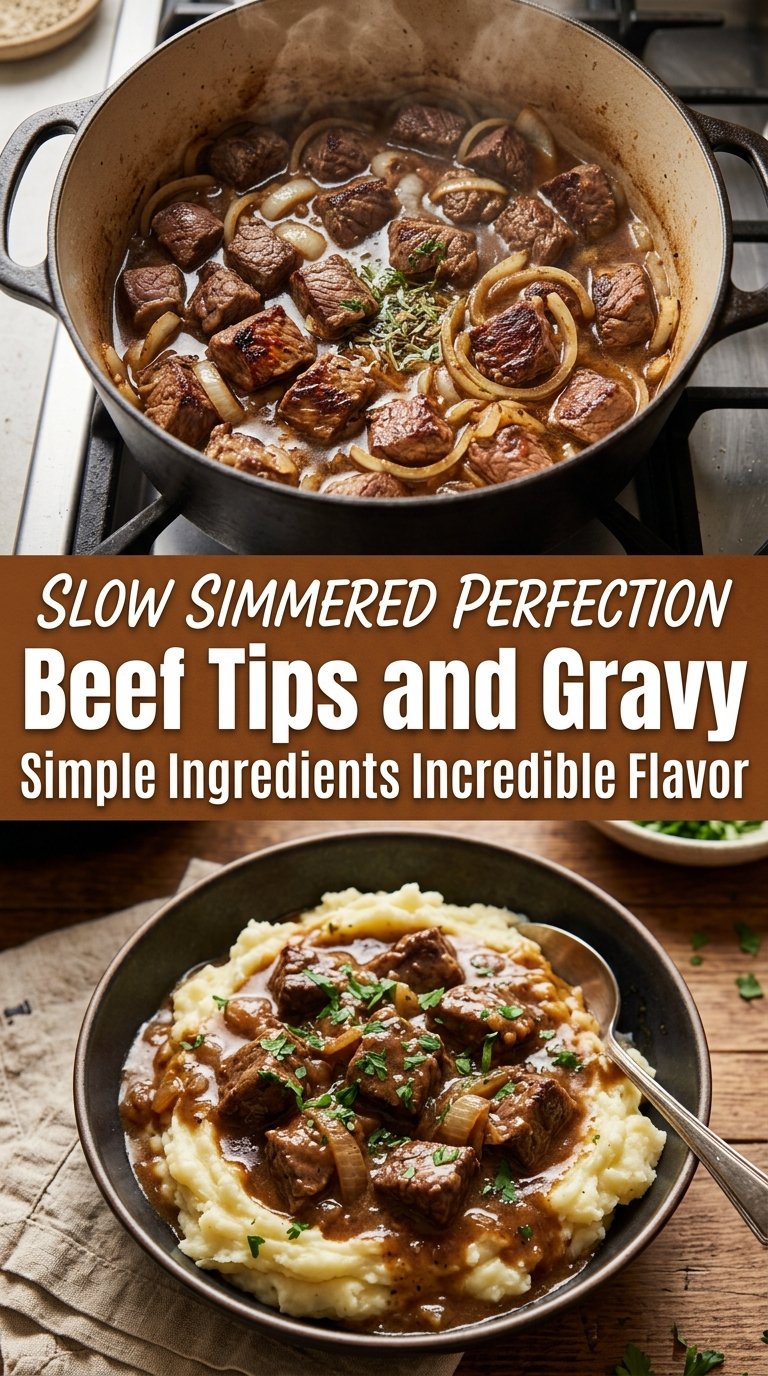
Beef tips go wrong when the heat is too high for too long or when the simmer is aggressive enough to tighten the meat before it has time to relax. You want a gentle burble, not a rolling boil. That slower heat turns stew meat from chewy into spoon-tender without shredding it into strings.
The browning step matters more than people think. If you crowd the pan, the beef steams and leaves you with gray meat instead of a deep savory base for the gravy. Work in batches if needed, then let the onions soften in the fond left behind. Those browned bits are what give the gravy its backbone.
- Don’t rush the simmer — the connective tissue in stew meat needs time to break down. When the beef is ready, it will give easily when pressed with a spoon.
- Keep the boil low — high heat tightens the meat and can make the gravy taste harsh before the flavors have blended.
- Brown in batches — a crowded pot gives you pale beef and a thinner-tasting sauce.
What Each Ingredient Is Actually Doing in This Dish
- Beef stew meat or sirloin tips — stew meat gives you the most reliable fall-apart texture after a long simmer. Sirloin tips cook a little faster and stay a touch meatier, so check them near the early side of the time range.
- Worcestershire sauce — this adds the deep savory note that makes the gravy taste like it simmered all afternoon. There isn’t a perfect substitute, but a splash of soy sauce plus a little extra broth gets you close in a pinch.
- Brown gravy mix — it helps build body and a darker, more rounded gravy quickly. If you want to skip it, use extra beef broth and add a little more cornstarch at the end, but the sauce will taste lighter and less concentrated.
- Cornstarch slurry — this thickens the gravy at the end without making the beef cook down any further. Mix it with cold water only, or you’ll get lumps that never fully dissolve.
- Onion and garlic — these don’t just season the dish; they sweeten the gravy as they soften. Mince the garlic finely so it disappears into the sauce instead of burning in the pot.
Building the Gravy Around the Beef, Not the Other Way Around
Searing the Beef First
Heat the oil until it shimmers, then brown the beef in a single layer. You’re looking for dark edges and a little crust, not full cooking through. If the pieces release moisture and start to gray, the pan is too crowded. Pull them out once they’ve picked up color on several sides and leave the fond behind in the pot.
Softening the Onion and Garlic
Add the diced onion to the same pot and cook until it turns translucent and starts to pick up color from the bottom. Stir in the garlic for just 30 seconds. If you let the garlic go longer, it can turn bitter and get lost under the beef broth later.
Simmering Until the Beef Gives Up
Return the beef to the pot and add the broth, Worcestershire, gravy mix, and seasonings. Bring it just to a simmer, then lower the heat and cover it. The liquid should move lazily around the edges of the pot. If it boils hard, the beef tightens before it softens, and the gravy can taste overreduced before the meat is ready.
Thickening at the End
Stir in the cornstarch slurry only after the beef is tender. Let it simmer for a few minutes until the gravy turns glossy and coats the back of a spoon. If it still looks loose, give it another minute or two. Cornstarch thickens as it heats, so it needs that final simmer to do its job.
Three Ways to Make This Recipe Your Own
Gluten-Free Version
Use a gluten-free brown gravy mix or skip it and build the sauce from broth and cornstarch alone. The flavor stays savory, but the gravy will be a little lighter and less dark unless you add an extra splash of Worcestershire or tamari.
Slow Cooker Method
Brown the beef, onions, and garlic first, then transfer everything except the cornstarch slurry to the slow cooker. Cook on low until the beef is tender, then thicken the gravy at the end on the stove or right in the cooker if it runs hot enough. Skipping the browning step makes the whole dish taste flatter.
Make It Creamier
Stir in a splash of heavy cream or a pat of butter after the gravy thickens for a softer, richer finish. Add it off the heat or over very low heat so the sauce stays smooth. This changes the dish from classic brown gravy to something silkier and a little more indulgent.
Storage and Reheating
- Refrigerator: Store in an airtight container for up to 4 days. The gravy thickens as it chills, so it will look a little tighter the next day.
- Freezer: It freezes well for up to 3 months. Cool completely, portion it into freezer-safe containers, and thaw overnight in the fridge before reheating.
- Reheating: Warm gently on the stove over low heat with a splash of broth to loosen the gravy. A hard boil can make the beef tough again and can push the sauce toward a gritty texture.
Answers to the Questions Worth Asking
Tender Beef Tips and Gravy
Ingredients
Equipment
Method
- Heat the olive oil in a large Dutch oven over medium-high heat until shimmering. (Visual cue: oil moves easily and coats the pot surface.)
- Brown the beef tips on all sides in the Dutch oven. (Visual cue: deep-brown edges form.)
- Remove the beef tips and set them aside. (Visual cue: pot bottom will have browned bits.)
- Add the onion and cook until softened. (Visual cue: onion turns translucent and smells sweet.)
- Stir in the garlic and cook for 30 seconds. (Visual cue: garlic is fragrant but not browned.)
- Return the beef tips to the pot. (Visual cue: beef is sitting on top of the onion mixture.)
- Add the beef broth, Worcestershire sauce, brown gravy mix, onion powder, garlic powder, dried thyme, salt, and black pepper to the pot. (Visual cue: gravy starts as a thick brown mixture.)
- Bring the mixture to a simmer over medium-high heat. (Visual cue: steady bubbles appear around the edges.)
- Cover and cook on low heat for 1½ to 2 hours until tender. (Visual cue: beef pulls apart easily with a fork.)
- Mix the cornstarch and cold water to make a slurry. (Visual cue: no dry cornstarch lumps remain.)
- Stir the slurry into the gravy. (Visual cue: gravy begins to thicken immediately.)
- Simmer for 5 minutes until thickened. (Visual cue: sauce coats the back of a spoon.)
- Garnish with fresh parsley for garnish. (Visual cue: bright green flecks on top.)
- Serve the beef tips and gravy over mashed potatoes, rice, or buttered noodles. (Visual cue: gravy is pooled over the base.)