
American Flag Cheesecake
American Flag Cheesecake always lands with that same quiet moment at the table: a clean slice of vanilla cheesecake, a buttery graham crust, and a bright fruit topping that looks…
Tip: save now, read later.
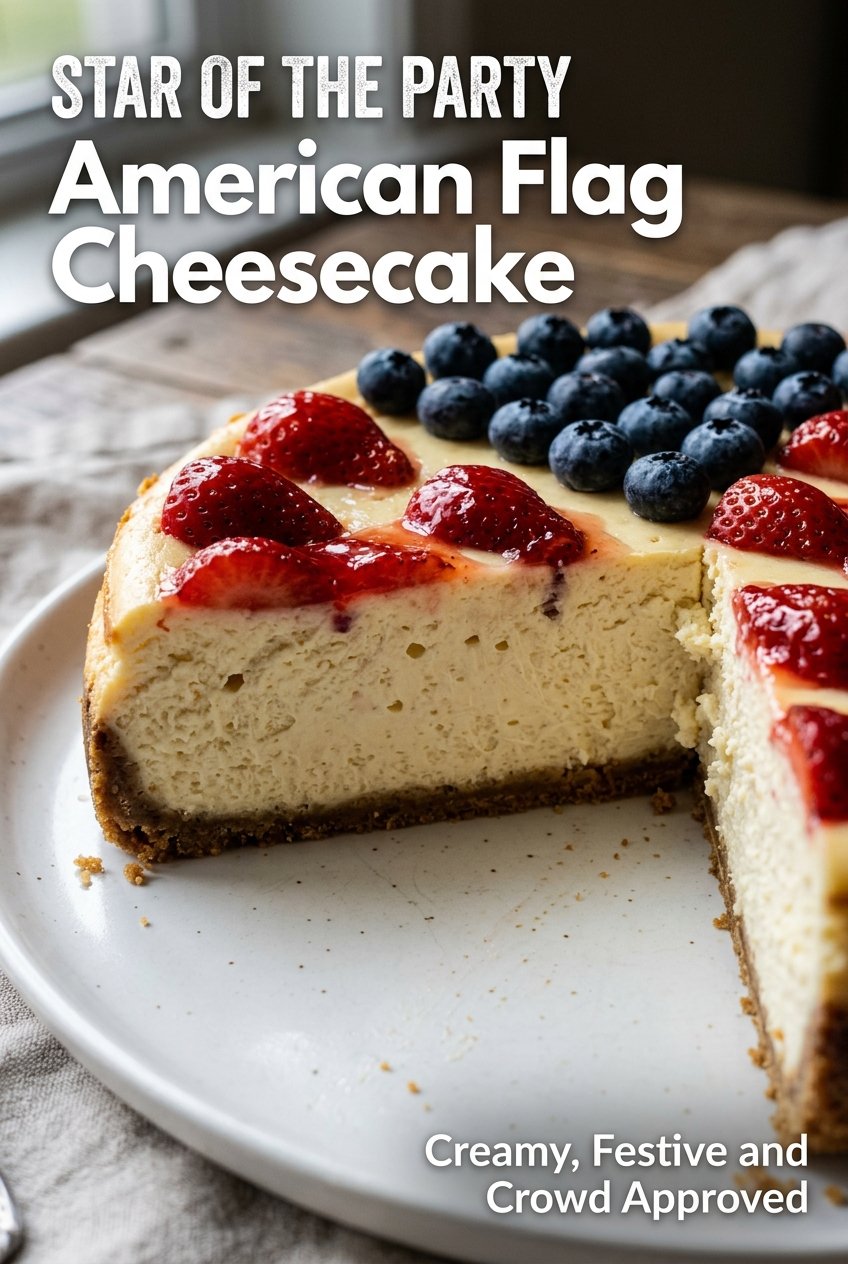
American Flag Cheesecake always lands with that same quiet moment at the table: a clean slice of vanilla cheesecake, a buttery graham crust, and a bright fruit topping that looks festive without tasting fussy. The filling stays dense and creamy, not airy or fragile, so each square-ish slice holds its shape under the berries instead of slumping into the plate.
What makes this version work is the balance. The crust gets a short bake so it tastes toasted instead of sandy, the cream cheese is beaten until smooth before the eggs go in, and the cheesecake cools slowly so the center sets without cracking. The fruit does the visual work, but the dessert underneath is the part people come back for.
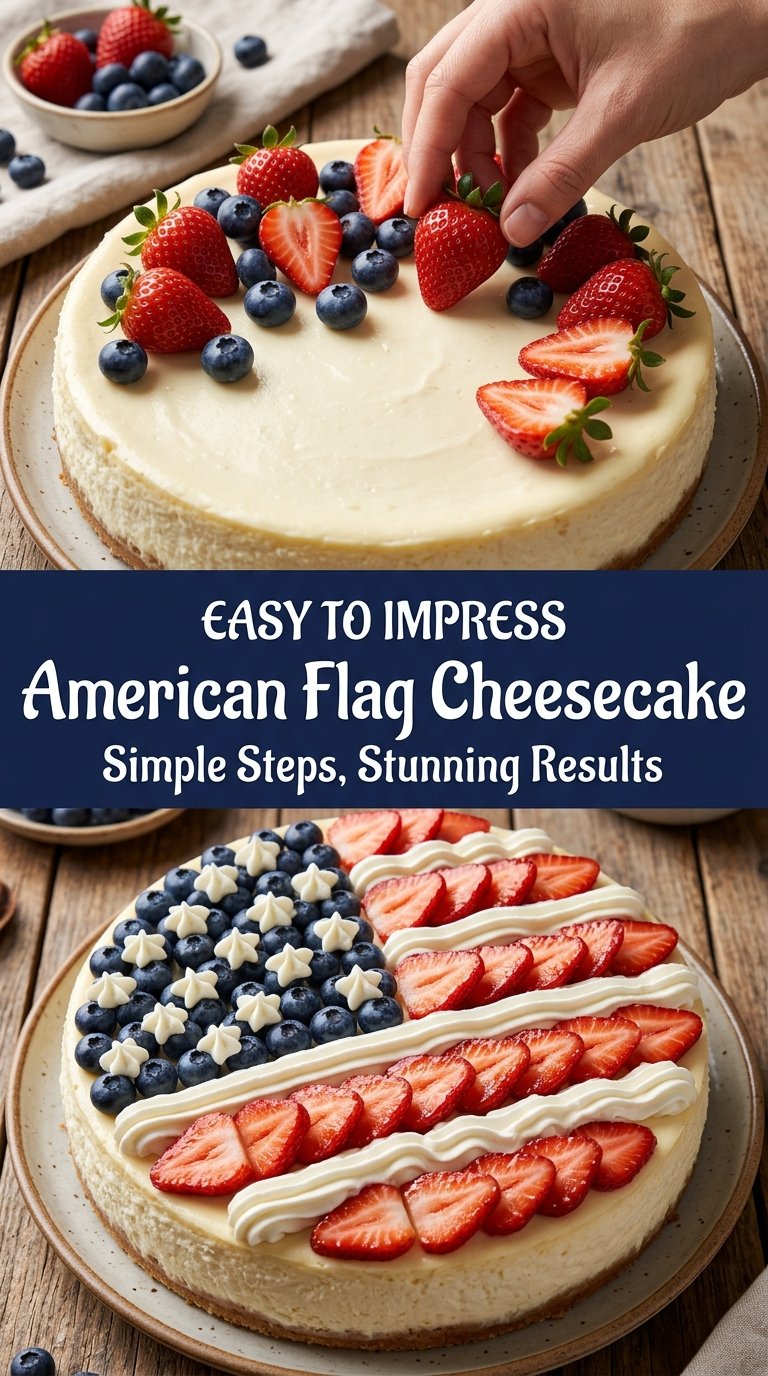
Below you’ll find the small details that keep the texture right, plus the easiest way to arrange the berries so the flag design looks sharp without turning into a project.
The cheesecake set up beautifully and the berry topping stayed neat even after chilling overnight. The crust had just enough crunch, and the apricot glaze gave the strawberries a nice shine without making them soggy.
Save this American Flag Cheesecake for the next patriotic cookout — the creamy filling, fresh berry topping, and graham cracker crust make it a showpiece that slices cleanly.
The Key to a Cheesecake That Slices Cleanly Under the Flag Topping
The biggest mistake with a decorated cheesecake is rushing the set. If the center is even a little loose when it comes out of the oven, the fruit topping will sink and the slices will smear instead of showing off those clean red and blue stripes. The cheesecake should still wobble slightly in the middle when you turn off the oven, but the edges should look set and matte.
Temperature matters just as much as baking time. Cold cream cheese leaves tiny lumps, and overbeating after the eggs go in adds air that puffs the cake and can lead to cracks later. Mix each stage until smooth, then stop. The slow cool-down in the turned-off oven keeps the surface from shocking and splitting.
What Each Ingredient Is Actually Doing in This Cheesecake
- Graham cracker crumbs — These give the crust its familiar buttery snap. You can crush the crackers yourself or buy crumbs, but you want them fine and even so the base packs tightly and doesn’t crumble when sliced.
- Unsalted butter — Butter is what turns the crumbs into a crust that holds together after chilling. Melted butter needs to coat every crumb, so stir until the mixture looks like wet sand and presses together in your hand.
- Cream cheese — This is the body of the cheesecake, so quality matters here more than anywhere else. Use full-fat blocks, softened until the center gives easily to a finger press; tub-style cream cheese is too soft and can make the filling loose.
- Sour cream — Sour cream adds tang and keeps the filling from tasting heavy. If you need a substitute, full-fat plain Greek yogurt works, but the texture will be a touch firmer and the flavor slightly sharper.
- Eggs — Eggs set the cheesecake, but they also make it fragile if you beat them too hard. Add them one at a time on low speed so the filling stays dense and smooth instead of foamy.
- Blueberries and strawberries — These aren’t just decoration; they bring freshness that cuts through the richness. Slice the strawberries evenly so the stripes look tidy and the topping sits flat.
- Apricot preserves — Optional, but helpful if you want the fruit to look glossy and stay in place. Warm it just enough to brush lightly, not enough to run, or the glaze will slide off the berries.
Building the Cheesecake Base Without Cracks or a Soggy Crust
Pressing and baking the crust
Mix the crumbs, sugar, and melted butter until every crumb looks moistened, then press the mixture firmly into the bottom of the springform pan. A flat-bottomed measuring cup helps get an even layer without loose patches. Bake it until it smells toasty and looks slightly darker at the edges; skipping this step leaves the crust sandy and weak under the filling.
Mixing the filling without whipping in air
Beat the cream cheese and sugar first until completely smooth, scraping the bowl so there are no little lumps hiding at the bottom. Add the sour cream and vanilla, then the eggs one at a time on low speed. If the batter looks fluffy, you’ve gone too fast; that trapped air expands in the oven and can cause cracks as it cools.
Baking and cooling with patience
Pour the filling over the cooled crust and bake until the edges are set but the center still has a gentle wobble. Don’t wait for the middle to look firm in the oven; it finishes setting as it cools. Turn the oven off, crack the door, and let the cheesecake sit there for an hour so the temperature drops slowly instead of shocking the surface.
Arranging the flag topping
Chill the cheesecake until it’s cold all the way through before adding fruit. Blueberries belong in the upper left corner first, because that anchors the design and gives you a visual guide for the stripes. Lay the strawberry slices in neat rows so the colors stay distinct, and brush on a thin sheen of warmed preserves only if you want a glossy finish.
How to Adapt This for a Crowd, a Shortcut, or a Different Diet
Gluten-Free Crust Swap
Use gluten-free graham-style crackers or gluten-free vanilla cookies in the crust. The texture stays the same if the crumbs are fine and the butter ratio stays unchanged, though a cookie-based crust will taste sweeter and a little more buttery.
Lighter Berry Variation
If you want a sharper fruit finish, add a few raspberries to the stripes or swap part of the strawberries for them. The color contrast looks beautiful, but raspberries are softer, so keep them on the top layer instead of piling them high.
Make-Ahead Cheesecake for Events
Bake the cheesecake a day ahead, chill it overnight, and add the fruit the morning you plan to serve it. That keeps the berries fresh and the design crisp, and it also gives the filling time to set fully for cleaner slices.
Storage and Reheating
- Refrigerator: Store covered for up to 5 days. The crust softens a little by day two, but the flavor stays excellent.
- Freezer: Freeze the cheesecake without the fruit topping for up to 2 months. Wrap it tightly, then thaw overnight in the refrigerator before decorating.
- Reheating: Don’t reheat cheesecake. Serve it cold from the fridge for the cleanest texture and the best slice; warming it makes the filling loose and the fruit topping slip.
Answers to the Questions Worth Asking
American Flag Cheesecake
Ingredients
Equipment
Method
- Preheat the oven to 325°F (163°C) and grease a 9-inch springform pan. Make sure the pan is well coated so the cheesecake releases cleanly.
- Mix graham cracker crumbs, granulated sugar, and melted unsalted butter until evenly combined. Press firmly into the bottom of the pan to form a compact layer.
- Bake the crust for 10 minutes. Remove and cool completely until firm to the touch (no steam should rise).
- Beat cream cheese and sugar until smooth. Scrape the bowl as needed so there are no lumps.
- Add sour cream and vanilla extract, then mix well until the batter is glossy and uniform. Keep mixing at low speed to avoid incorporating too much air.
- Add eggs one at a time, mixing on low speed after each addition. Stop as soon as each egg is just blended.
- Pour the filling over the cooled crust and smooth the top. Tap the pan lightly to settle the batter and pop any surface bubbles.
- Bake at 325°F (163°C) for 55–65 minutes until the center is slightly set. The edges should look set while the middle still jiggles a little.
- Turn the oven off and crack the door open, then let the cheesecake cool for 1 hour. This gradual cooling helps prevent surface cracks.
- Refrigerate the cheesecake at least 6 hours or overnight. Chill until fully firm before topping and slicing.
- Arrange blueberries in the upper left corner to create the flag stars section. Place them close together so the area reads as a solid field.
- Create red stripes using rows of sliced strawberries across the remaining surface. Overlap slightly to form even bands from side to side.
- Brush the fruit lightly with warmed apricot preserves if desired. Use a thin coat so the fruit shines without making the topping watery.
- Chill until ready to serve. Keep it cold so the design stays crisp when sliced.