

Baked Ziti with Ricotta and Mozzarella
The foil lifts and the edges are bubbling, while the middle still looks soft enough to need a few minutes on the counter. That’s the moment I look for with…
Tip: save now, read later.
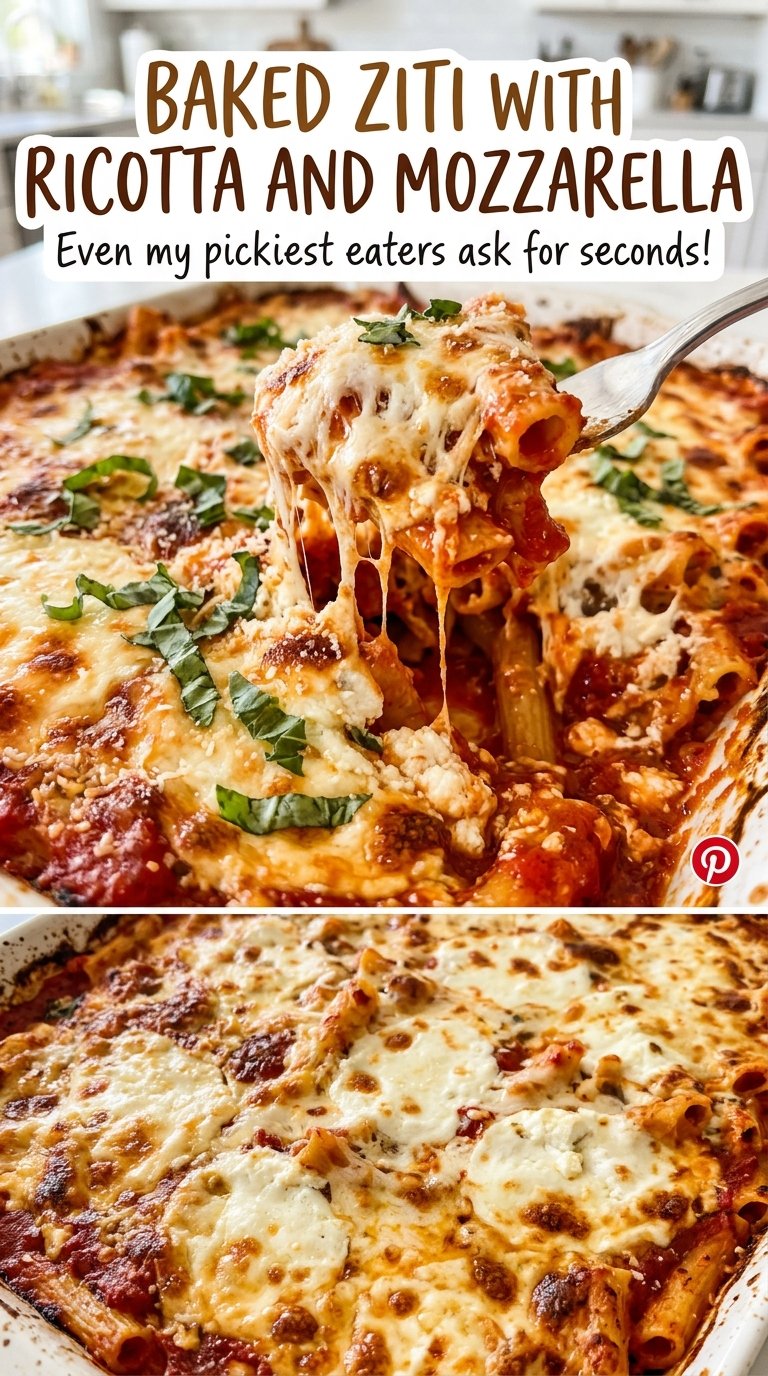
The foil lifts and the edges are bubbling, while the middle still looks soft enough to need a few minutes on the counter. That’s the moment I look for with baked ziti. This version gets its hearty tomato sauce from ground beef, marinara, and a can of diced tomatoes, with a pocketed layer of ricotta and mozzarella running through the pasta.
I cook the ziti a little shy of al dente before it goes into the oven. It finishes in the sauce instead of sitting in boiling water until it’s fully tender, which helps the noodles keep their shape through the bake. The sauce gets a short simmer while the ricotta, egg, and Parmesan are stirred together, so each part is ready when it’s time to layer.
After the dish rests, the cheese settles and the layers are easier to serve without losing that creamy ricotta center. You get saucy pasta, savory beef, and a melted mozzarella top in each scoop.

Kitchen Note
Give the baked ziti the full 10-minute rest before serving. The bubbling cheese settles during that pause, and the first portions come out in more distinct layers instead of sliding apart.
Save this baked ziti with ricotta and mozzarella for a bubbling, beefy pasta dinner with a creamy cheese layer in the middle.
Why the ricotta belongs in a layer, not stirred through the pasta
Ricotta stirred into tomato sauce can make every bite taste and feel the same. Here, the filling stays in a soft band between two layers of sauced ziti, so you get creamy bites alongside pasta that still tastes distinctly tomatoey. It also keeps the ricotta from being diluted through the whole dish.
The egg and Parmesan help the ricotta mixture hold together as it bakes. I stir those into the ricotta first, then dollop the mixture over the first half of the pasta rather than trying to spread it into a perfectly even sheet. The mozzarella goes over those dollops, and the remaining ziti covers the filling. A few gaps between the ricotta mounds aren’t a problem; they give the sauce and cheese room to settle into the middle.
This layering is especially useful in a full 9×13-inch dish. When the pasta is scooped out, the ricotta doesn’t vanish into the sauce, and the top remains a separate mozzarella-and-Parmesan layer. That contrast is what makes each serving feel like baked ziti rather than a casserole of uniformly cheesy pasta.
What the beef, tomatoes, and three cheeses each bring
- Ground beef — The 85% lean beef brings a savory, meaty base without leaving as much excess fat as a fattier grind. Drain the excess fat after browning so it doesn’t pool in the finished dish.
- Marinara and diced tomatoes — The jarred marinara brings an already-seasoned tomato base; the undrained diced tomatoes add small, juicy pieces and their liquid. A familiar, affordable marinara works well here, since the beef, onion, garlic, and seasonings build on it.
- Whole-milk ricotta — Whole-milk ricotta gives the middle a creamy texture. Choose a smooth container without a puddle of liquid on top; a watery ricotta can make the filling looser.
- Egg and Parmesan — The egg helps the ricotta layer set, while the grated Parmesan adds a salty, savory note. Finely grated Parmesan blends more evenly into the filling than large shreds.
- Shredded mozzarella — The bag of shredded mozzarella is divided between the middle and the top. It melts into the ricotta layer and covers the surface; there’s no need to buy a specialty cheese for this bake.
- Ziti — The straight tubes hold sauce inside and around the pasta. If you’re choosing a box, use plain ziti and cook it just short of al dente so it can finish in the oven.
The four stages that keep the pasta tender and the sauce rich
Stop the ziti just before al dente
Bring 4 quarts of water to a boil in a large pot and add 1 tablespoon kosher salt. Cook 1 pound of ziti for 2 minutes less than the package directions for al dente, then drain it. The pasta should still feel a little firm when you bite a piece; it will continue cooking in the oven. Don’t cook it all the way tender in the pot, or it can soften too much during the bake.
Brown the beef and soften the onion
Heat 1 tablespoon olive oil in a 12-inch skillet over medium-high heat, then add the ground beef and diced yellow onion. Cook for 6 to 8 minutes, breaking the beef into small pieces as it browns, until the onion is softened and the beef reaches 160°F. Drain the excess fat before adding the other sauce ingredients. This keeps the sauce from carrying a layer of grease into the baking dish.
Give the tomato sauce its short simmer
Add the minced garlic and cook for 30 seconds, just until fragrant. Stir in the marinara, undrained diced tomatoes, Italian seasoning, remaining 1/2 teaspoon kosher salt, and black pepper. Lower the heat and simmer for 10 minutes; the sauce should be hot and cohesive, with the diced tomatoes still visible. Keep the heat low so the sauce simmers gently rather than splattering.
Layer, cover, and finish until bubbling
Heat the oven to 375°F and grease a 9×13-inch baking dish. Toss the drained ziti with the meat sauce, spread half in the dish, then dollop on the ricotta mixture and sprinkle with 2 cups mozzarella. Add the remaining ziti, followed by the remaining 2 cups mozzarella and 1/2 cup Parmesan. Cover with foil and bake for 20 minutes, then uncover and bake for 10 to 15 minutes, until the edges are bubbling and the center reaches 160°F.
Two useful ways to change the layers without losing the feel of baked ziti
Make it meat-free with a vegetarian Parmesan
Leave out the ground beef and choose a Parmesan labeled vegetarian if you need the dish to be fully vegetarian. Keep the onion, garlic, marinara, tomatoes, and seasonings in the sauce; it will be lighter and less meaty, but the ricotta and mozzarella still make the layers satisfying.
Put more mozzarella in the middle
Keep the full 16-ounce bag, but move 1 cup of mozzarella from the topping into the ricotta layer. The center will be cheesier and the top will have a thinner cheese cover, while the overall amount stays the same.
Storage and Reheating
- Refrigerator: Refrigerate leftovers in a covered container within 2 hours and use within 3 to 4 days. The pasta will absorb more sauce as it sits, so leftovers will be less saucy than freshly baked portions.
- Freezer: Freeze individual portions in airtight containers for up to 3 months. Thaw overnight in the refrigerator for more even reheating; the pasta may be softer after freezing.
- Reheating: Cover a portion and warm it in a 350°F oven until hot throughout, or microwave it covered in short intervals. Avoid reheating uncovered for a long stretch, which can dry the pasta and cheese.
Questions that come up while making baked ziti
Baked Ziti with Ricotta and Mozzarella
Ingredients
Equipment
Method
- Bring 4 quarts of water to a boil in a large pot.
- Add 1 tablespoon of the salt to the boiling water.
- Cook the ziti for 2 minutes less than the package directions for al dente, then drain.
- Heat the olive oil in a 12-inch skillet over medium-high heat.
- Add the ground beef and onion and cook for 6 to 8 minutes, breaking up the beef, until the beef reaches 160°F and the onion is softened; drain excess fat.
- Add the garlic and cook for 30 seconds.
- Stir in the marinara, diced tomatoes, Italian seasoning, remaining 1/2 teaspoon salt, and black pepper.
- Simmer over low heat for 10 minutes.
- In a medium bowl, stir together the ricotta, egg, and 1 cup of the Parmesan until combined.
- Heat the oven to 375°F and grease a 9x13-inch baking dish.
- In a large bowl, toss the drained ziti with the meat sauce.
- Spread half of the ziti mixture in the prepared dish.
- Dollop the ricotta mixture over the ziti and sprinkle with 2 cups of the mozzarella.
- Top with the remaining ziti.
- Sprinkle the remaining 2 cups mozzarella and 1/2 cup Parmesan over the top.
- Cover the dish with foil and bake for 20 minutes.
- Uncover and bake for 10 to 15 minutes, until bubbling at the edges and the center reaches 160°F.
- Rest for 10 minutes before serving.
