

Black Cat Oreo Cupcakes with Chocolate Buttercream
Once the batter reaches the liners, a whole Oreo disappears beneath it, leaving a chocolate-cookie layer at the bottom of each cupcake. I like that these Black Cat Oreo Cupcakes…
Tip: save now, read later.
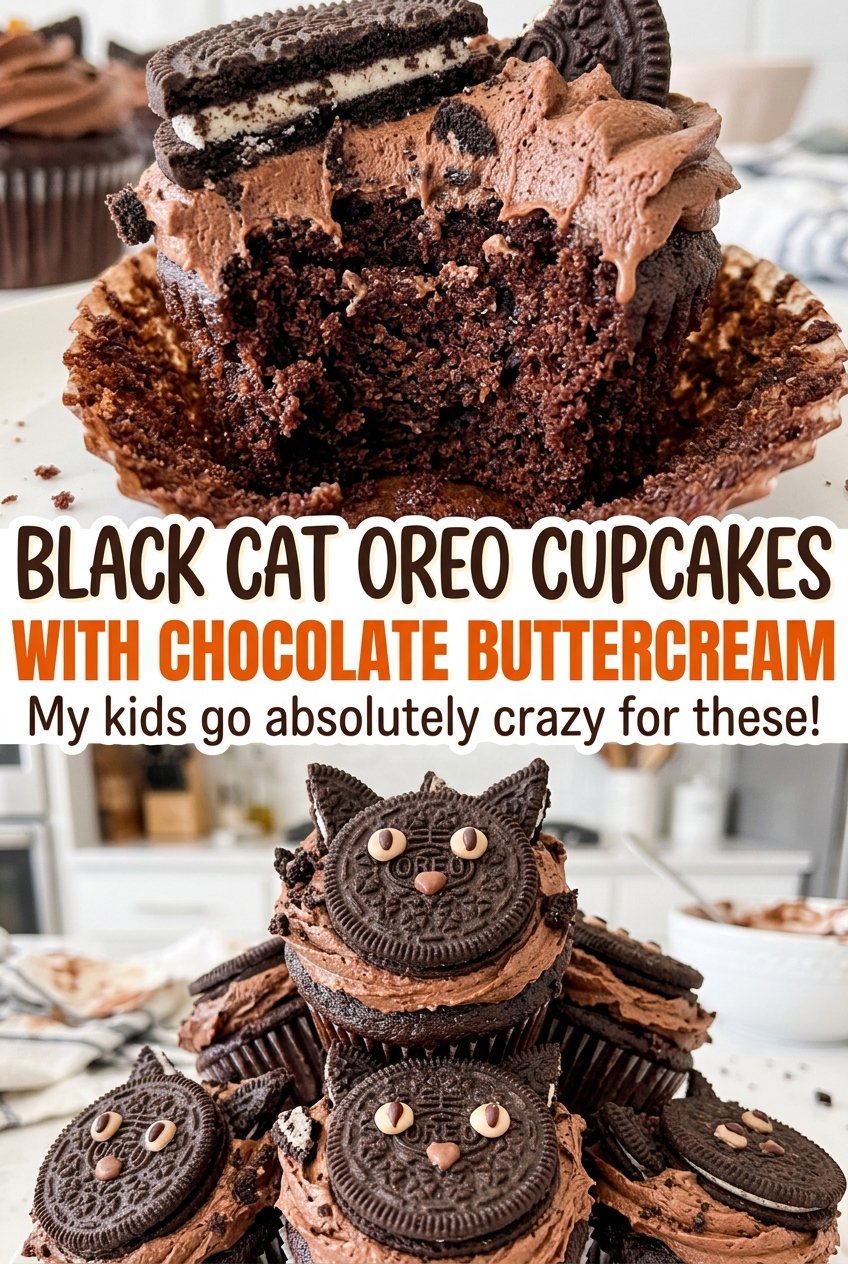
Once the batter reaches the liners, a whole Oreo disappears beneath it, leaving a chocolate-cookie layer at the bottom of each cupcake. I like that these Black Cat Oreo Cupcakes with Chocolate Buttercream use the same cookies for the ears, too, so the cat faces come together with decorations already in the recipe.
The batter comes together with a whisk, but it needs a light hand once the flour goes in. Stir only until the dry streaks disappear; a few extra stirs can make cupcakes dense instead of tender. The chocolate buttercream gets its fluffy texture from beating the cream in after the butter, sugar, and cocoa.
Give the cupcakes time to cool completely before you spread on the frosting. Then press in the cookie ears and candy details while the buttercream is soft, and you’ll have little black cats with chocolatey tops, crisp cookie ears, and whiskers made from sprinkles.
Kitchen Note
Wait until the cupcakes are completely cool before spreading on the buttercream. Even a little warmth can soften the frosting, making it harder to keep the cat faces neat.
Save these Black Cat Oreo Cupcakes for a baking day when chocolate frosting, cookie ears, and sprinkle whiskers are just the right kind of fun.
A Toothpick Can Lie When an Oreo Sits Under the Batter
These cupcakes have a whole cookie at the bottom, so where you check for doneness matters. If the toothpick hits the Oreo, it may pick up cookie cream or crumbs and tell you nothing useful about the cake. Insert it into the cupcake’s center, but angle it away from the cookie layer.
Use the toothpick result together with the other cue: the tops should spring back when you press them lightly. A clean toothpick or one with a few moist crumbs is what you want; wet batter means the center needs more time. Checking both the cake’s texture and its spring-back keeps you from pulling the pan too early—or leaving the cupcakes in the oven while you wait for a cookie-streaked toothpick to look perfectly clean.
Why These Cupcakes Use Whole Oreos and Split Oreos
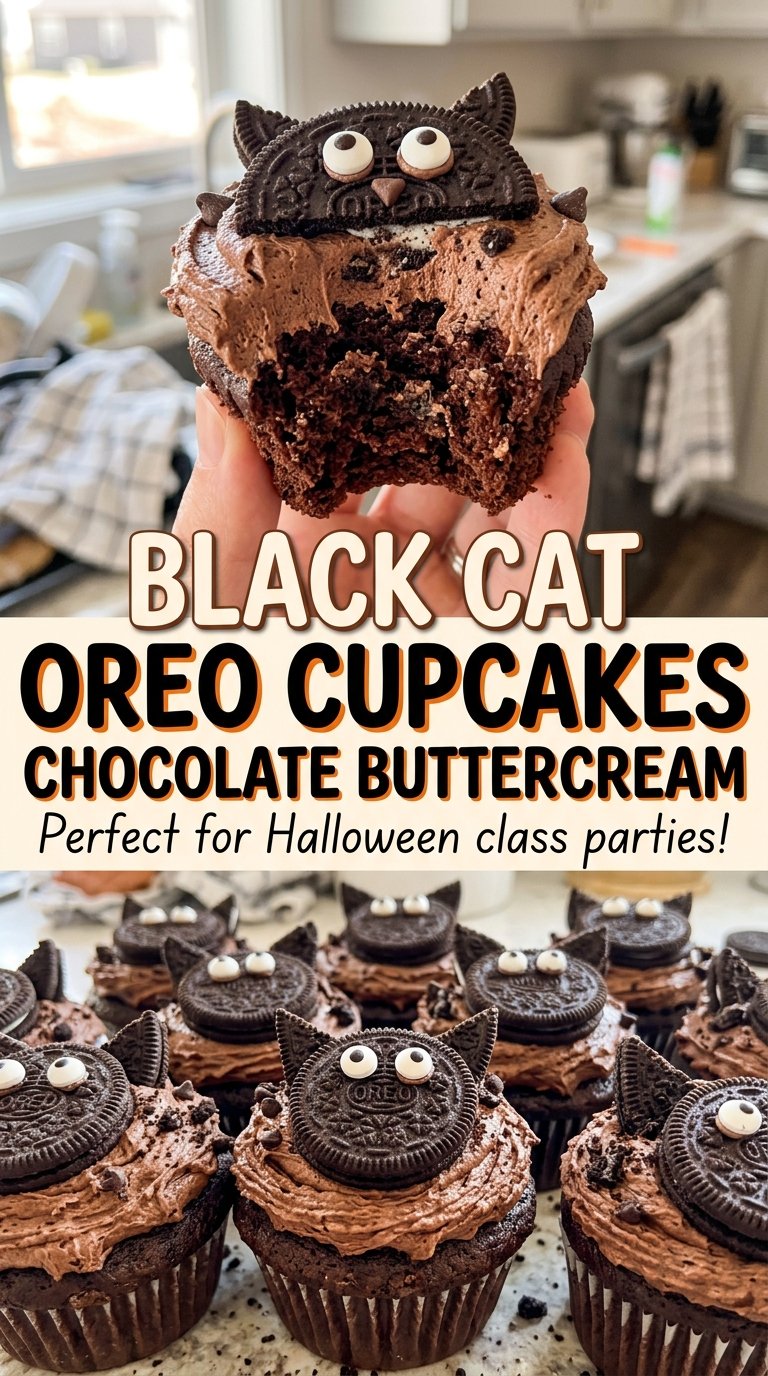
- Oreo cookies do two jobs here: whole cookies make the cupcake bases, while split cookies form the ears. Stick with sandwich cookies in both places so the base and decorations have the shape this design needs.
- All-purpose flour and baking powder give the cupcakes their structure and lift. Whisk them with the salt before they meet the wet ingredients so the leavener is spread through the flour rather than concentrated in one spot.
- Neutral oil keeps the batter simple to whisk and lets the chocolate cookie and cocoa frosting stand out. Another neutral-tasting oil can work, but a strongly flavored oil will come through in the cake.
- Whole milk, eggs, and vanilla round out the wet mixture. Bring the eggs and milk close to room temperature if you can; they’ll blend into the oil and sugar more smoothly than cold ingredients straight from the refrigerator.
- Butter, powdered sugar, cocoa, and heavy cream make a thick, spreadable chocolate frosting. Unsweetened cocoa gives it a chocolate base, while the cream helps it turn fluffy after beating.
- Black gel coloring and the candy decorations turn chocolate frosting into cat faces. Gel color adds less liquid than food coloring drops, and the eyes, pink noses, and chocolate sprinkles each give the finished cupcakes their distinct details.
Mix the Batter Gently, Then Build the Cat Faces
Set an Oreo in Each Liner
Heat the oven to 350°F and line a standard 12-cup muffin pan with paper liners. Place one whole Oreo flat in each liner; these cookies make the base beneath the cake batter. Whisk the flour, baking powder, and salt together in a medium bowl so they’re ready to add in one go.
Whisk the Wet Ingredients and Fold in the Flour
In a large bowl, whisk the sugar, oil, and eggs until smooth, then whisk in the milk and vanilla. Add the flour mixture and stir just until no dry streaks remain. Scrape the bottom of the bowl as you stir, but stop once the flour is incorporated so you don’t overwork the batter.
Bake Until the Tops Spring Back
Divide the batter evenly among the liners, covering each Oreo base. Bake for 18–22 minutes, until the tops spring back when lightly pressed and a toothpick inserted in the center away from a cookie comes out clean or with a few moist crumbs. Cool the cupcakes in the pan for 5 minutes, then transfer them to a wire rack to cool completely.
Beat the Buttercream and Add the Details
Beat the softened butter until creamy, then gradually beat in the powdered sugar and cocoa at low speed. Add the heavy cream and beat at medium-high speed for 2 minutes, until the frosting looks fluffy, then beat in the black gel coloring. Spread frosting over the cooled cupcakes and press in two split Oreo halves for ears, two candy eyeballs, and one pink candy nose per cupcake; arrange six chocolate sprinkles on each side for whiskers.
Two Ways to Change the Finish Without Losing the Oreo Base
Keep the frosting cocoa-brown
Leave out the black gel coloring and the buttercream will stay cocoa-brown. The chocolate flavor remains the same, but the cat faces have a softer, less dramatic look.
Make a gluten-free batch
Replace the all-purpose flour with a cup-for-cup gluten-free baking blend, and use gluten-free Oreo cookies for both the bases and ears. Choose gluten-free candy eyes, pink candies, and sprinkles as well; the cupcakes may have a slightly more delicate crumb.
Storage and Reheating
- Refrigerator: Store covered for up to 4 days. The cake may feel firmer when chilled, and the candy decorations can lose a little crispness.
- Freezer: Freeze unfrosted cupcakes in an airtight container for up to 2 months. Thaw completely before adding buttercream and decorations.
- Reheating: These are best brought toward room temperature rather than reheated. Don’t microwave decorated cupcakes; the buttercream softens and the candy details can shift.
Questions That Come Up While Baking These Oreo Cat Cupcakes
Black Cat Oreo Cupcakes with Chocolate Buttercream
Ingredients
Equipment
Method
- Preheat the oven to 350°F.
- Line a 12-cup standard muffin pan with paper liners.
- Place one whole Oreo cookie in each liner.
- Whisk the flour, baking powder, and salt in a medium bowl.
- In a large bowl, whisk the sugar, oil, and eggs until smooth.
- Whisk in the milk and vanilla.
- Add the flour mixture to the egg mixture and stir just until no dry streaks remain.
- Divide the batter evenly among the liners, covering the Oreo bases.
- Bake for 18–22 minutes, until the tops spring back when lightly pressed and a toothpick inserted in the center away from a cookie comes out clean or with a few moist crumbs.
- Cool the cupcakes in the pan for 5 minutes.
- Transfer the cupcakes to a wire rack to cool completely.
- Beat the butter until creamy.
- Gradually beat in the powdered sugar and cocoa at low speed.
- Add the heavy cream and beat at medium-high speed for 2 minutes until fluffy.
- Beat in the black gel food coloring.
- Spread the buttercream over the cooled cupcakes.
- Split the remaining Oreos and press two halves into each cupcake as ears.
- Add two candy eyeballs to each cupcake.
- Add one pink candy-coated chocolate to each cupcake for a nose.
- Arrange six chocolate sprinkles on each side of each cupcake as whiskers.
