
Country Fried Chicken with White Country Gravy
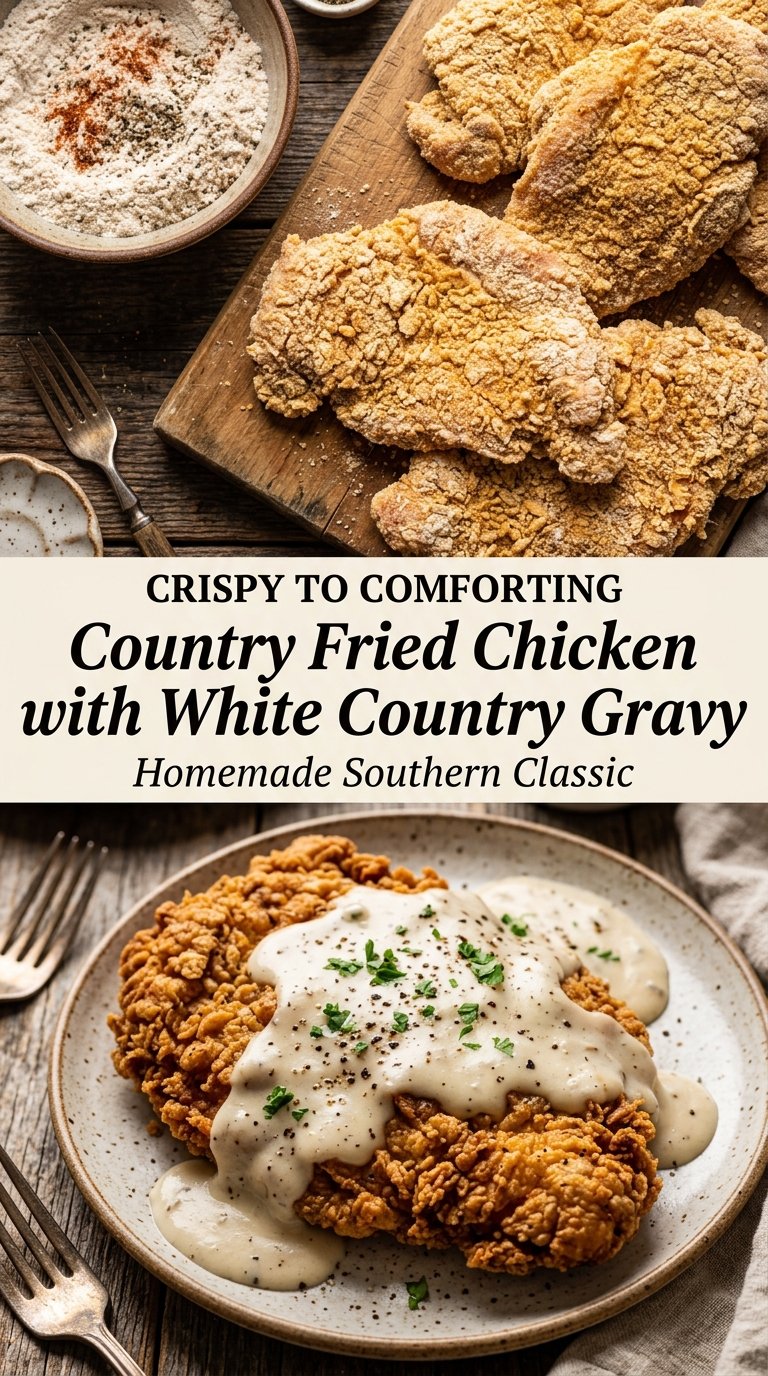
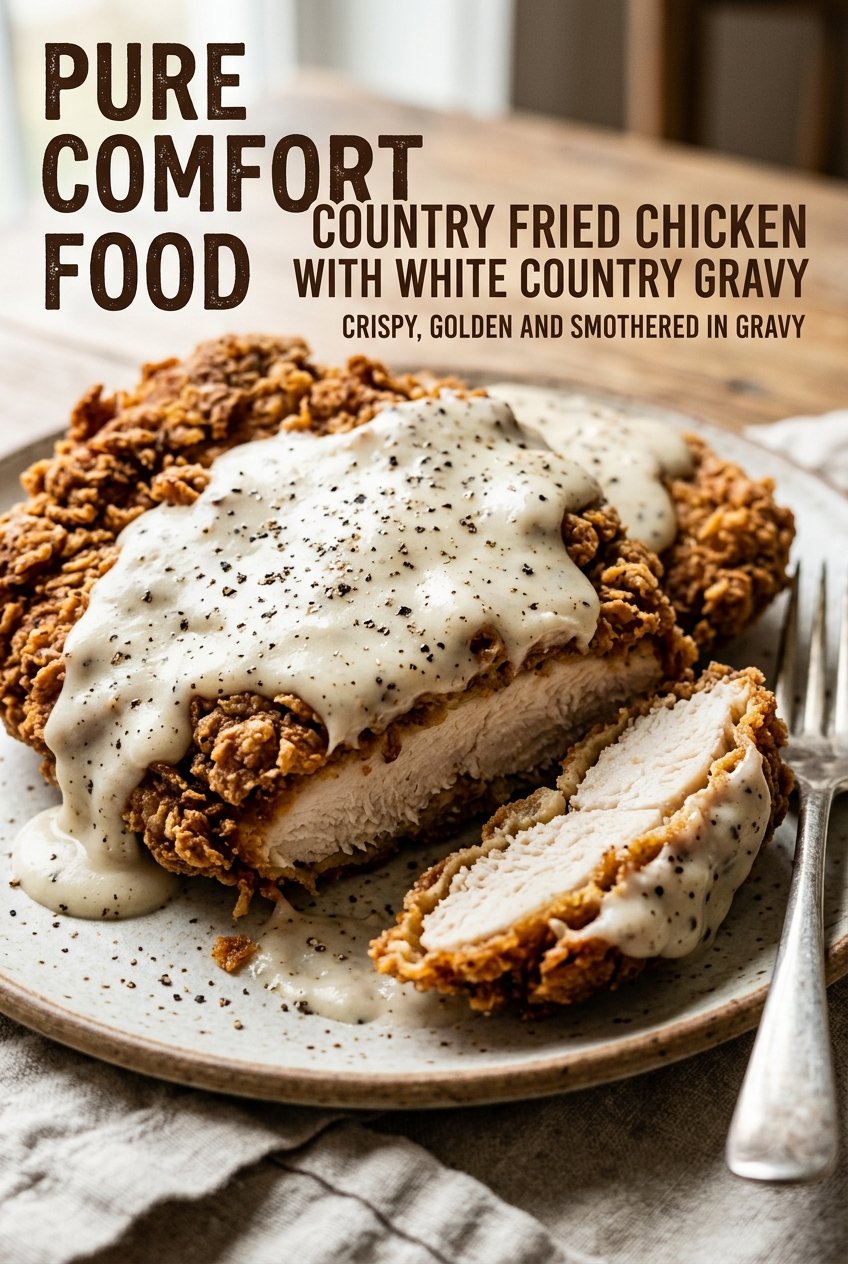
Crispy country fried chicken turns into a full comfort-food dinner the second that peppery white gravy hits the crust. The chicken stays juicy under a shattering, seasoned coating, and the…
Tip: save now, read later.
Crispy country fried chicken turns into a full comfort-food dinner the second that peppery white gravy hits the crust. The chicken stays juicy under a shattering, seasoned coating, and the gravy clings in all the right places instead of sliding off into a watery puddle. This is the kind of meal that feels old-school in the best way: simple ingredients, but the technique matters enough to make every bite count.
The difference here starts with pounding the chicken to even thickness, then building a flour coating that actually has flavor baked into it. Buttermilk and eggs help the flour stick and create that rough, craggy crust that fries up with more texture than a smooth, tight breading ever will. The gravy uses the same logic: cook the flour in butter first so it tastes clean and nutty, then whisk in the milk slowly so it turns silky instead of lumpy.
Below, I’m walking through the part that keeps the coating crisp, the gravy from getting gluey, and the small timing details that matter once everything is hot and ready.
The crust came out wonderfully craggy and stayed crisp even after I poured the gravy on top. I also liked that the white gravy thickened in about 5 minutes and didn’t taste floury at all.
Crispy Country Fried Chicken with White Country Gravy is the kind of comfort dinner worth pinning for a night when you want crunchy chicken and silky gravy on the same plate.
The Crust Stays Crisp When the Gravy Goes On — if You Handle the Frying Right
Country fried chicken fails in two places: the breading goes soft, or the chicken cooks before the crust has time to brown properly. Both problems usually come from rushing the pan. If the oil is too cool, the coating drinks it up and turns heavy. If the chicken is too thick, the outside over-browns before the center is done.
Pounding the breasts to an even thickness solves half the battle. The other half is keeping the oil steady at 350°F and not crowding the skillet. When the chicken has room, the temperature stays where it should, the crust sets fast, and those rough floury ridges turn deeply golden instead of pale and greasy.
- Even thickness matters more here than in a lot of fried chicken recipes. Thin edges dry out fast, and thick centers leave you with an overcooked crust.
- The seasoned flour is doing more than coating the chicken. It builds the salty, peppery shell that gives the gravy something to cling to.
- A wire rack beats paper towels. Paper traps steam under the crust and softens the bottom before you even spoon on the gravy.
What Each Ingredient Is Doing in This Dish
Boneless skinless chicken breasts give you a clean, even cut that fries quickly and slices neatly. Pounding them to an even thickness keeps the cooking predictable. If you want a richer, more forgiving result, boneless chicken thighs work too, but you’ll need to give them a little longer in the oil.
Buttermilk and eggs create a sticky bath that helps the flour cling in a thick, textured layer. Buttermilk also adds mild tang and tenderness. If you don’t have it, stir 1 tablespoon of lemon juice or vinegar into 1 cup of milk and let it sit for 5 minutes, then whisk in the eggs.
All-purpose flour with paprika, garlic powder, onion powder, salt, and black pepper builds the seasoned crust and seasons the chicken all the way through the coating. The paprika gives color more than heat. Freshly ground black pepper matters in both the breading and the gravy because it gives the dish that classic country-style bite.
Butter, flour, and whole milk make the gravy. Whole milk gives the sauce enough body to turn silky without tasting thin. Lower-fat milk will work in a pinch, but the gravy will be a little less plush and may need an extra minute on the stove to thicken.
How to Fry the Chicken and Build the Gravy in the Right Order
Set up the coating before the oil heats
Get the flour mixture, buttermilk-egg mixture, and a wire rack ready before you turn on the stove. The breading sticks best when it goes from wet to dry to hot oil without sitting around and turning gummy. If the chicken rests too long after dredging, the flour hydrates too much and the crust can fall off in patches.
Fry until the crust is deep golden, not pale blonde
Heat the oil to 350°F and fry in batches with space around each piece. You want a steady sizzle the moment the chicken hits the pan, not a furious splatter that means the oil is too hot. Flip once when the first side is a deep golden color and releases easily from the pan; if it sticks, it needs another minute.
Rest the chicken while you start the gravy
Move the chicken to a wire rack as soon as it comes out of the oil. That keeps the bottom crisp while the heat evens out inside the meat. Don’t cover it, or the steam will undo the crust you just worked for. Once the chicken is resting, use a clean saucepan for the gravy so the milk doesn’t pick up fried bits that make it taste muddy.
Cook the roux long enough to lose the raw flour taste
Melt the butter, whisk in the flour, and let it bubble for about a minute before adding the milk. The paste should look smooth and smell a little nutty, not raw. Whisk the milk in gradually and keep the heat at medium-low if needed; high heat can make the gravy seize into lumps before it has a chance to thicken evenly.
Three Ways to Make This Work at Your Table
For a dairy-free version
Use unsweetened dairy-free milk in the breading marinade and for the gravy, then choose a neutral dairy-free butter. The chicken still fries up well, but the gravy will taste a little lighter and less rich than the classic version, so pepper and salt matter even more.
For a gluten-free plate
Swap the all-purpose flour with a 1:1 gluten-free flour blend in both the breading and the gravy. The crust will be a little more delicate, so let it fry until it releases cleanly before flipping, and keep the gravy moving as it thickens to avoid any grainy texture.
For chicken thighs instead of breasts
Boneless thighs give you juicier meat and a little more forgiveness if the pan runs hot. They may take a few minutes longer, so use the color of the crust and the internal temperature as your guide rather than the clock alone.
Storage and Reheating
- Refrigerator: Store the chicken and gravy separately for up to 3 days. The crust softens a bit in the fridge, but it still reheats well if you use the oven.
- Freezer: The fried chicken freezes better than the gravy. Freeze the chicken on a tray, then wrap tightly and store for up to 2 months; the gravy can be frozen, but it may need a hard whisk after thawing to smooth it back out.
- Reheating: Warm the chicken on a rack in a 375°F oven until hot and crisp again, about 15 to 20 minutes depending on thickness. Reheat the gravy slowly on the stove with a splash of milk and whisk often so it doesn’t turn pasty.
Questions I Get Asked About This Recipe
Country Fried Chicken with White Country Gravy
Ingredients
Equipment
Method
- Place the chicken breasts between plastic wrap and pound to an even thickness for uniform cooking.
- Whisk the buttermilk and eggs together in a shallow bowl until smooth.
- Combine the all-purpose flour, paprika, garlic powder, onion powder, salt, and black pepper in another bowl.
- Dip each chicken piece into the buttermilk mixture, then coat thoroughly in the seasoned flour so it looks fully covered.
- Heat the vegetable oil in a large skillet to 350°F (175°C) until it shimmers at frying temperature.
- Fry the chicken for 4–5 minutes per side, turning once, until golden brown and cooked through with crisp coating.
- Transfer the fried chicken to a wire rack so the bottom stays crisp.
- Melt the butter in a saucepan over medium heat until foamy.
- Whisk in the all-purpose flour and cook for 1 minute to remove the raw flour taste.
- Gradually whisk in the whole milk until smooth with no lumps.
- Simmer the gravy until thickened, about 5 minutes, while whisking occasionally so it coats the back of a spoon.
- Season with salt and black pepper, adjusting to taste.
- Spoon warm gravy generously over the fried chicken so it lightly soaks and stays creamy.
- Serve immediately with fresh parsley and extra black pepper if using.