
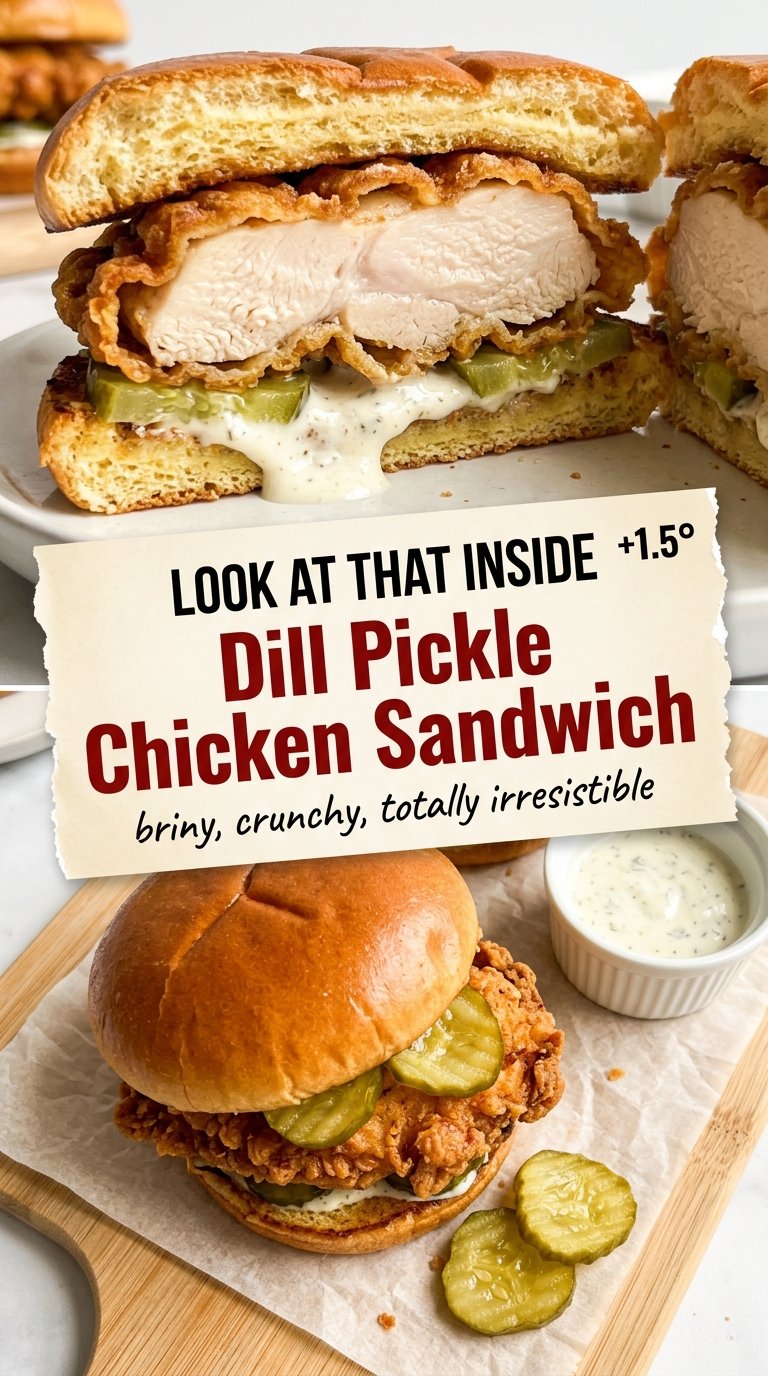
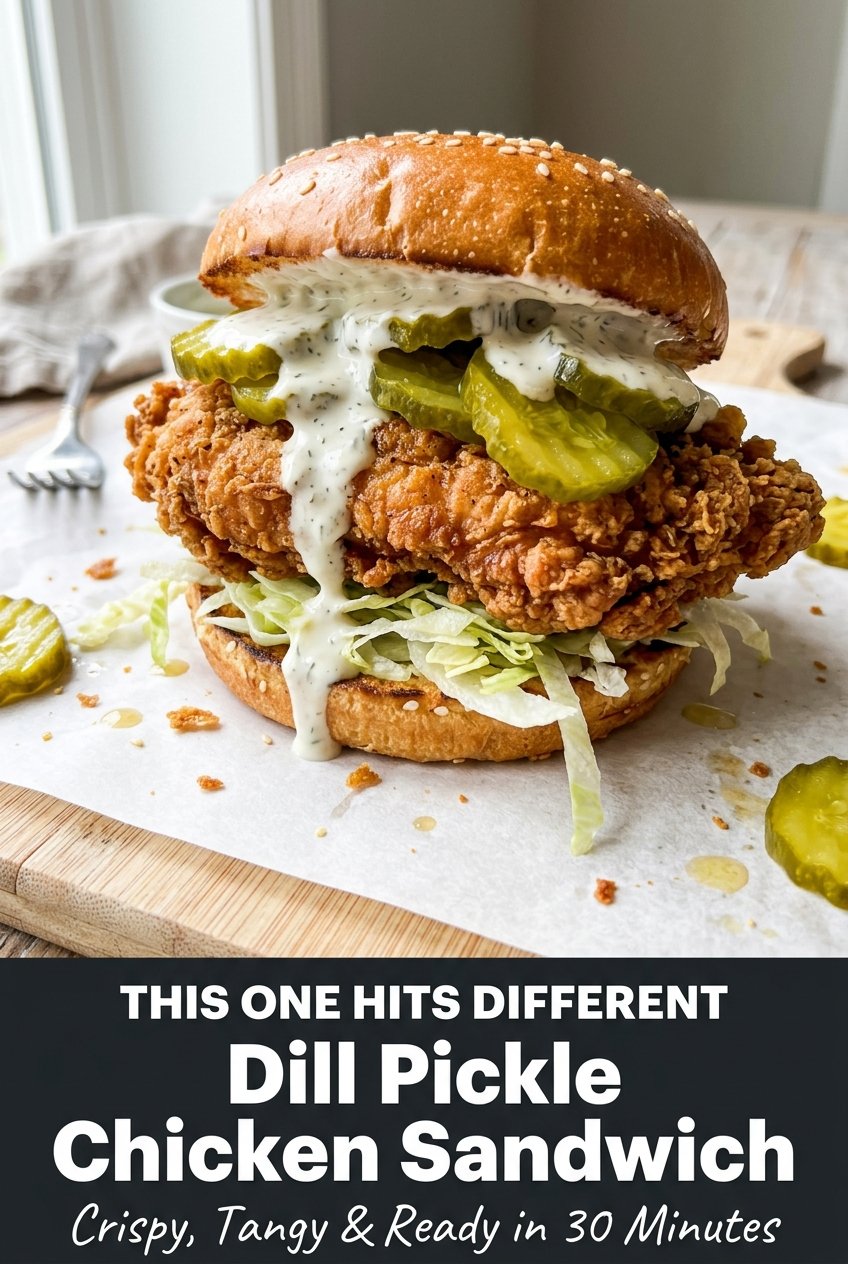
Dill Pickle Chicken Sandwich
Crispy fried chicken and dill pickles belong together in a way that feels almost obvious once you bite into this sandwich. The crust stays rugged and craggy, the chicken stays…
Tip: save now, read later.
Crispy fried chicken and dill pickles belong together in a way that feels almost obvious once you bite into this sandwich. The crust stays rugged and craggy, the chicken stays juicy from the pickle brine, and the cool garlic-dill sauce cuts straight through the richness without making the bun soggy. It’s the kind of sandwich that disappears fast because every layer is doing actual work.
The pickle juice marinade isn’t just there for flavor. It seasons the chicken all the way through and helps the meat stay tender, even after frying. The coating gets its extra crunch from cornstarch in the dredge and from a double-dip that builds those rough edges everyone wants. A little pickle juice in the egg wash pulls the whole sandwich flavor together from the inside out.
Below, I’ll walk through the part that matters most: how to get a crisp crust that doesn’t fall off, how to keep the sauce bright instead of bland, and what to do if you want to make these sandwiches ahead without losing that hot-from-the-skillet texture.
The chicken stayed juicy after frying and that pickle brine really came through without tasting sour. My husband kept talking about the crunchy crust and asked me to pack the leftovers for lunch the next day.
Save this dill pickle chicken sandwich for the night you want a crunchy, briny chicken sandwich with a real pickle kick.
The Brine Is Doing More Than Adding Pickle Flavor
Pickle juice sounds like a gimmick until you cook with it. The vinegar and salt work on the chicken the same way a quick brine would, seasoning the meat and helping it hold onto moisture during frying. That’s why the chicken tastes seasoned all the way through instead of just coated on the outside.
The real mistake with sandwiches like this is over-brining or skipping the pat-dry step. Too long in the pickle juice and the texture can turn a little rubbery. Skip the quick blot and the flour turns pasty instead of crisp. You want the chicken dry enough for the coating to cling, but not so dry that it has nothing to grab onto.
The other piece people miss is heat. Frying at 350°F gives you a crust that browns before the chicken overcooks. If the oil is too cool, the breading soaks up grease and goes heavy. If it’s too hot, the outside scorches before the center reaches 165°F.
What the Dredge and Sauce Are Actually Pulling Off
Chicken breasts: Halving them horizontally gives you thinner cutlets that cook quickly and stay tender. Thick breasts take too long to fry and the crust gets darker before the center is ready.
Pickle juice: Use the juice from a dill pickle jar, not sweet brine. You want sharp, salty acidity here, and that’s what makes the chicken taste like a dill pickle sandwich instead of just fried chicken with pickles on top.
Cornstarch: This is what keeps the coating light and crisp. All flour works, but the crust won’t shatter the same way. If you don’t have cornstarch, use potato starch for a similar effect.
Mayonnaise: This anchors the sauce and gives it body. Greek yogurt can replace part of it, but the sauce will be tangier and less lush. The mayo also keeps the sauce stable in the fridge.
Dill pickles: Chop some finely for the sauce and slice the rest for the sandwich. The chopped pickles melt into the sauce better than spears or big chunks, which matters if you want every bite to taste balanced.
Getting the Crunchy Crust and Juicy Center at the Same Time
The Pickle Brine Bath
Put the chicken in the brine long enough to season it, but not so long that the surface gets soft. One to eight hours works well, and the sweet spot is usually around two to four hours for cutlets this size. When you pull the chicken out, it should smell tangy and look slightly translucent at the edges. Pat it lightly before dredging; if it’s dripping wet, the flour turns gummy and falls away in the oil.
Building a Craggy Dredge
Mix the flour, cornstarch, spices, and dried dill until everything is evenly distributed. Dredge the chicken, dip it in the egg wash, then back into the flour mixture and press the coating on firmly. That second dredge is what gives you those irregular, crunchy ridges instead of a smooth shell. If bare spots show through, pinch on a little extra flour mixture right away before the chicken goes into the oil.
Frying Without Losing the Coating
Heat the oil to 350°F and fry just two pieces at a time so the temperature doesn’t crash. You’re listening for a steady, lively sizzle, not furious popping. Flip once the first side is deep golden and the chicken releases easily from the pan. Move it to a wire rack, not a plate, or the bottom steams and softens while you finish the rest.
Assembly While Everything Is Still Hot
Toast the brioche buns cut-side down until they’re just lightly golden. Spread the sauce on both halves so the bun gets a little insulation from the heat and pickle juices. Stack on the lettuce, chicken, and pickle chips, then close the sandwich right away. Waiting too long lets the crust steam under its own heat, and that’s the fastest way to lose the crunch you worked for.
How to Adapt This Sandwich Without Losing What Makes It Good
Bake It Instead of Frying
For a lighter version, set the breaded chicken on a rack over a sheet pan, spray it generously with oil, and bake at 425°F until deeply golden and cooked through. The crust won’t be as rugged as fried chicken, but the pickle brine and spice mix still give you a strong sandwich. A quick broil at the end helps restore some color.
Gluten-Free Version
Swap the all-purpose flour for a 1:1 gluten-free flour blend and keep the cornstarch in place. The crust will still crisp up well, especially if you let the breaded chicken rest for a few minutes before frying. Use gluten-free buns or serve it as a lettuce wrap if that fits your table better.
Make It Spicier
Add cayenne to the dredge and a spoonful of hot sauce to the egg wash. That heat works especially well with the pickle brine because the vinegar sharpens it instead of dulling it. Start with a little and taste the sauce as you go, since the pickles already bring enough punch on their own.
Storage and Reheating
- Refrigerator: Store leftover chicken separately from the buns and toppings for up to 3 days. The crust softens, but it still tastes good.
- Freezer: Freeze the cooked chicken on a tray, then wrap tightly once solid. It freezes well, but the crust won’t stay fully crisp after thawing.
- Reheating: Warm the chicken on a rack in a 375°F oven or air fryer until hot and re-crisped. Don’t microwave it or the coating turns soggy before the center warms through.
Answers to the Questions Worth Asking
Dill Pickle Chicken Sandwich
Ingredients
Equipment
Method
- Place the halved chicken breasts in a zip-lock bag or bowl and pour in 1½ cups dill pickle juice, garlic powder, onion powder, and black pepper. Seal and refrigerate for at least 1 hour up to 8 hours.
- In a bowl, combine mayonnaise, finely chopped dill pickles, pickle brine, dried dill, garlic powder, and lemon juice. Season with salt and pepper to taste, cover, and refrigerate until ready to use.
- In a shallow bowl, whisk together all-purpose flour, cornstarch, garlic powder, onion powder, smoked paprika, salt, black pepper, and dried dill. Mix until evenly combined.
- In a second bowl, whisk the large eggs with ¼ cup pickle juice for the egg wash. Whisk until smooth and uniform.
- Remove chicken from brine and pat gently dry, leaving a little moisture so the coating sticks. Keep it lightly tacky, not completely dry.
- Dredge each chicken piece in the flour mixture, dip into the egg wash, then dredge in the flour mixture again for a thick, craggly crust. Press the coating in firmly.
- Heat 1½ inches of neutral oil in a heavy skillet or Dutch oven to 350°F. Fry chicken pieces 2 at a time for 4–5 minutes per side until deep golden and internal temperature reaches 165°F.
- Transfer the fried chicken to a wire rack and do not stack. Let it rest briefly while you toast the buns.
- Toast the brioche buns cut-side down in a dry skillet until lightly golden, about 1 minute. Keep them from browning too far.
- Spread a generous layer of dill pickle sauce on both halves of each bun. Cover each cut side evenly.
- Layer the bottom bun with shredded iceberg lettuce, place the hot crispy chicken on top, then pile on dill pickle chips. Cap with the top bun and serve immediately.