Honey Garlic Glazed Salmon
Sticky honey garlic glazed salmon earns its place in the weeknight rotation because it gives you crisp edges, flaky center-cut fillets, and a pan sauce that clings instead of sliding…
Tip: save now, read later.
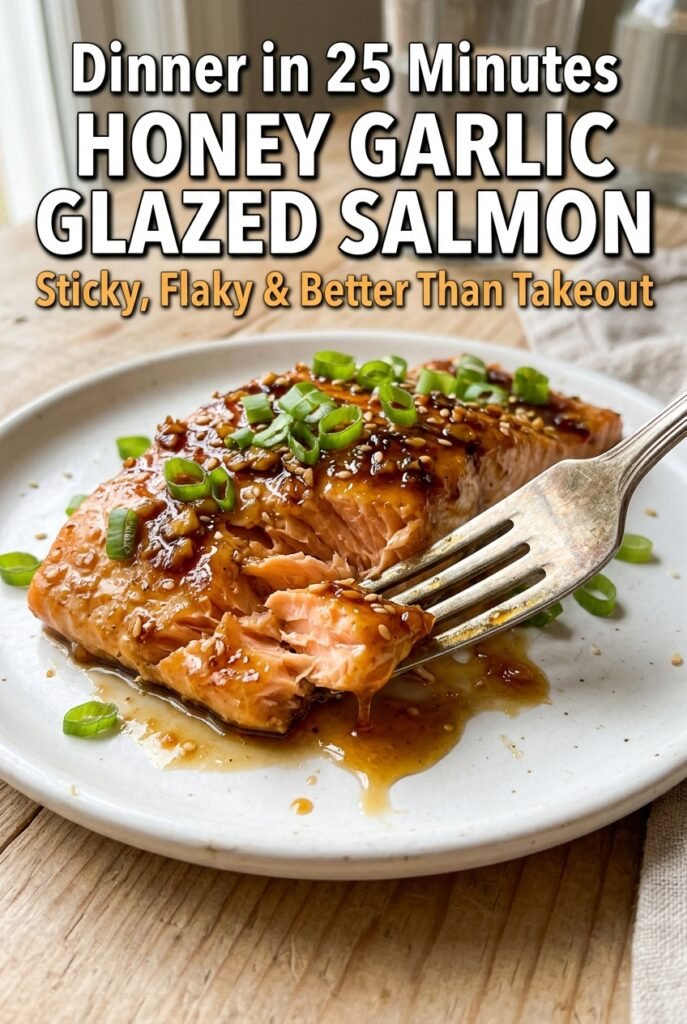
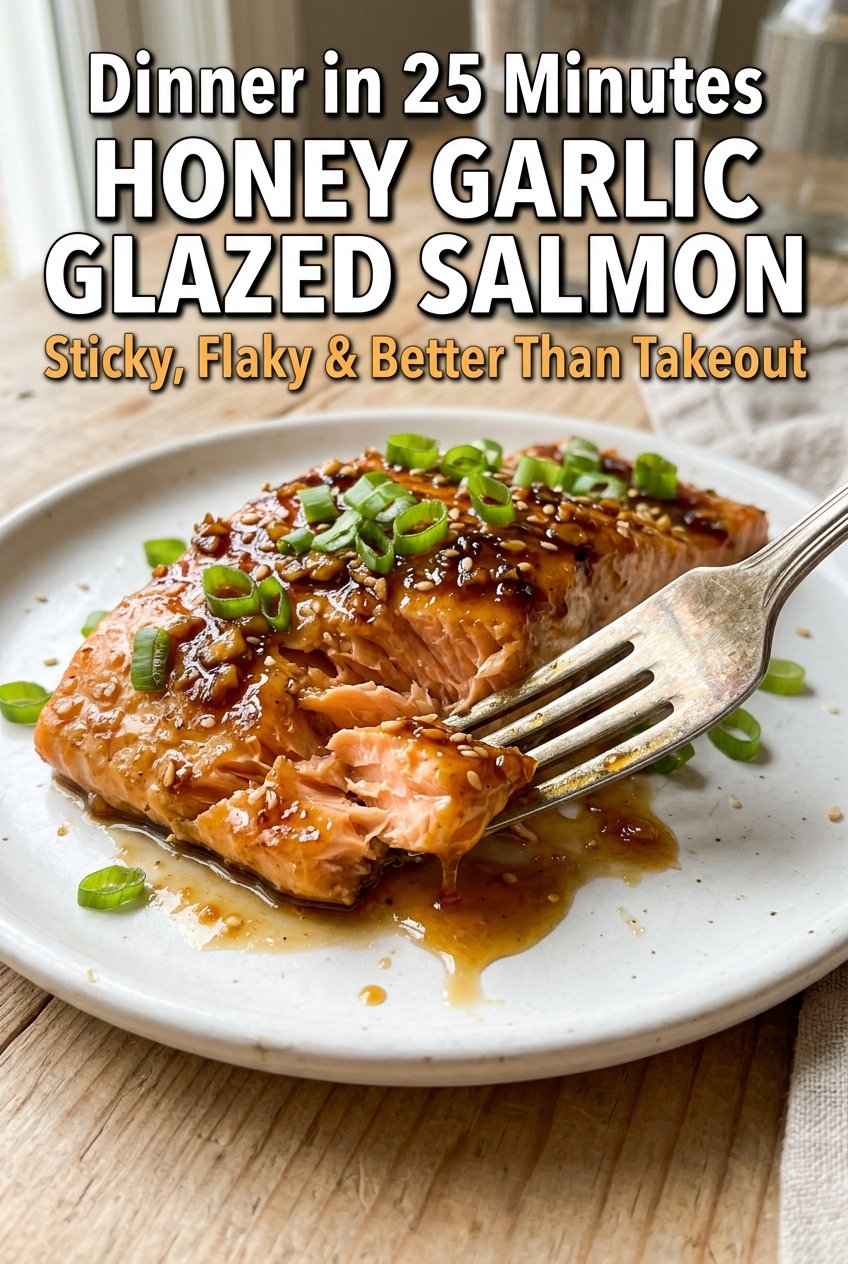
Sticky honey garlic glazed salmon earns its place in the weeknight rotation because it gives you crisp edges, flaky center-cut fillets, and a pan sauce that clings instead of sliding off the fish. The glaze turns glossy and caramelized in the same skillet, so every bite gets that sweet-savory coating with a little heat from the garlic and just enough lemon to keep it from feeling heavy.
The trick is drying the salmon first and letting it sear before the glaze goes in. That keeps the fish from steaming and gives you the kind of deep golden crust that makes the whole dish taste like it took far more effort than it did. The butter added at the end softens the glaze and helps it spoon over the fish without turning grainy or too sharp.
Below, you’ll find the timing that keeps the salmon tender, the small pan detail that matters most, and a few smart swaps for making this work with what you already have in the kitchen.
The glaze got sticky and shiny without burning, and the salmon flakes apart beautifully at 145°F. I served it over rice and my husband asked if we could put it on the menu for next week too.
Save this honey garlic glazed salmon for the nights when you want glossy, caramelized salmon with almost no cleanup.
The Fastest Way to Ruin Salmon: Starting with a Wet Surface
Salmon has a bad habit of steaming before it sears, and the usual reason is simple: moisture. If the fillets go into the pan damp, the surface has to shed water before it can brown, which steals the short window you need for a crisp crust. Patting the fish dry is not a tiny extra step here. It is the step that decides whether the glaze lands on top of a beautifully seared fillet or a pale one that never quite gets there.
The second mistake is adding the honey garlic mixture too early. Honey burns fast, and garlic turns bitter when it sits in high heat for too long. Sear the salmon first, then lower the heat before the glaze goes in so the sauce can bubble, thicken, and coat the fish without scorching.
- Salmon fillets — Skin-on fillets give you the best buffer against overcooking and help the fish stay together when you flip it. If you use skinless fillets, shorten the first sear by a minute or so and handle them gently, because they’ll need support from the spatula the whole way.
- Honey — This is what creates the sticky finish and that lacquered look in the pan. There isn’t a true substitute for the way honey caramelizes, but maple syrup works in a pinch; the glaze will taste a little darker and less floral.
- Low-sodium soy sauce — Soy sauce brings salt and depth at the same time, which keeps the glaze from tasting like plain sweetener. Regular soy sauce works too, but cut back on any extra salt on the salmon or the final dish can lean too salty.
- Fresh lemon juice — A small amount keeps the glaze from feeling heavy and sharpens the sweet garlic notes. Bottled lemon juice will work, but fresh juice tastes cleaner and brighter, especially in such a short-cooked sauce.
- Butter — The butter gets stirred in at the end to round out the glaze and help it cling to the fish. If you need a dairy-free version, use a teaspoon of olive oil instead, but the sauce won’t finish quite as silkily.
How to Keep the Glaze Glossy Instead of Burned
Dry the fish and season it first
Lay the salmon on paper towels and press the top lightly until the surface feels dry, not slick. Season both sides with salt, pepper, and paprika before the pan heats up so the spices can stick instead of scattering into the oil. If the fillets are very thin on one end, tuck that side under slightly when you set them in the skillet so the whole piece cooks more evenly.
Build the crust before the sauce joins in
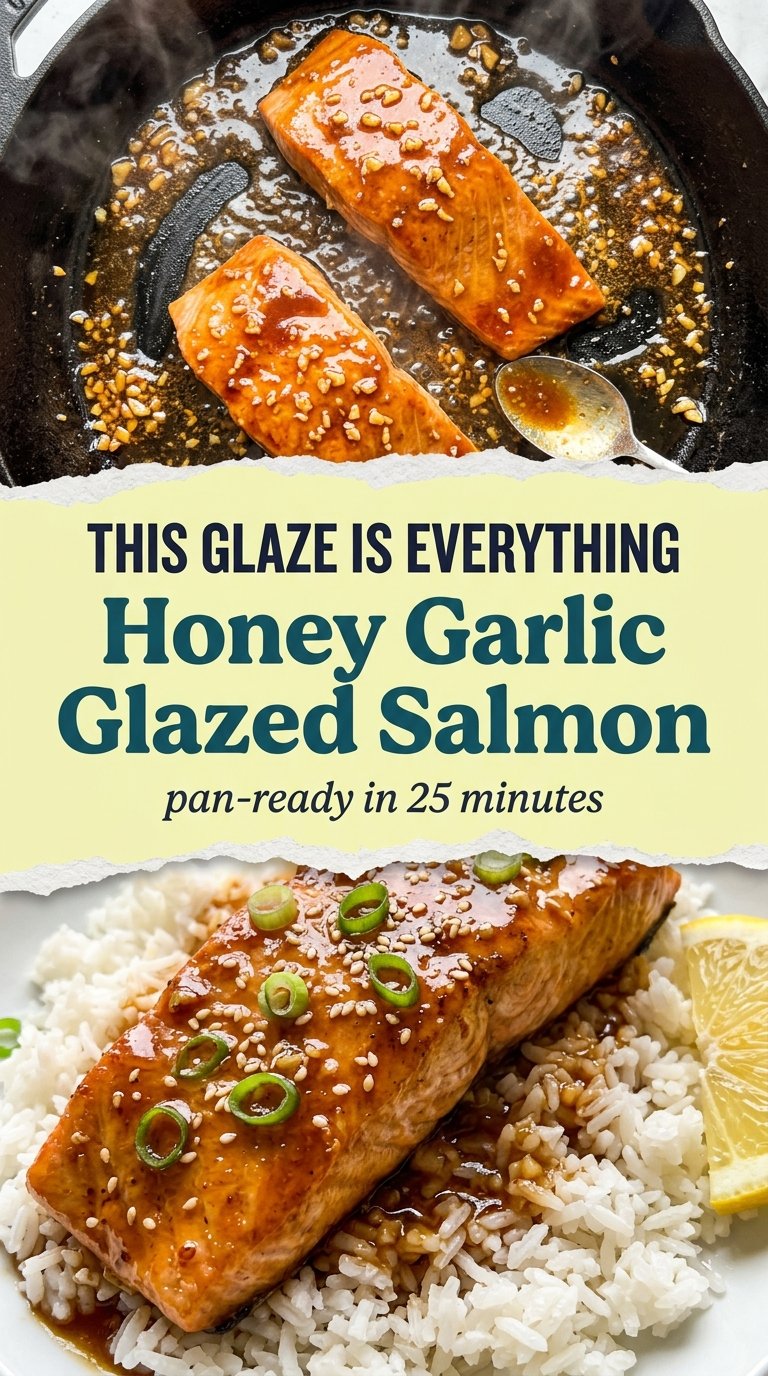
Heat the oil until it shimmers, then place the salmon skin-side up and leave it alone. You want a steady sizzle and a crust that releases on its own after 3 to 4 minutes; if it sticks, it needs another minute. Flip carefully once the bottom is deeply golden, then lower the heat before adding the butter and glaze so the sugars don’t scorch on contact.
Finish in the pan, not under a broiler
Once the glaze is in, spoon it over the fillets constantly while it bubbles and thickens for 2 to 3 minutes. The sauce should look glossy and lightly syrupy, not foamy and thin. Pull the salmon when it flakes easily and reaches 145°F in the thickest part, because it will keep cooking for a minute after it leaves the heat.
How to Adapt Honey Garlic Glazed Salmon Without Losing the Point
Dairy-Free Version
Swap the butter for a small splash of olive oil at the end. You’ll lose a little richness, but the glaze will still gloss the salmon and cling well. This is the easiest adjustment if you’re cooking for someone who avoids dairy.
Less Sweet, More Savory
Cut the honey to 2 tablespoons and add an extra teaspoon of lemon juice. The glaze will be a little less sticky but more balanced, especially if you’re serving it with rice or noodles that already bring some sweetness of their own.
Gluten-Free Swap
Use a certified gluten-free soy sauce or tamari in the glaze. The texture and finish stay the same, and this swap doesn’t change the cooking method at all.
For Extra Heat
Increase the red pepper flakes to 1 teaspoon or add a small pinch of cayenne. The heat will ride underneath the honey instead of fighting it, which works better than dumping in hot sauce after the glaze is done.
Storage and Reheating
- Refrigerator: Store leftovers in an airtight container for up to 2 days. The glaze will thicken as it chills, and the salmon will lose a little of its just-cooked flake.
- Freezer: Freezing isn’t ideal for this one. The sauce and the salmon both change texture after thawing, and the glaze can turn sticky in a way that doesn’t feel fresh.
- Reheating: Warm gently in a covered skillet over low heat with a teaspoon of water to loosen the sauce, or use short bursts in the microwave at medium power. High heat dries out the fish fast and can push the glaze from glossy to burnt-tasting.
Questions I Get Asked About This Recipe
Honey Garlic Glazed Salmon
Ingredients
Equipment
Method
- Pat salmon fillets completely dry with paper towels, then season both sides with salt, black pepper, and paprika.
- Heat olive oil in a large non-stick or cast iron skillet over medium-high heat until it shimmers.
- Whisk honey, minced garlic, low-sodium soy sauce, fresh lemon juice, sesame oil, and red pepper flakes in a small bowl, then set aside.
- Place salmon fillets skin-side up in the hot pan and sear undisturbed for 3–4 minutes, until a golden crust forms.
- Flip the fillets carefully.
- Reduce heat to medium, add butter to the pan, and let it melt.
- Pour the honey garlic glaze over the salmon and let it bubble and thicken for 2–3 minutes.
- Spoon the glaze continuously over the tops of the fillets until glossy and deeply caramelized.
- Check doneness: salmon should flake easily with a fork and reach 145°F (63°C) internal temperature.
- Transfer salmon to plates over steamed rice, spoon any remaining glaze over the top, and garnish with sliced green onions and sesame seeds before serving immediately.