Black Forest Icebox Cake
Dark chocolate wafers soften into tender, cake-like layers under billowy whipped cream and glossy cherry filling, and that contrast is what makes a Black Forest icebox cake disappear fast. It…
Tip: save now, read later.
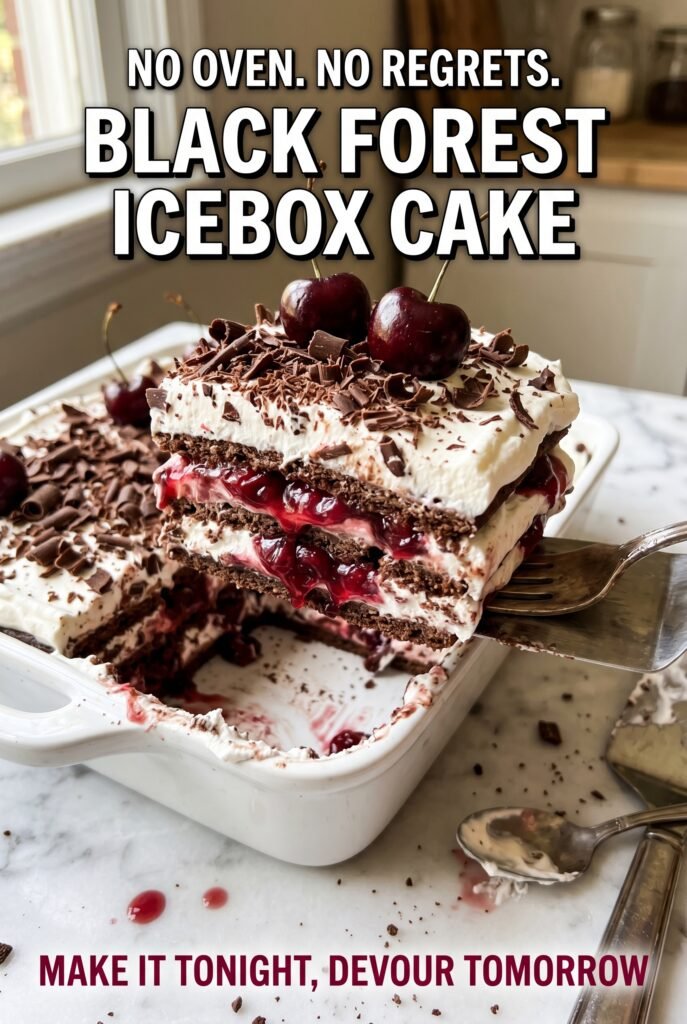
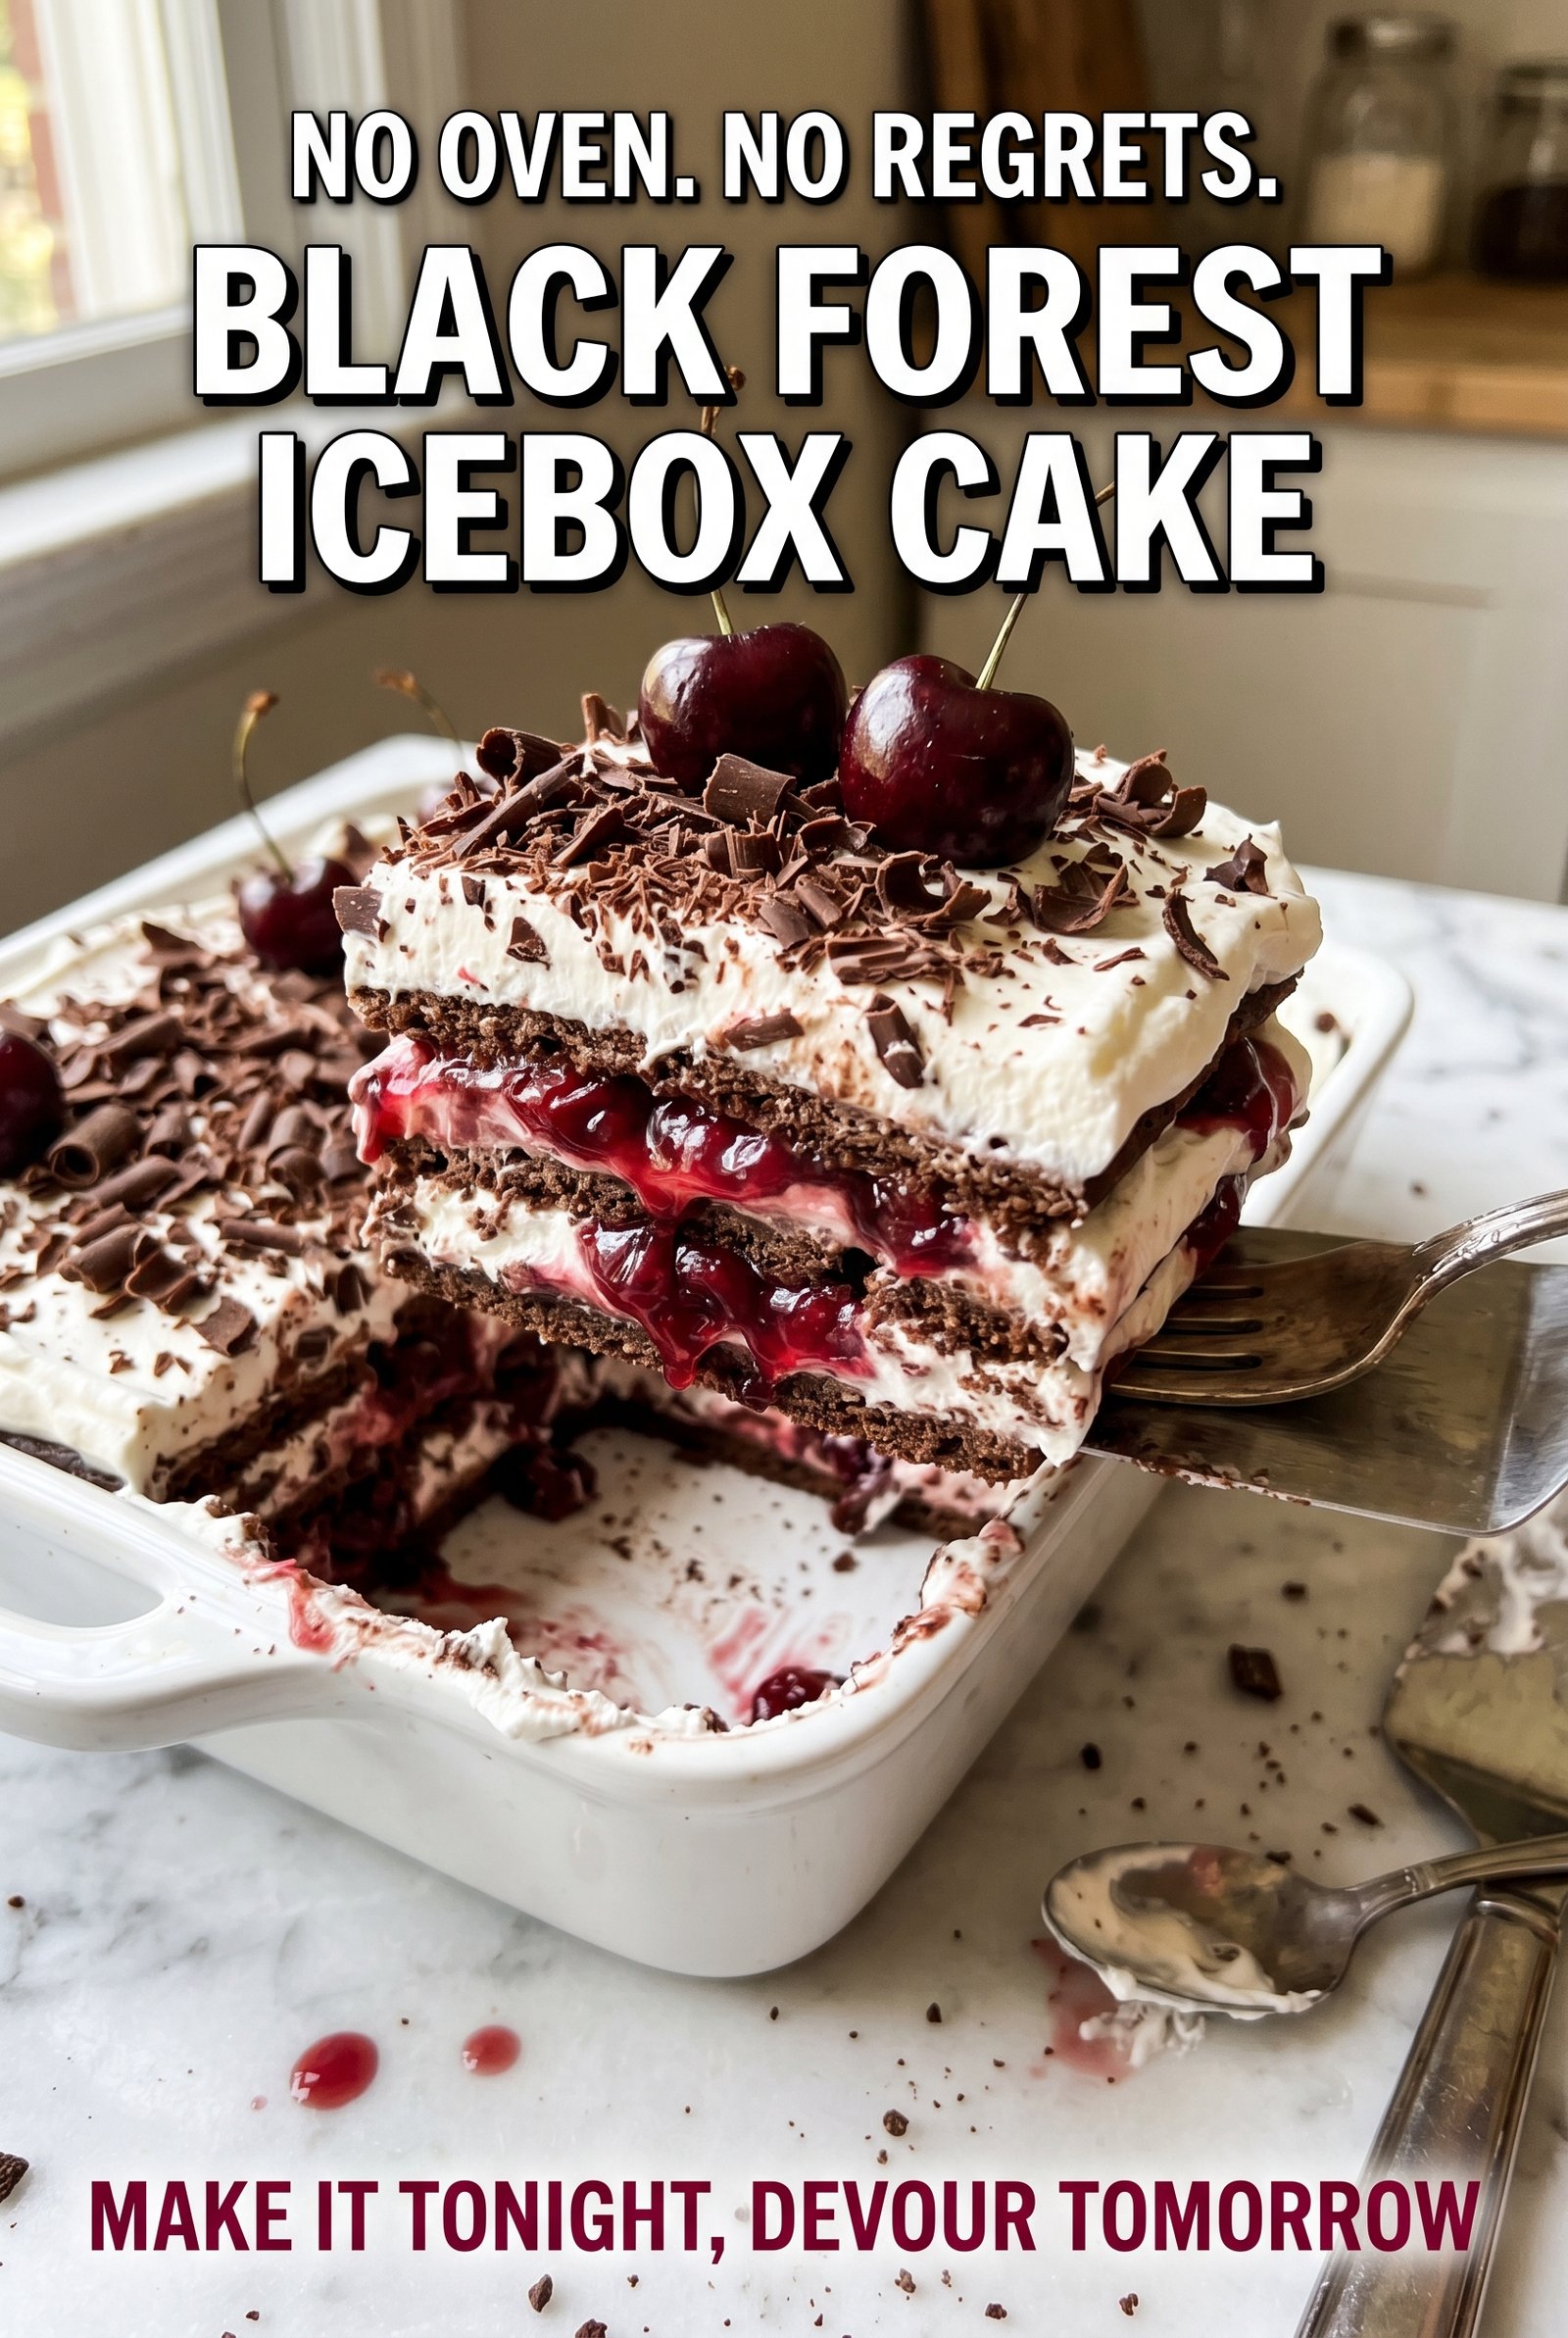
Dark chocolate wafers soften into tender, cake-like layers under billowy whipped cream and glossy cherry filling, and that contrast is what makes a Black Forest icebox cake disappear fast. It cuts cleanly after a long chill, but the texture stays plush and spoonable at the same time. Every slice looks dramatic on the plate without asking for any baking at all.
The trick is balance. Chocolate wafers bring the cocoa bitterness, but they need time in the cream to lose their crunch. Cherry pie filling adds body and shine, while the whipped cream keeps everything light enough that the dessert never turns heavy. I like to chill the bowl before whipping the cream and stop at stiff peaks so the layers stay neat when you stack them.
Below, you’ll find the one layering detail that keeps this dessert from sliding around, plus a few smart swaps if you want to change the fruit or make it a little richer. The best part is how well this dessert waits for you. It gets better after a night in the fridge.
The cookies softened into perfect layers overnight, and the cherry filling stayed put instead of running all over the plate. I also loved that the whipped cream held its shape through the last slice.
Save this Black Forest Icebox Cake for a make-ahead chocolate-and-cherry dessert that slices cleanly and chills up beautifully.
The Reason This Cake Sets Up Instead of Slumping
The structure comes from patience, not flour or eggs. Chocolate wafers absorb moisture from the whipped cream and cherry filling, which turns them from crisp cookies into soft, layered sheets that slice like cake. If you cut into it too soon, the layers will slide and the cookies will still taste dry at the center. Give it at least 6 hours, and overnight is even better.
The other place people run into trouble is the whipped cream. Soft peaks collapse under the weight of the fruit, and overbeaten cream turns grainy when you spread it. Stiff peaks hold their shape between the cookie layers, which is what keeps the finished dessert neat instead of slouchy.
What Each Ingredient Is Actually Doing in This Dessert
- Chocolate wafer cookies — These are the backbone of the cake. They soften into clean, dark layers that mimic chocolate sponge without baking. Regular chocolate sandwich cookies don’t work the same way because the filling adds grease and keeps the layers from absorbing moisture evenly.
- Cherry pie filling — This gives you the cherry flavor, color, and glossy texture that make the dessert look finished. If you swap in homemade cherry compote, cook it down until it’s thick and cool it completely first, or the extra liquid will run into the cream layers.
- Heavy whipping cream — Use real heavy cream here, not whipping topping. It whips into a stable cloud that can hold the fruit and cookies in place. Cold cream whips faster and holds more air, which makes the layers lighter.
- Powdered sugar and vanilla — The sugar sweetens the cream without leaving it gritty, and vanilla rounds out the chocolate. Granulated sugar doesn’t dissolve as smoothly in whipped cream, so the texture can feel sandy.
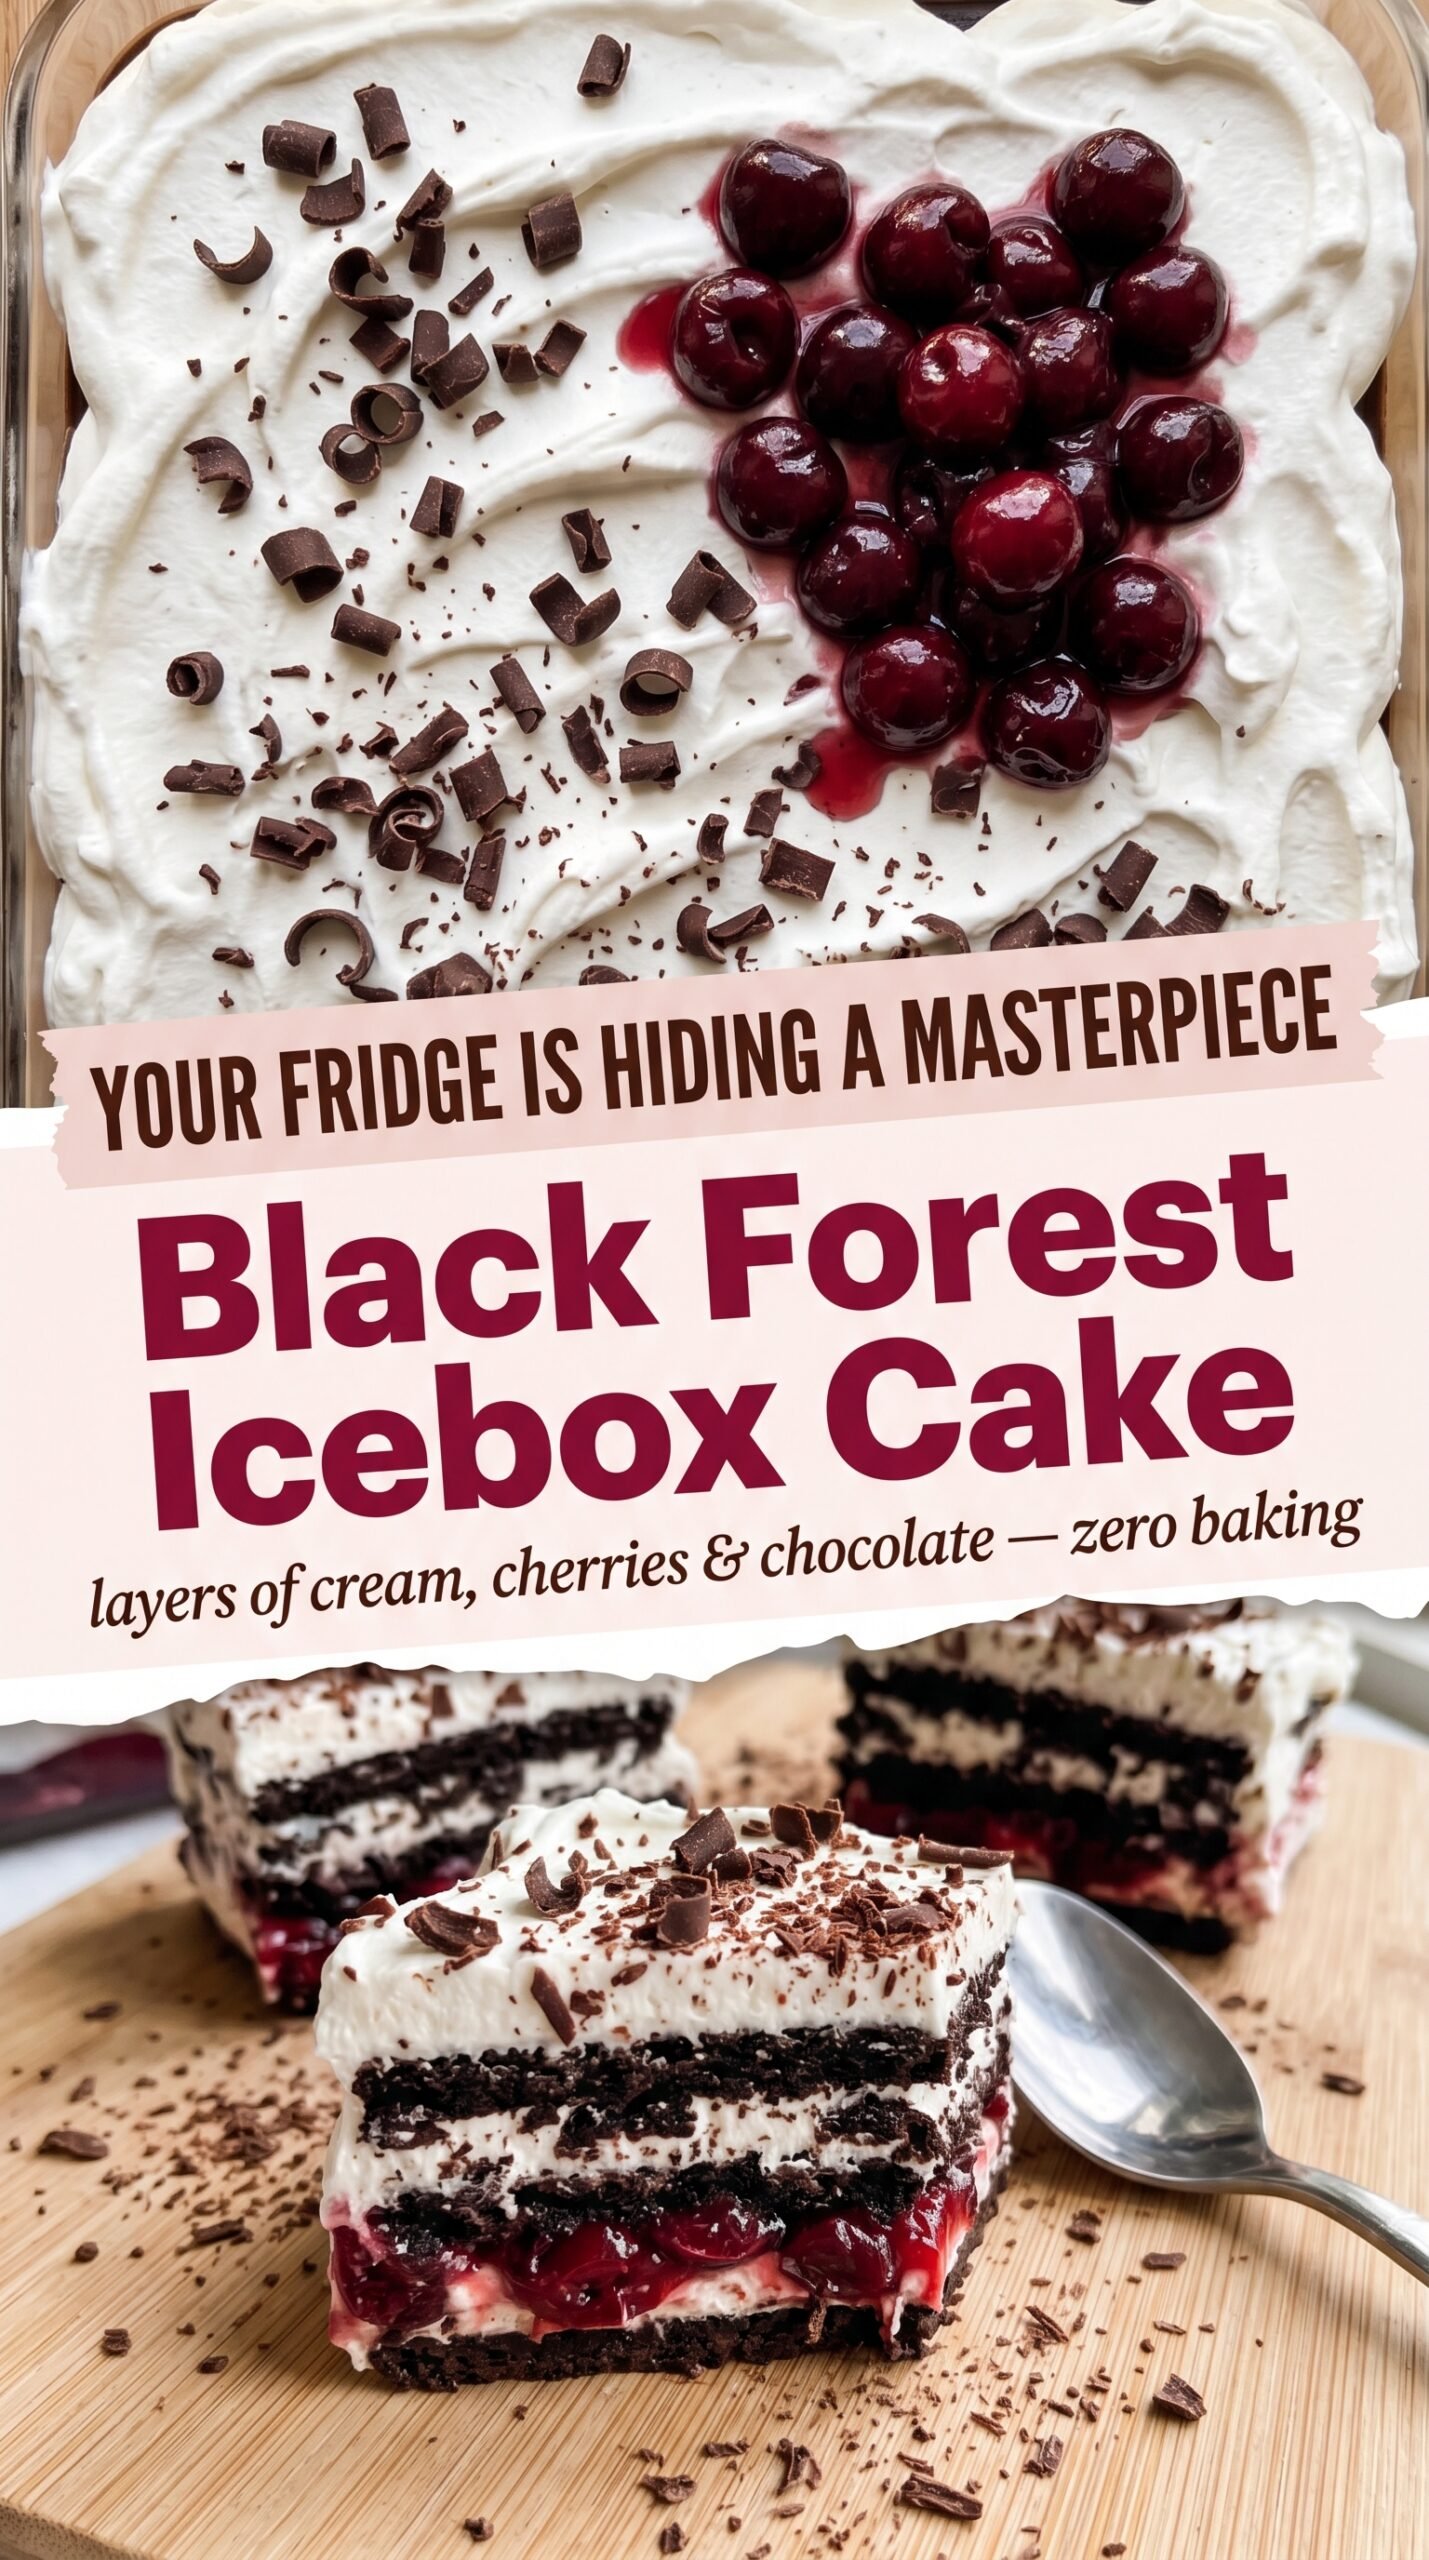
- Dark chocolate shavings — These finish the top with a little bitterness and a nice visual contrast. They’re optional, but they give the dessert that classic Black Forest look without adding extra work.
- Fresh dark cherries — The garnish adds freshness and a firmer bite right at the end. If you can’t find them, skip them rather than using soft canned cherries, which can make the top look muddy.
Building the Layers So the Dessert Holds Its Shape
Whip the Cream to the Right Point
Beat the cold cream, powdered sugar, and vanilla in a chilled bowl until stiff peaks form. The cream should stand straight when you lift the beaters, but it shouldn’t look dry or clumpy. If you stop at soft peaks, the layers will slump once the cookies start soaking up moisture. If you overbeat it, the cream can turn grainy and lose its smooth spread.
Anchor the First Cookie Layer
Spread a thin layer of whipped cream on the bottom of the baking dish before adding cookies. That small swipe keeps the first layer from sliding when you start stacking. Arrange the wafers snugly, breaking a few to fit the edges so the base is covered as evenly as possible. Gaps at the bottom tend to show up as weak spots when you slice later.
Stack Without Pressing Too Hard
Spread whipped cream over the cookies, then spoon the cherry filling over that layer. Keep the fruit close to the edges, but don’t drown the cream completely or the layers will blur together. The goal is visible strata when you cut into it, with enough filling to flavor each bite and enough cream to keep the dessert light. Repeat until the dish is filled, ending with a smooth layer of cream on top.
Chill Until the Cookies Turn Cake-Like
Cover the dish loosely and refrigerate it for at least 6 hours. Overnight gives the best texture because the wafers fully soften and the flavors meld. If you rush this step, the center will still be cookie-crisp while the outer edges taste finished, and that contrast is not the good kind.
Three Ways to Make This Dessert Fit What You Have
Use Homemade Cherry Filling
Cook fresh or frozen cherries with a little sugar and cornstarch until thick and glossy, then cool it completely before layering. You’ll get a brighter fruit flavor and less syrupy sweetness than canned pie filling, but the dessert needs the filling to be fully cooled or the cream will loosen.
Make It Dairy-Free
Use a stable dairy-free whipping cream that’s meant for beating, not plain coconut milk from a can. You’ll still get a fluffy top layer, but the flavor will lean a little coconut-forward depending on the brand. Check that your cookies are dairy-free too, since some chocolate wafers contain milk ingredients.
Add a Deeper Chocolate Note
Fold a spoonful of cocoa powder into the whipped cream or add a layer of finely grated dark chocolate between the cookies. That pushes the dessert closer to a classic Black Forest flavor, with a slightly more bittersweet finish and a richer look in each slice.
Storage and Reheating
- Refrigerator: Store covered for up to 3 days. The cookies soften more each day, so the texture becomes looser after the first day but still tastes good.
- Freezer: It freezes, but the whipped cream loses some of its airy texture when thawed. Freeze slices tightly wrapped, then thaw in the refrigerator if you need to, but I’d treat this as a chilled dessert rather than a freezer dessert.
- Reheating: Don’t reheat it. Serve it straight from the fridge. If it sits out too long, the cream softens and the layers lose the clean edges that make this dessert so pretty.
Answers to the Questions Worth Asking
Black Forest Icebox Cake
Ingredients
Equipment
Method
- In a large chilled bowl, beat cold heavy whipping cream, powdered sugar, and pure vanilla extract with a hand mixer on medium-high speed until stiff peaks form, about 3–4 minutes, with the mixture holding tall peaks when you lift the beaters.
- Spread a thin layer of whipped cream on the bottom of a 9×13-inch baking dish to anchor the first cookie layer.
- Arrange a single layer of chocolate wafer cookies side by side across the bottom of the dish, breaking cookies as needed to fit.
- Spoon and spread a generous layer of whipped cream evenly over the cookies, covering them completely.
- Spoon a layer of cherry pie filling over the whipped cream, spreading it to the edges but leaving a small border of white cream visible.
- Repeat the layers—cookies, whipped cream, cherry pie filling—until all ingredients are used, finishing with a final layer of whipped cream on top.
- Smooth the top layer of whipped cream with an offset spatula so it looks even and level.
- Scatter dark chocolate shavings generously over the top and arrange fresh pitted dark cherries decoratively across the surface.
- Drizzle lightly with maraschino cherry juice if desired for a glossy finish.
- Cover the dish loosely with plastic wrap and refrigerate for at least 6 hours, or overnight, until the cookies soften into cake-like layers and the filling sets thick and sliceable.
- Slice into squares to reveal dark-and-white layers, and serve cold directly from the dish.