
Lemon Garlic Grilled Chicken Breast (Meal Prep)
Juicy grilled chicken breast can be bland fast, but this lemon garlic version stays bright, tender, and worth eating three days in a row. The edges pick up a deep…
Tip: save now, read later.
Juicy grilled chicken breast can be bland fast, but this lemon garlic version stays bright, tender, and worth eating three days in a row. The edges pick up a deep char on the grill while the inside stays clean and moist, which is exactly what meal prep chicken should do. It tastes good straight from the fridge, warm over rice, or sliced into a salad without needing a heavy sauce to rescue it.
The trick is balance. Lemon brings freshness, but too much acid for too long can make the surface of the chicken turn soft and stringy, so the marinade stays in the safe window: long enough to flavor, short enough to protect texture. Olive oil carries the garlic, herbs, and paprika across the meat, while a brief rest after grilling keeps the juices from flooding the cutting board. The chicken finishes tasting seasoned all the way through, not just on the outside.
Below, I’ve included the exact grill timing that keeps the breasts from drying out, plus the storage move that makes this recipe hold up through the week.
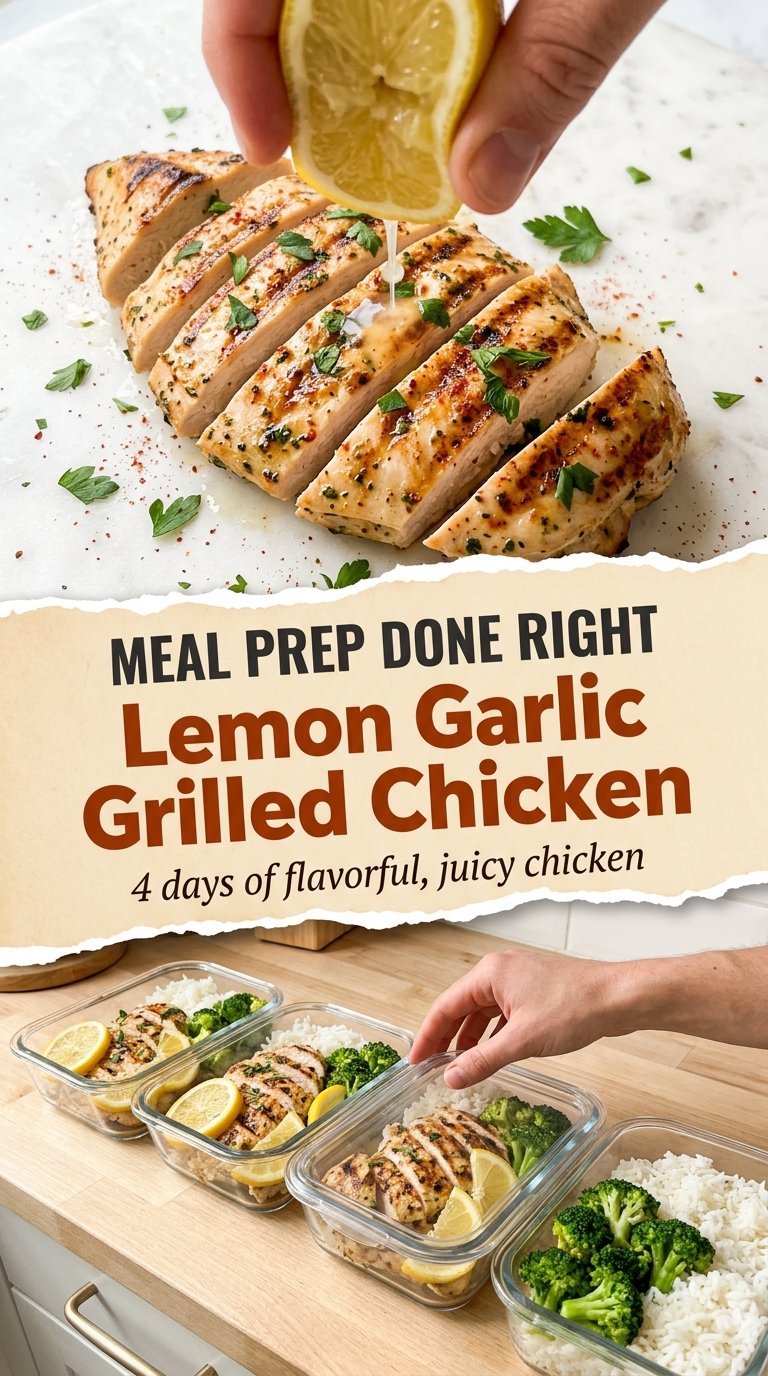
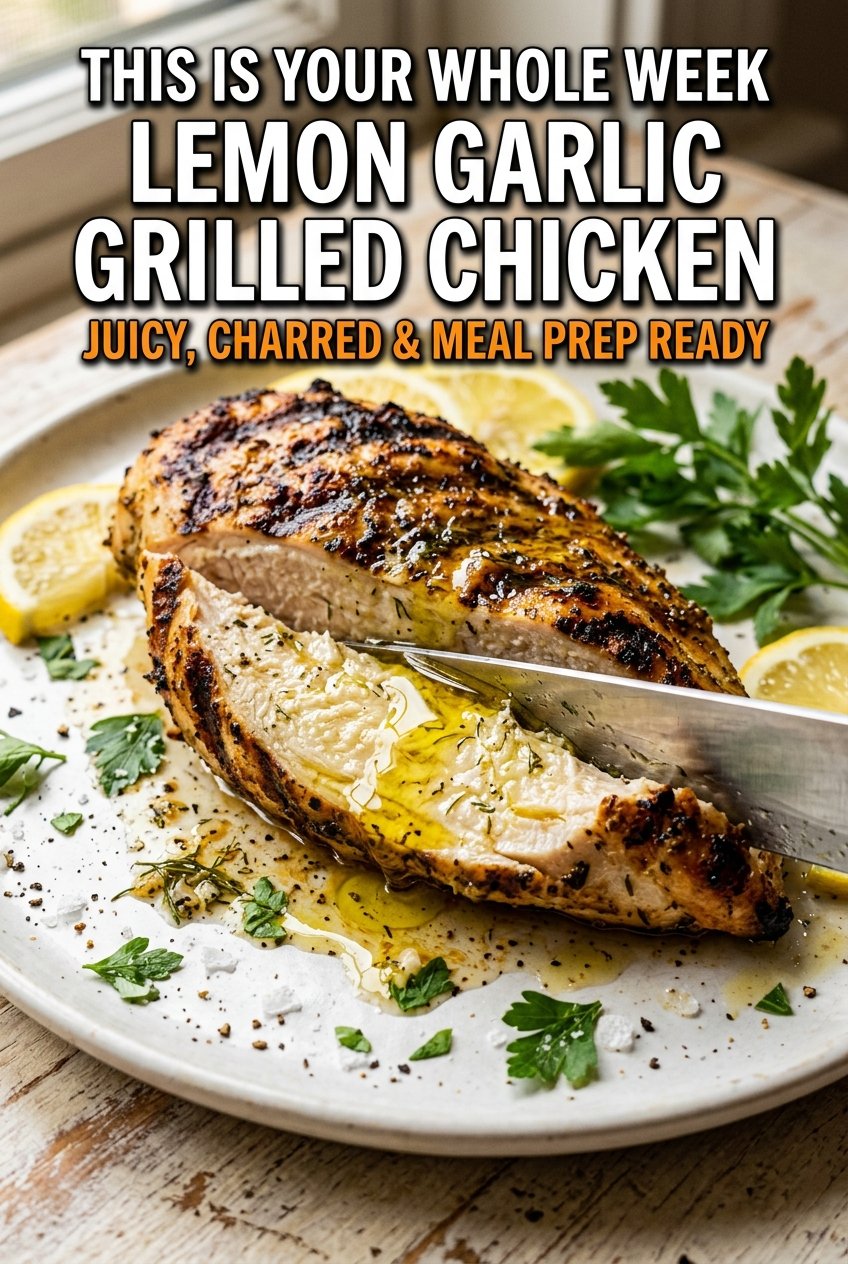
The lemon-garlic marinade kept the chicken super juicy, and the grill marks came out perfect after 6 minutes per side. I sliced it for lunches all week and it never got dry.
Save this lemon garlic grilled chicken for meal prep days when you want juicy chicken that still tastes fresh on day four.
The Shortcut That Makes Lemon Garlic Chicken Stay Juicy on the Grill
Most grilled chicken breast goes wrong in one of two places: the marinade is too sharp, or the meat sits over heat until the center finally catches up with the outside. This version avoids both problems by using enough oil to protect the surface and by pulling the chicken the second it hits 165°F. That leaves you with a clean lemon-garlic flavor and a texture that stays tender after chilling.
Thickness matters more than people expect. If one end of the breast is much thicker than the other, it cooks unevenly and the thin side dries out before the thick side is done. Pounding the chicken to an even thickness gives you even grill marks, easier timing, and less guesswork when you’re portioning for the week.
- Chicken breasts — Look for pieces that are similar in size so they finish at the same time. If yours are thick on one end, pound them lightly between sheets of parchment until the whole breast is even.
- Olive oil — This keeps the lemon from being too aggressive and helps the seasoning cling. A standard everyday olive oil works fine here; there’s no need to use your most expensive bottle.
- Fresh lemon juice and zest — Juice gives the bright tang, but zest is where the real lemon aroma lives. Skip bottled juice if you can; it tastes flatter and doesn’t give the same clean finish.
- Garlic, oregano, thyme, and smoked paprika — Garlic and herbs build the savory backbone, while smoked paprika adds a little color and grill-friendly depth. If you only have sweet paprika, it still works, but the finished chicken will taste a little softer and less smoky.
- Salt — This is what seasons the meat all the way through instead of just coating the surface. If you cut the salt too much, the marinade tastes bright but the chicken itself tastes thin.
Getting the Grill Marks Without Drying Out the Chicken
Mix the Marinade First
Whisk the olive oil, lemon juice, zest, garlic, oregano, thyme, smoked paprika, onion powder, salt, and pepper until the mixture looks slightly thickened and speckled with herbs. That little emulsion helps the seasoning cling to the chicken instead of sliding to the bottom of the bowl. If the garlic is sitting in clumps, the marinade won’t coat evenly, and you’ll end up with hot spots of flavor instead of balanced seasoning.
Let the Chicken Absorb the Flavor
Coat the chicken well, then refrigerate it for at least 30 minutes or up to 8 hours. The minimum gives you surface flavor; the longer rest builds a little more depth without turning the meat mushy. Don’t push it past 8 hours, because the lemon will start to change the texture on the outside of the chicken.
Grill Over Medium-High Heat
Preheat the grill or grill pan until it’s hot enough that the chicken sizzles the moment it lands. Brush the grates with oil, then cook the breasts for 6 to 7 minutes per side, depending on thickness. If the chicken sticks, it usually means the grill wasn’t hot enough yet, so leave it alone for another minute before trying to turn it. You’re looking for deep golden char marks and a firm edge with a little give in the center.
Rest Before Slicing
Move the chicken to a plate and let it sit for 5 minutes before cutting. This is where the juices settle back into the meat instead of running out with the first slice. If you slice immediately, the inside still tastes fine, but the cut surface looks dry and the meal prep containers collect liquid at the bottom.
Three Ways to Adapt It for Real Life
Dairy-Free and Naturally Gluten-Free
This recipe already fits both needs without any special swaps. That’s part of why it’s such a strong meal prep option: you get a clean, simple protein that works with rice, potatoes, salads, or wraps without having to rebuild the whole meal.
Use Chicken Thighs for Extra Forgiveness
Boneless, skinless thighs work well if you want a little more cushion against overcooking. They’ll need a few extra minutes on the grill and they won’t slice as neatly, but they stay juicier and reheat beautifully.
Make It Ahead for the Week
Slice the chicken after it rests, then pack it into containers with your sides while it’s still just warm. That keeps it from steaming itself into dryness as it cools. A squeeze of fresh lemon right before eating wakes everything back up.
Storage and Reheating
- Refrigerator: Store in airtight containers for up to 4 days. The flavor stays bright, though the outside will lose a little of its fresh-grill edge.
- Freezer: Freezes well for up to 3 months if wrapped tightly and packed flat. Thaw overnight in the fridge so the slices reheat evenly.
- Reheating: Warm gently in a skillet over low heat with a splash of water or broth, or microwave in short bursts. High heat dries grilled chicken out fast, especially once it’s already been cooked and chilled.
Answers to the Questions Worth Asking
Lemon Garlic Grilled Chicken Breast (Meal Prep)
Ingredients
Equipment
Method
- Whisk the olive oil, lemon juice, lemon zest, minced garlic, oregano, thyme, smoked paprika, onion powder, salt, and black pepper together in a large bowl or zip-lock bag until combined and uniform.
- Add the chicken breasts to the marinade and turn to coat evenly, then seal and refrigerate for at least 30 minutes (up to 8 hours) for deeper flavor.
- Remove the marinated chicken from the fridge and let it sit at room temperature for 10 minutes while you heat the grill.
- Preheat your grill or grill pan over medium-high heat, then lightly brush the grates with oil to help prevent sticking.
- Place the chicken breasts on the grill and cook for 6–7 minutes per side, until the internal temperature reaches 165°F (74°C) and the grill marks are deep golden-char.
- Transfer the chicken to a plate and rest for 5 minutes before slicing or storing to lock in the juices.
- Slice each breast against the grain into thick pieces, or leave whole, then divide into meal prep containers.
- Refrigerate for up to 4 days, or freeze individually for up to 3 months; reheat until steaming hot, then serve with lemon slices and chopped fresh parsley, squeezing a little extra lemon over the top before eating.