Loaded Nacho Fries with Beef and Jalapeño Cheese Sauce
Crispy fries lose their chance at greatness the second they sit under the wrong topping, and that’s exactly why this version works. The beef is seasoned and cooked until it…
Tip: save now, read later.
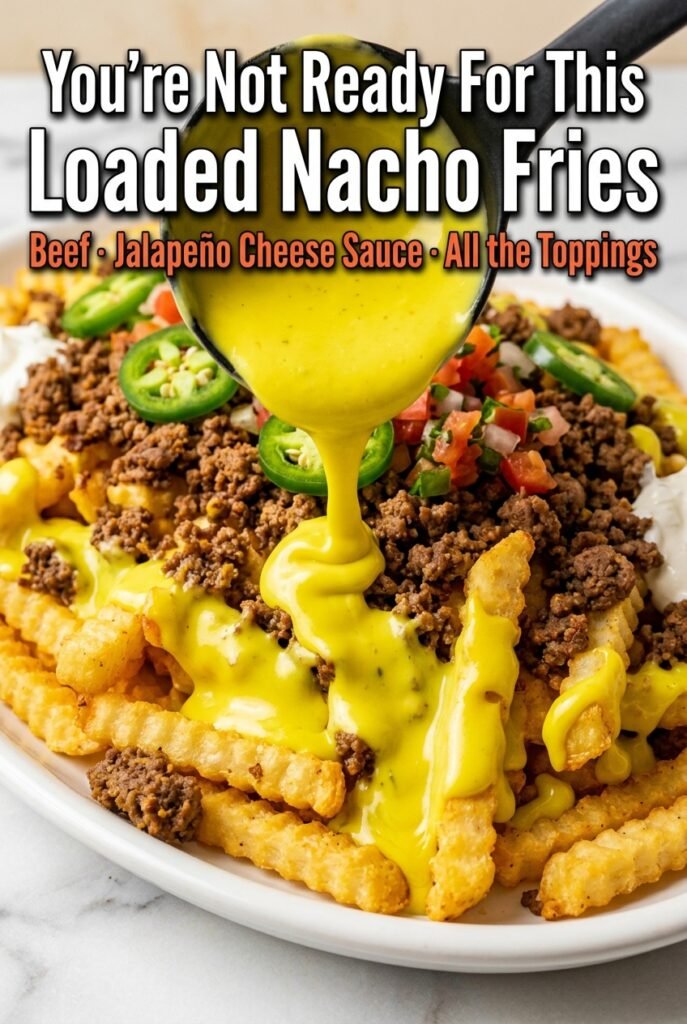
Crispy fries lose their chance at greatness the second they sit under the wrong topping, and that’s exactly why this version works. The beef is seasoned and cooked until it clings to the fries instead of sliding off, and the jalapeño cheese sauce stays silky enough to pour but thick enough to coat every crack and ridge. You get crunch, heat, and that pull-apart cheese moment without ending up with a soggy tray.
The key is building each part with restraint. The fries need enough oil and seasoning to brown hard in the oven, not steam into softness. The cheese sauce also matters more than people think: a little flour gives it body, cheddar brings the sharp bite, and Velveeta keeps it smooth so the sauce doesn’t grain out when it hits the heat from the jalapeños.
Below, I’ll walk through the one mistake that ruins nacho fries fast, how to keep the sauce creamy, and a few smart swaps if you need to work with what’s already in the fridge.
The fries stayed crispy under all that beef and cheese, and the jalapeño sauce was smooth instead of grainy. I used the sour cream on top to cool it down, and my husband kept going back for “one more handful.”
Loaded nacho fries with beef and jalapeño cheese sauce are the kind of pile-up that disappears fast, so save this one for game day, parties, or a night when crispy fries and molten cheese are the whole plan.
The Crunch Dies First When You Rush the Assembly
The biggest failure with loaded fries isn’t the seasoning or the cheese. It’s timing. Once hot fries hit a wet topping and sit for even a few minutes, the bottom layer starts softening and the whole thing turns heavy. That’s why every part here is built to be fast, hot, and ready to stack.
The fries need to come out deeply golden before you even think about assembling. The beef should be cooked and seasoned ahead of the cheese so you’re not scrambling while the fries cool. And the sauce should be kept warm on the lowest heat possible, not boiled, because a broken cheese sauce turns this into a greasy mess instead of a smooth, clingy drizzle.
- Crispy fries are the base that keeps the whole tray from collapsing. Frozen crinkle-cut fries work well because the ridges catch the beef and sauce, but fresh-cut fries need a little extra oil and space on the pan to crisp properly.
- Sharp cheddar gives the sauce its real cheese flavor, but it can turn gritty if it’s dumped into a sauce that’s too hot. Shred it yourself if you can; pre-shredded cheese contains starches that can make the sauce less smooth.
- Velveeta isn’t there for nostalgia. It’s the insurance policy that keeps the sauce silky and stable, especially once the pickled jalapeños and brine go in. If you skip it, expect a sharper sauce with a greater chance of breaking.
- Pickled jalapeño brine brightens the sauce and cuts through the richness. Fresh jalapeños won’t give you the same tang, so if you substitute them, add a small splash of vinegar to get that sharp edge back.
What Each Layer Needs Before It Hits the Fries

The fries need a light coat of oil and seasoning so the surface dries out and browns instead of steaming. If they’re crowded on the pan, they’ll soften before they ever get crisp, and no amount of cheese can fix that. Give them breathing room and flip them once so both sides get that deep, blistered edge.
The beef wants to be cooked first, then drained well before the spices and tomato paste go in. That little bit of tomato paste matters because it gives the meat a sticky, savory coating that helps it stay put on the fries instead of sliding into the corners of the pan. For the cheese sauce, whole milk gives the best body, and the combination of roux, cheddar, and Velveeta creates a pourable sauce that still holds on the fries.
- Ground beef with some fat, like 80/20, has better flavor and browns well. Lean beef works too, but you’ll lose a little richness and may need a touch more seasoning.
- Tomato paste deepens the beef mixture and helps it taste like proper nacho filling rather than plain taco meat. Cook it for the full two minutes so it loses the raw edge and turns darker and sweeter.
- Whole milk makes the sauce thicker and smoother than skim milk. Lower-fat milk can work in a pinch, but the sauce will be thinner and less luxurious.
- Pickled jalapeños bring heat, but more importantly they bring tang. Fresh jalapeños are fine if that’s what you have, but they’ll taste sharper and less balanced unless you add a splash of brine or vinegar.
Building the Fries So They Stay Crispy Under the Toppings
Seasoning the Fries
Toss the fries with oil and the spice mix before they go into the oven so every surface gets coated. The garlic powder and smoked paprika add flavor that survives the bake, while the salt helps draw out a little surface moisture. Spread them in a single layer; if they overlap, the steam gets trapped and the edges never crisp.
Cooking the Beef Until It Clings
Brown the beef over medium-high heat until the pink is gone and the bits at the bottom of the pan are deeply caramelized. Drain the excess fat so the topping doesn’t puddle under the fries, then stir in the spices and tomato paste. The mixture should look thick and glossy, not wet.
Making the Jalapeño Cheese Sauce
Melt the butter, whisk in the flour, and cook it long enough to smell slightly nutty. That short roux step keeps the sauce from tasting pasty. Add the milk slowly and keep whisking until it thickens enough to coat a spoon, then lower the heat before the cheese goes in. If the pan is too hot, the cheddar can turn grainy or separate.
Stacking and Serving Fast
Assemble on an oven-safe platter or sheet pan while everything is hot. Start with the fries, add the beef, then pour the cheese sauce over the top in ribbons so some of it settles into the edges and some stays visible on the surface. Finish with the cold toppings last so you get contrast instead of wilted herbs and melted sour cream.
How to Adapt These Loaded Nacho Fries Without Losing the Point
Make It Gluten-Free
Use a gluten-free flour blend in the cheese sauce and check that your frozen fries are certified gluten-free. The texture stays close to the original because the roux still thickens the milk the same way, and the rest of the dish is naturally gluten-free once the toppings are verified.
Skip the Beef and Keep the Bite
Swap the beef for seasoned black beans or crumbled plant-based meat if you want a vegetarian version. Black beans give you a softer, earthier result, while plant-based crumbles keep more of the original texture and hold up better under the cheese sauce.
Turn Down the Heat Without Losing the Jalapeño Flavor
Use fewer pickled jalapeños and skip some of the brine if you want a milder sauce. You’ll still get that tangy pepper flavor, but the sauce won’t hit as hard on the back end.
Storage and Reheating
- Refrigerator: Store the fries, beef, and cheese sauce separately for up to 3 days. The fries will lose their crispness once chilled.
- Freezer: Freeze the beef only if you want to get ahead; the fries and cheese sauce don’t freeze well in their finished form. The sauce can separate after thawing.
- Reheating: Reheat fries in a hot oven or air fryer until crisp again, warm the beef in a skillet, and reheat the sauce low and slow with a splash of milk. Microwaving the full assembled dish is the fastest way to end up with soggy fries and a broken sauce.
Answers to the Questions Worth Asking

Loaded Nacho Fries with Beef and Jalapeño Cheese Sauce
Ingredients
Equipment
Method
- Preheat your oven to 425°F (220°C). Toss frozen crinkle-cut fries with olive oil, garlic powder, smoked paprika, salt, and black pepper, then spread in a single layer on a large baking sheet for even browning.
- Bake the fries for 25–30 minutes at 425°F (220°C), flipping halfway, until deeply golden and crispy at the edges. Remove and keep them hot while you cook the beef and sauce.
- Heat a skillet over medium-high heat and add ground beef, cooking 6–8 minutes until fully browned with no pink remaining. Break the meat apart as it cooks for consistent crumbles.
- Drain excess fat, then stir in chili powder, cumin, garlic powder, onion powder, smoked paprika, salt, black pepper, and tomato paste. Cook for 2 more minutes until fragrant and coated, then set aside.
- Melt unsalted butter in a saucepan over medium heat. Whisk in all-purpose flour and cook for 1 minute until it smells slightly nutty.
- Slowly pour in whole milk while whisking constantly to prevent lumps. Cook for 3–4 minutes until the sauce thickens enough to coat the back of a spoon.
- Reduce heat to low and add sharp cheddar cheese and Velveeta a handful at a time. Stir until fully melted and silky smooth.
- Stir in minced pickled jalapeños, jalapeño brine, and garlic powder, then taste and adjust salt. Keep warm on low heat, stirring occasionally, so it stays pourable.
- Pile the baked fries on a large oven-safe platter or sheet pan and spoon the seasoned beef evenly over the fries. Distribute the beef so every bite has topping.
- Pour the warm jalapeño cheese sauce generously over everything, letting it cascade and pool into the fries. Top with pickled jalapeño slices, pico de gallo (or diced tomatoes), sour cream dollops, green onions, cilantro, and a drizzle of hot sauce.
- Serve immediately while the fries are still crispy, with extra cheese sauce on the side for dipping. Add any additional hot sauce to taste right before serving.