Homemade Raspberry Pie
Fresh raspberry pie has a way of disappearing faster than almost any other fruit dessert on the table. The filling turns jammy and bright, the berries keep just enough shape…
Tip: save now, read later.
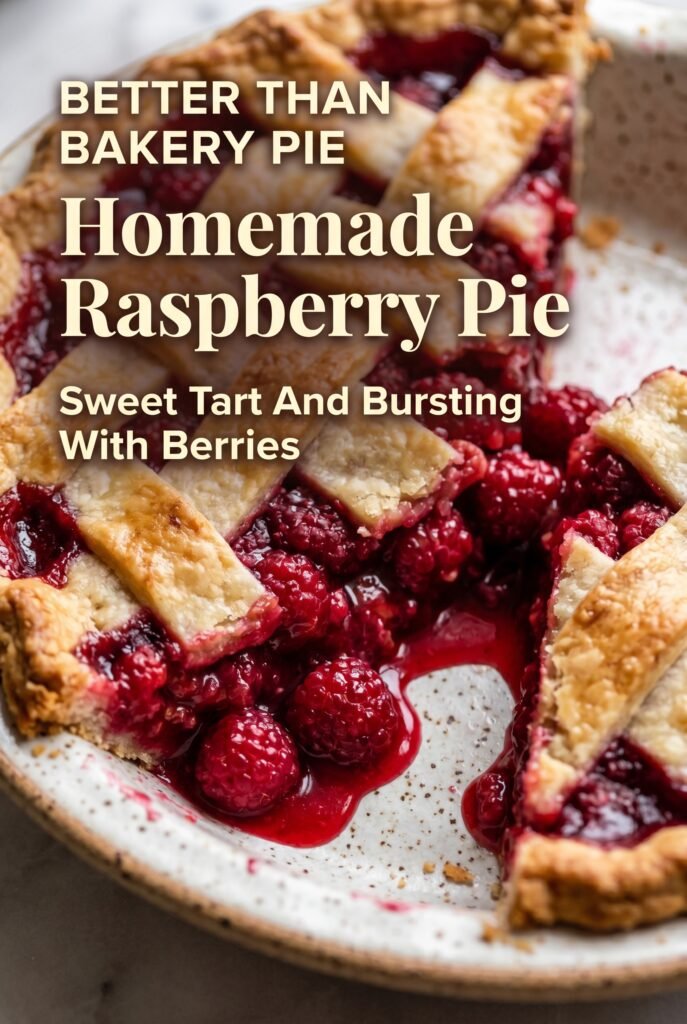
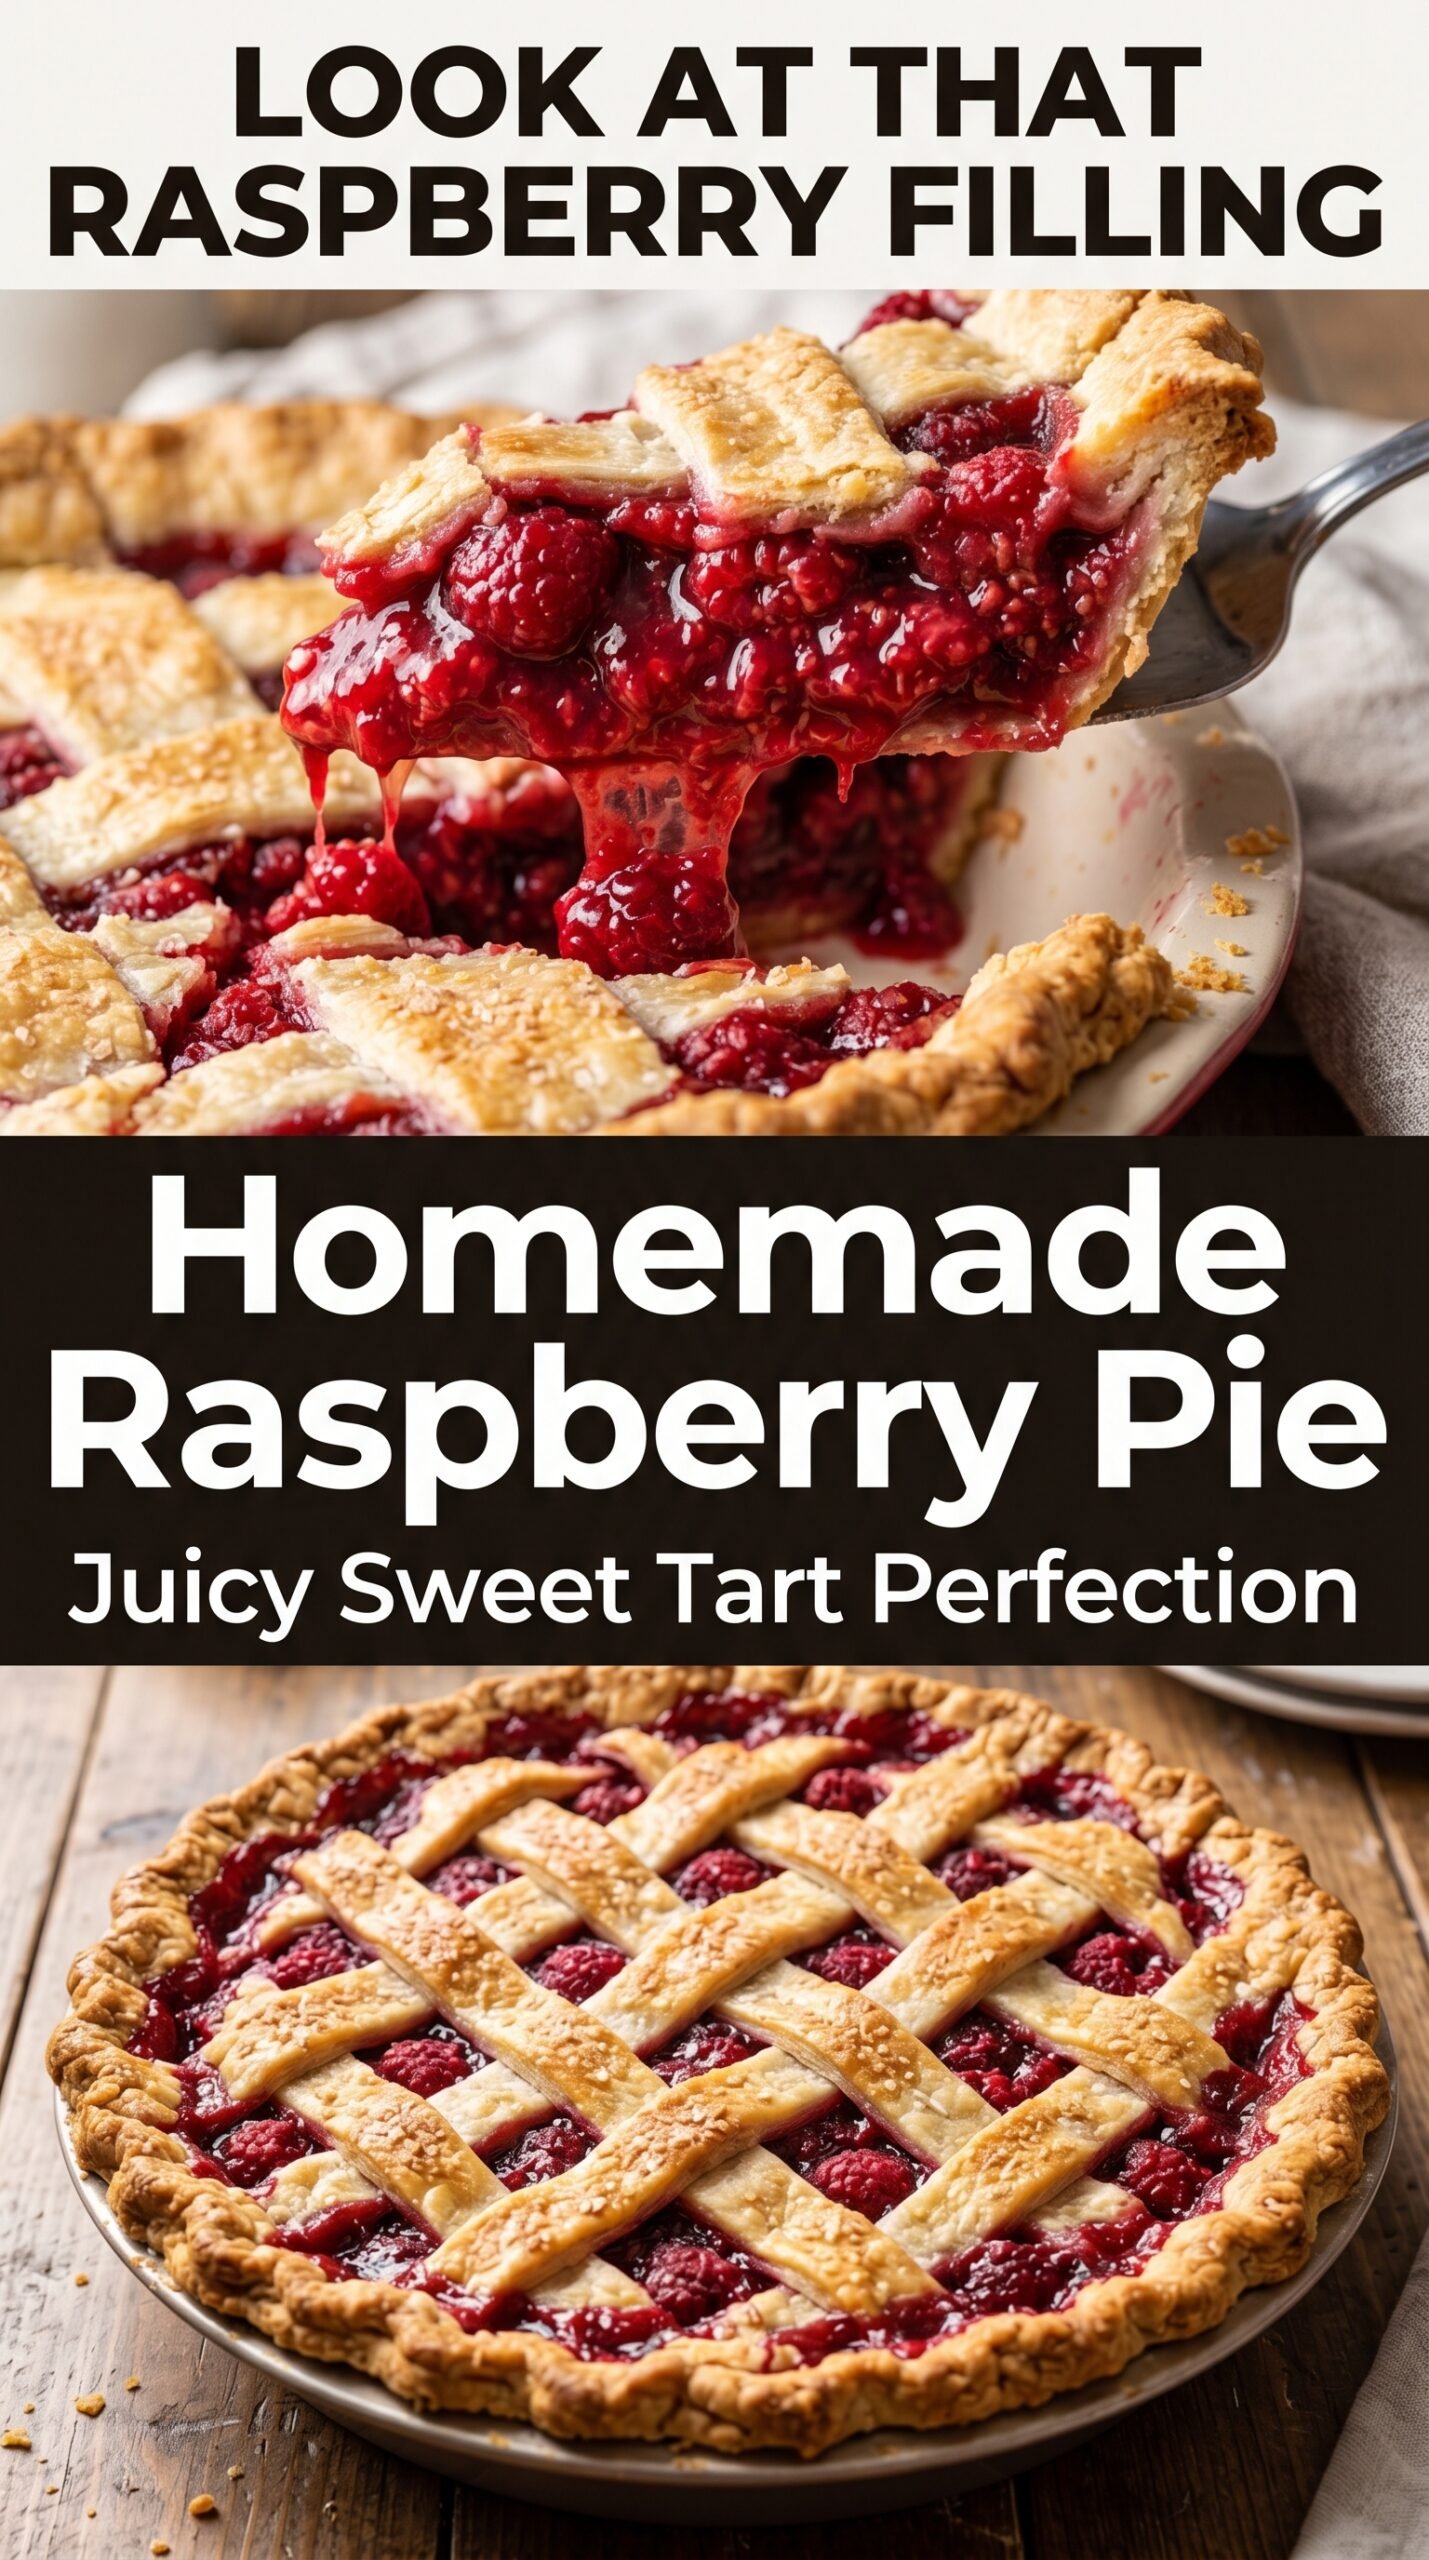
Fresh raspberry pie has a way of disappearing faster than almost any other fruit dessert on the table. The filling turns jammy and bright, the berries keep just enough shape to give every bite some texture, and the crust stays flaky if you give the pie the time it needs to cool. The best version has balance: sweet, but not cloying; thick enough to slice cleanly, but still soft and juicy at the center.
What makes this pie work is the combination of cornstarch, lemon juice, and a little butter. Raspberries release a lot of liquid as they bake, and without enough thickener the filling slides apart when you cut it. The lemon sharpens the fruit instead of letting the sugar flatten it, and the butter adds a round, glossy finish that makes the filling taste richer than it is.
Below, I’ve included the small details that matter most: how to keep the bottom crust from turning soggy, when the filling has actually thickened enough, and why cooling the pie all the way through is the difference between neat wedges and a spoonable mess.
The filling set up beautifully after cooling, and the crust stayed crisp on the bottom instead of getting soggy. I used fresh raspberries and the sweet-tart balance was spot on.
Love the glossy, jammy finish of this homemade raspberry pie? Save it to Pinterest for the days when you want a berry dessert with a flaky crust and clean slices.
The Reason Raspberry Pie Sets Cleanly Instead of Running
Raspberry pie fails most often for one reason: the filling gets pulled from the oven before the cornstarch has had time to do its job. The center should be bubbling, not just warm. That bubbling is what tells you the starch has reached the temperature it needs to thicken properly as the pie cools.
The other trap is cutting too soon. Even a well-baked pie needs a long rest so the juices settle and the filling firms up. If you slice while it’s still hot, the filling will look loose no matter how carefully you baked it. Let it cool completely, and the slices hold together with a glossy, spoonable center.
What Each Ingredient Is Actually Doing in This Pie
- Fresh raspberries — These bring the bright, tangy flavor and the soft, juicy texture that defines the pie. Frozen berries can work in a pinch, but don’t thaw them first or they’ll leak extra liquid and make the filling harder to set.
- Granulated sugar and brown sugar — The white sugar sweetens cleanly, while the brown sugar adds a deeper note that softens the sharpness of the berries. If you only have white sugar, use it for all of the sweetness and the pie will still work, just with a slightly brighter fruit flavor.
- Cornstarch — This is the thickener that keeps the filling from pouring out when you cut the pie. Flour won’t give the same clear, glossy finish, and you’d need more of it to get close.
- Lemon juice — A small amount wakes up the berries and keeps the filling from tasting flat. Bottled lemon juice works here, though fresh gives a cleaner edge.
- Butter — A few small pieces on top of the filling melt into the fruit and round out the texture. It doesn’t replace the thickener, but it does give the filling a richer, smoother finish.
- Pie crust — A sturdy, well-chilled double crust holds up best under juicy fruit. If you’re using a homemade crust, keep the dough cold right up until it goes into the oven so the layers stay flaky instead of shrinking.
Building the Pie So the Bottom Crust Stays Flaky
Getting the Crust Ready
Roll the bottom crust into the pie plate and keep it cold while you mix the filling. Warm dough softens fast, and that’s when the crust starts shrinking in the oven instead of holding its shape. If the dough tears, patch it with a small piece rather than stretching it, because stretched dough tends to snap back as it bakes.
Mixing the Berry Filling
Stir the raspberries with the sugars, cornstarch, lemon juice, vanilla, and almond extract until the berries are evenly coated. The fruit will look a little dry at first, then turn glossy as the sugar starts drawing out the juices. Don’t let the mixture sit too long before baking or you’ll end up with extra liquid pooled in the bowl instead of thickening in the oven.
Sealing and Venting
Spoon the filling into the crust, dot it with butter, then add the top crust or lattice. Seal the edges well so the juices don’t leak out and burn on the pan. If you’re using a full top crust, cut vents that are large enough for steam to escape; tiny slits trap moisture and can make the center gummy.
Baking Until the Center Bubbles
Start the pie at 400°F so the crust sets quickly, then lower the temperature once it has begun to brown. The pie is done when the top is deeply golden and you can see thick, slow bubbles pushing up through the vents or lattice. If the edges brown too fast, shield them with foil so the center has time to catch up without burning the crust.
Make It With Frozen Raspberries
Use frozen berries straight from the freezer and increase the baking time a little if needed. Thawing them first releases more juice, which can make the filling loose before the cornstarch has a chance to thicken it.
Gluten-Free Crust
Swap in your favorite gluten-free double crust and chill it well before baking. Gluten-free dough can be more fragile, so work it gently and use parchment if you need help transferring the top crust.
Dairy-Free Version
Leave out the butter dots or replace them with a plant-based butter alternative. The filling will still set, though it will taste a little less rich and glossy.
Using a Lattice Top for Extra Visual Appeal
A lattice lets more steam escape, which can help the filling thicken a little faster and gives the pie a more rustic finish. It also browns faster than a solid top, so keep an eye on it during the last 15 minutes of baking.
Storage and Reheating
- Refrigerator: Store covered for up to 4 days. The crust softens a bit after the first day, but the filling stays nicely sliceable.
- Freezer: Freeze baked pie slices or the whole pie tightly wrapped for up to 2 months. Thaw in the refrigerator overnight so the crust doesn’t turn soggy from rapid condensation.
- Reheating: Warm slices in a 300°F oven until the filling loosens slightly and the crust crisps back up. The microwave works in a pinch, but it softens the crust and makes the filling runnier.
Answers to the Questions Worth Asking

Homemade Raspberry Pie
Ingredients
Equipment
Method
- Preheat oven to 400°F (200°C). Set out a 9-inch pie plate and get the pie crusts ready.
- Roll one pie crust into a 9-inch pie plate. Gently press it into the corners without stretching.
- In a large bowl, combine fresh raspberries, granulated sugar, brown sugar, cornstarch, lemon juice, vanilla extract, and almond extract. Toss until the berries are evenly coated and the mixture looks thick.
- Spoon filling into the prepared crust. Spread it out evenly so it bakes at the same rate.
- Dot the filling with butter pieces. Distribute the butter across the top of the filling for richness.
- Place the second crust over the filling or create a lattice crust. Trim any excess crust so the top sits neatly.
- Seal and crimp the edges. Press firmly along the rim to keep the filling from leaking.
- Cut vents if using a full top crust. Make a few slits so steam can escape.
- Whisk egg and water together. Brush the egg wash over the crust for a glossy, golden finish.
- Bake for 20 minutes at 400°F (200°C). Look for early browning on the edges.
- Reduce oven temperature to 375°F (190°C) and continue baking for 30–35 minutes. Bake until golden brown and bubbly in the center.
- Cool completely before slicing. Let the filling set so each slice holds together.
- Serve the raspberry pie with whipped cream or vanilla ice cream. Add toppings right before serving for the best texture.