Homemade Reese’s Peanut Butter Cups
Homemade Reese's Peanut Butter Cups are a truly delightful treat that mix smooth, creamy peanut butter with rich chocolate in every bite. They have that perfect balance of sweet and…
Tip: save now, read later.
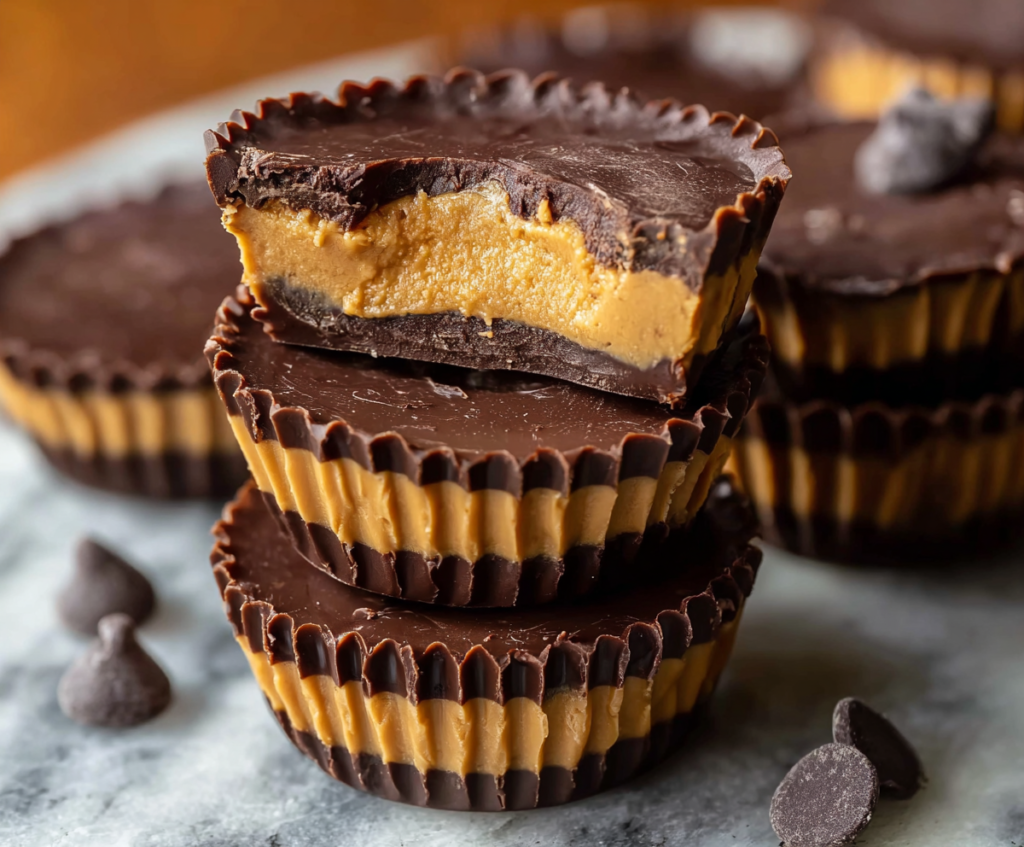
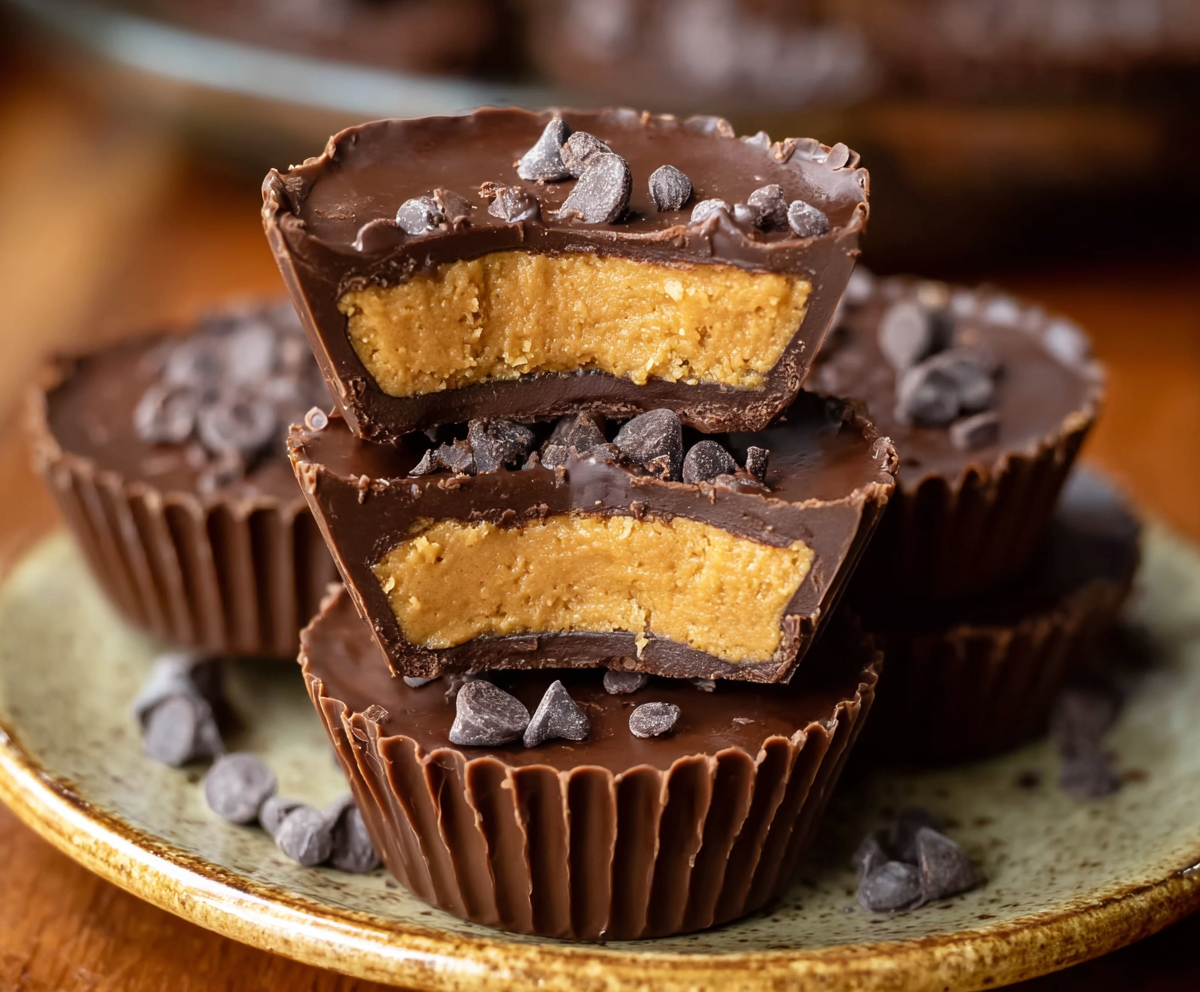
Homemade Reese’s Peanut Butter Cups are a truly delightful treat that mix smooth, creamy peanut butter with rich chocolate in every bite. They have that perfect balance of sweet and salty flavors, just like the classic candy you know and love, but even better because you made them yourself! The texture is soft and melt-in-your-mouth, making them an irresistible snack or dessert.
I love making these peanut butter cups because it’s surprisingly simple, and you can customize the sweetness and peanut butter flavor exactly how you like. One tip I always follow is to chill the cups well between layers so they hold together nicely, making them easier to eat and share. It’s also fun to experiment a bit with adding a sprinkle of sea salt on top for an extra pop of flavor—that little touch really makes a difference.
These homemade peanut butter cups are great for sharing with friends or keeping tucked away for a little personal treat. I like to serve them up in small paper liners, just like the store-bought ones, which makes them feel special and perfect for gifting too. There’s something so satisfying about making a classic candy at home and watching everyone’s faces light up with delight when they taste them fresh from the fridge.
Key Ingredients & Substitutions
Peanut Butter: Creamy peanut butter works best for that smooth, classic texture. Look for unsweetened or lightly salted to balance the sweetness. If you have allergies, sunflower seed butter can be a great nut-free substitute.
Powdered Sugar: This adds sweetness and helps thicken the peanut butter mixture. You can swap it with coconut sugar powder for a less processed alternative, but it might change the texture slightly.
Chocolate Chips: Semi-sweet chocolate chips are ideal for a nice balance of sweetness. If you prefer a richer flavor, use dark chocolate. For a sweeter outcome, try milk chocolate chips instead.
Butter & Oil: Butter makes the peanut butter filling creamy, while a bit of oil in the chocolate helps it melt smoothly and shine. Coconut oil adds a slight coconut flavor, which some people enjoy, but vegetable oil works fine too.
How Can I Get Smooth, Even Layers with These Peanut Butter Cups?
The secret to perfect peanut butter cups is layering carefully and chilling between steps.
- Start by melting chocolate gently, stirring often to avoid burning.
- Pour the first chocolate layer in each cup and spread it evenly by gently tilting the tin.
- Chill this layer until firm—this keeps the peanut butter from mixing into the chocolate.
- Add the peanut butter filling and press it flat so the chocolate covers smoothly later.
- Top with the second chocolate layer, making sure to cover the peanut butter completely for a neat finish.
- Chill again until set, then carefully remove the paper liners to keep the cups intact.
Patience between steps is key here, and it really pays off with clean layers and a satisfying bite every time.
Equipment You’ll Need
- Muffin tin – holds the paper liners in place and shapes the peanut butter cups perfectly.
- Paper cupcake liners – makes removing the cups easy and keeps them neat.
- Microwave-safe bowl – for melting the chocolate quickly and evenly.
- Spoon or small spatula – helps spread chocolate layers smoothly.
- Mixing bowl – to combine the peanut butter filling ingredients thoroughly.
Flavor Variations & Add-Ins
- Swap peanut butter for almond or cashew butter for a different nutty taste that still feels creamy.
- Mix in mini chocolate chips or chopped nuts into the peanut butter filling for a crunchy surprise.
- Add a pinch of cinnamon or vanilla extract to the peanut butter layer for extra warmth and depth.
- Top each cup with a sprinkle of sea salt before the final chocolate layer to enhance the sweet and salty flavor balance.
Homemade Reese’s Peanut Butter Cups
Ingredients You’ll Need:
For The Peanut Butter Filling:
- 1 cup creamy peanut butter (preferably unsweetened or lightly salted)
- 1 cup powdered sugar
- 1/4 cup unsalted butter, softened
- Pinch of salt (optional, if peanut butter is unsalted)
For The Chocolate Coating:
- 2 cups semi-sweet chocolate chips (or chocolate melting wafers)
- 1 tablespoon vegetable oil or coconut oil (for smoother chocolate)
How Much Time Will You Need?
Making these peanut butter cups takes about 15 minutes of hands-on work, plus 1 hour for chilling so they set properly. The process is simple and quick, with easy mixing and layering steps.
Step-by-Step Instructions:
1. Prepare Your Workspace and Ingredients:
Line a muffin tin with paper cupcake liners to make removal easy. In a bowl, mix the peanut butter, powdered sugar, softened butter, and a pinch of salt (if you use it) until it’s smooth and creamy. Set this filling mixture aside while you melt the chocolate.
2. Melt the Chocolate:
Put the chocolate chips and vegetable or coconut oil in a microwave-safe bowl. Heat them in 30-second bursts, stirring well after each session until the chocolate is completely melted and smooth. This makes it easier to spread and gives it a nice shine.
3. Layer the Chocolate and Peanut Butter:
Spoon about 1 tablespoon of melted chocolate into each cupcake liner. Tilt the tin carefully to spread chocolate evenly along the bottom. Pop the tray in the refrigerator for 10 minutes to let this layer harden.
Once firm, add about 1 tablespoon of the peanut butter filling on top of the chocolate layer in each cup. Press it gently to make a flat layer.
Then, pour another tablespoon of melted chocolate over the peanut butter to cover it completely.
4. Chill and Serve:
Put the peanut butter cups back in the refrigerator for at least 1 hour until they are fully set and firm.
Remove the cups from the tin and peel off the paper liners. They’re ready to enjoy! You can eat them straight from the fridge or let them sit at room temperature for a softer bite.
Can I Use Natural Peanut Butter Instead?
Yes! Just make sure to stir it well first since natural peanut butter separates. You might need to add a little extra powdered sugar to help the filling hold together better.
How Should I Store Homemade Peanut Butter Cups?
Store them in an airtight container in the refrigerator for up to 2 weeks. You can also freeze them for up to 3 months—just thaw in the fridge before eating.
Can I Make These Peanut Butter Cups Dairy-Free?
Absolutely! Use a dairy-free butter substitute and check that your chocolate chips are vegan or dairy-free to keep this treat allergen-friendly.
What Can I Substitute for Powdered Sugar?
If you need a substitute, you can use finely ground coconut sugar or a sugar-free powdered sweetener, but keep in mind the texture and sweetness may vary slightly.