
Italian Dressing Baked Chicken
Golden-baked chicken with crisp edges and a juicy center is exactly what you want on a busy night, and Italian dressing does the heavy lifting here. It brings vinegar, oil,…
Tip: save now, read later.
Golden-baked chicken with crisp edges and a juicy center is exactly what you want on a busy night, and Italian dressing does the heavy lifting here. It brings vinegar, oil, herbs, garlic, and salt in one move, which means the chicken gets seasoned all the way through without a long list of separate ingredients. The Parmesan on top turns the surface a little savory and crusty, so each slice tastes like more than the sum of its parts.
The trick is in the bake. A hot oven helps the outside brown before the chicken dries out, and letting the excess marinade drip off keeps the dish from steaming in a puddle. You still get tenderness from the dressing, but you also get those caramelized edges that make plain baked chicken worth repeating.
Below, I’ve included the timing that keeps the chicken juicy, the one step that keeps the top from turning soggy, and a few smart ways to change it up if you want to adjust the heat, dairy, or serving style.
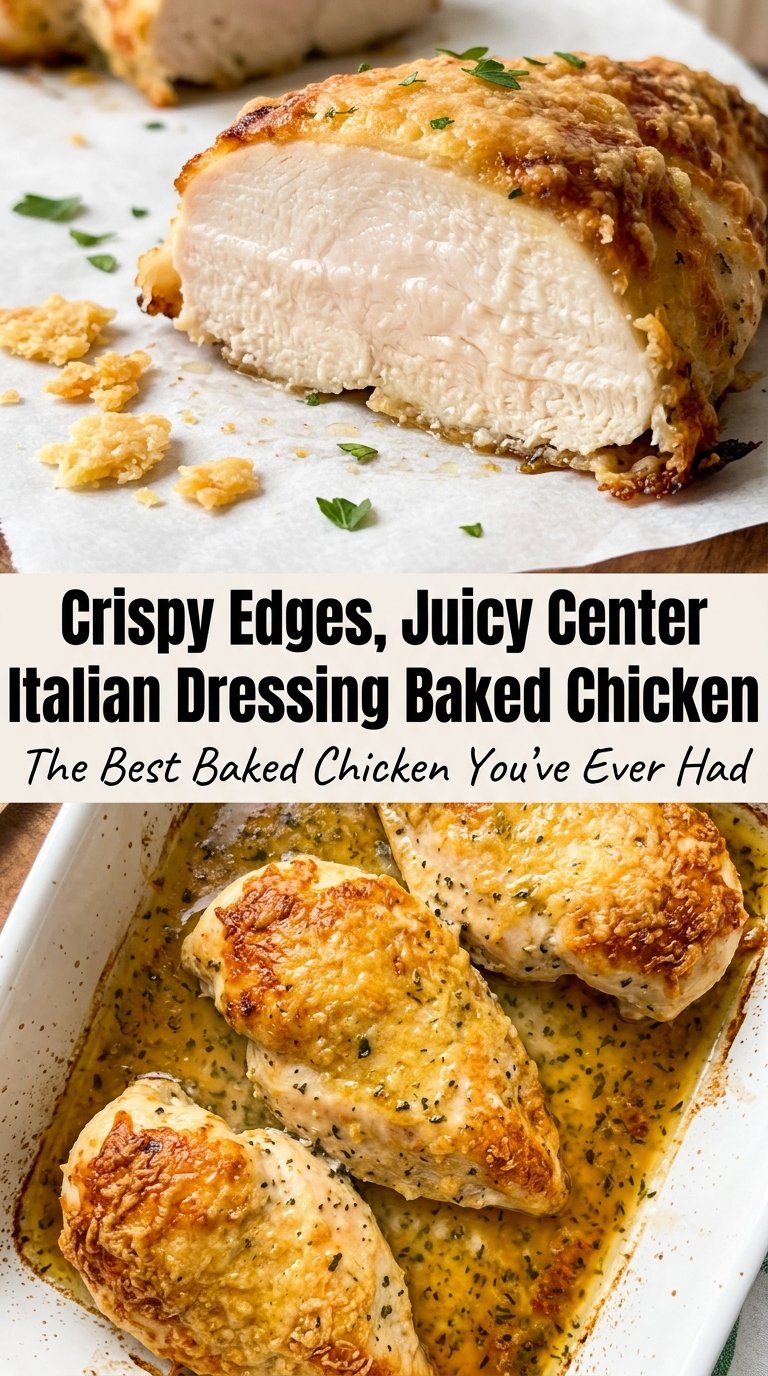
The chicken stayed juicy and the Parmesan got this little golden crust on top. I marinated it for about 4 hours and it came out with so much flavor that I didn’t even need sauce.
Marinated Italian dressing baked chicken with a golden Parmesan top and juicy, tangy flavor
The Reason Italian Dressing Keeps Baked Chicken Tender Instead of Dry
Italian dressing works here because it brings acid, oil, and seasoning in one pour. The acid lightly firms the outside of the chicken while the oil helps carry the herbs and garlic into every bite, and that combination is why the meat tastes seasoned instead of merely coated. The mistake most people make is using too much dressing for too long and expecting it to behave like a brine; it doesn’t. A few hours is plenty for boneless breasts, and eight hours is the upper limit before the texture starts to get a little soft at the edges.
Another thing that matters is how the chicken goes into the pan. If it sits in a deep pool of marinade, the top will steam and the Parmesan won’t brown properly. Let the excess drip off, arrange the pieces in a single layer, and bake them hot enough to give the surface a little color before the center overcooks.
What Each Ingredient Is Actually Doing in This Dish
- Italian dressing — This is the backbone of the recipe. It already contains oil, vinegar, herbs, and salt, so it seasons and tenderizes at the same time. Store-bought works well here, though a thicker dressing usually clings to the chicken better than a thin one.
- Garlic powder and onion powder — These round out the dressing and keep the flavor from tasting flat after baking. Fresh garlic can burn in the oven, but powdered versions stay mellow and savory.
- Dried Italian seasoning — This boosts the herb flavor so it still comes through after the chicken bakes. If your dressing is already heavily herb-based, you can reduce it a bit, but I wouldn’t skip it entirely unless the dressing is especially bold.
- Parmesan cheese — Parmesan gives the top a salty, nutty crust that the dressing alone can’t create. Freshly grated melts and browns better than the shelf-stable kind, which tends to stay gritty.
- Lemon slices — The lemon is for serving, not baking. A squeeze over the finished chicken wakes up the herbs and cuts through the richness of the Parmesan.
Getting the Chicken Browned, Juicy, and Done at the Same Time
Marinating Without Turning the Chicken Mushy
Coat the chicken evenly in the dressing and seasonings, then let it sit in the refrigerator for at least 30 minutes. That short rest gives the outside a head start on flavor without pushing the texture too far. If you leave it much longer than 8 hours, the acid can start to soften the surface in an uneven way. A shallow dish works fine, but a zip-top bag helps the marinade cling to every side.
Setting Up the Pan for Browning
Preheat the oven to 425°F and lightly oil the baking dish. This temperature is hot enough to color the Parmesan and give the chicken a little browning before it dries out. Lay the breasts in a single layer with space between them, because crowded chicken releases steam and loses that baked, almost roasted edge. Let the excess marinade drip off before they go in; otherwise the top stays slick instead of crusty.
Baking to the Right Internal Temperature
Bake uncovered for 22 to 28 minutes, depending on the thickness of the chicken breasts. The safest sign is the temperature: pull them when the thickest part hits 165°F. If you only go by time, thinner pieces can overcook fast. The chicken should look opaque with golden spots on top, and the juices should run clear when pierced near the center.
Resting Before You Slice
Let the chicken rest for 5 minutes after it comes out of the oven. That pause keeps the juices inside the meat instead of spilling onto the cutting board. If you slice too soon, the first cut looks dry even when the chicken was cooked perfectly. A short rest also gives the Parmesan time to set so it doesn’t slide off in a loose layer.
How to Adapt This for Different Tastes and Diets
Dairy-Free Version
Skip the Parmesan and brush the tops with a little extra olive oil before baking. You’ll lose the salty crust, but the chicken will still pick up plenty of flavor from the dressing and seasonings. If you want a similar savory finish, scatter a little dairy-free Parmesan-style topping after baking.
Lower-Heat Version
Leave out the red pepper flakes and use a milder Italian dressing. This keeps the same herby, tangy backbone without any bite, which works well if you’re serving kids or pairing it with a peppery salad.
Using Chicken Thighs Instead
Boneless, skinless thighs work well if you want more forgiveness and a slightly richer result. They usually need a few extra minutes in the oven, and they’re done when they reach 165°F in the thickest part. The flavor leans deeper and the texture stays juicier, though the pieces won’t slice as neatly as breasts.
Storage and Reheating
- Refrigerator: Store leftovers in an airtight container for up to 4 days. The chicken stays tender, though the Parmesan top softens as it sits.
- Freezer: It freezes well for up to 2 months. Wrap the chicken tightly and thaw it in the refrigerator overnight before reheating so it doesn’t dry out.
- Reheating: Warm it in a 325°F oven, covered loosely with foil, until heated through. Microwaving works in a pinch, but it can turn the edges rubbery, especially if the chicken was sliced thin.
Answers to the Questions Worth Asking

Italian Dressing Baked Chicken
Ingredients
Equipment
Method
- Place the chicken breasts in a large zip-lock bag or shallow dish and pour the Italian dressing over them until evenly coated. Add a quick mix so the surface looks glossy with dressing.
- Sprinkle the garlic powder, onion powder, dried Italian seasoning, salt, black pepper, and red pepper flakes (if using) over the chicken. Seal the bag and make sure spices cling to the coated chicken.
- Refrigerate the sealed bag or covered dish for at least 30 minutes, up to 8 hours, for deeper flavor. Chill until the chicken feels marinated and aromatic.
- Preheat the oven to 425°F (220°C) and lightly grease a baking dish with olive oil. Use a thin coating so the chicken browns instead of sticks.
- Remove the chicken from the marinade and let excess drip off, then arrange the pieces in the prepared baking dish in a single layer. Leave space between breasts so they bake evenly.
- Sprinkle the grated Parmesan evenly over the tops of each chicken breast. The layer should look dry and even, not clumpy.
- Bake uncovered for 22–28 minutes at 425°F (220°C) until the internal temperature reaches 165°F (74°C). The tops should be golden with slightly caramelized edges.
- Rest the baked chicken for 5 minutes after removing from the oven. During resting, the juices redistribute so slices stay tender.
- Garnish with fresh chopped parsley and serve with lemon slices alongside pasta, rice, roasted vegetables, or a crisp garden salad. Finish with lemon for bright, tangy flavor right before eating.