No Bake Oreo Icebox Cake
No Bake Oreo Icebox Cake is a super simple and delicious dessert that brings together crunchy Oreo cookies and creamy layers of whipped cream or pudding. It’s a chilled treat…
Tip: save now, read later.
No Bake Oreo Icebox Cake is a super simple and delicious dessert that brings together crunchy Oreo cookies and creamy layers of whipped cream or pudding. It’s a chilled treat where the cookies soak up the cream and become wonderfully soft, creating a perfect mix of textures without any baking required.
I love making this cake because it’s so easy to throw together, especially when you want something sweet but don’t want to heat up the kitchen. One of my favorite tips is to let it chill overnight – that way the Oreos get really soft, and each bite melts in your mouth. Plus, it’s always a crowd-pleaser, whether you’re sharing with family or bringing it to a summer party.
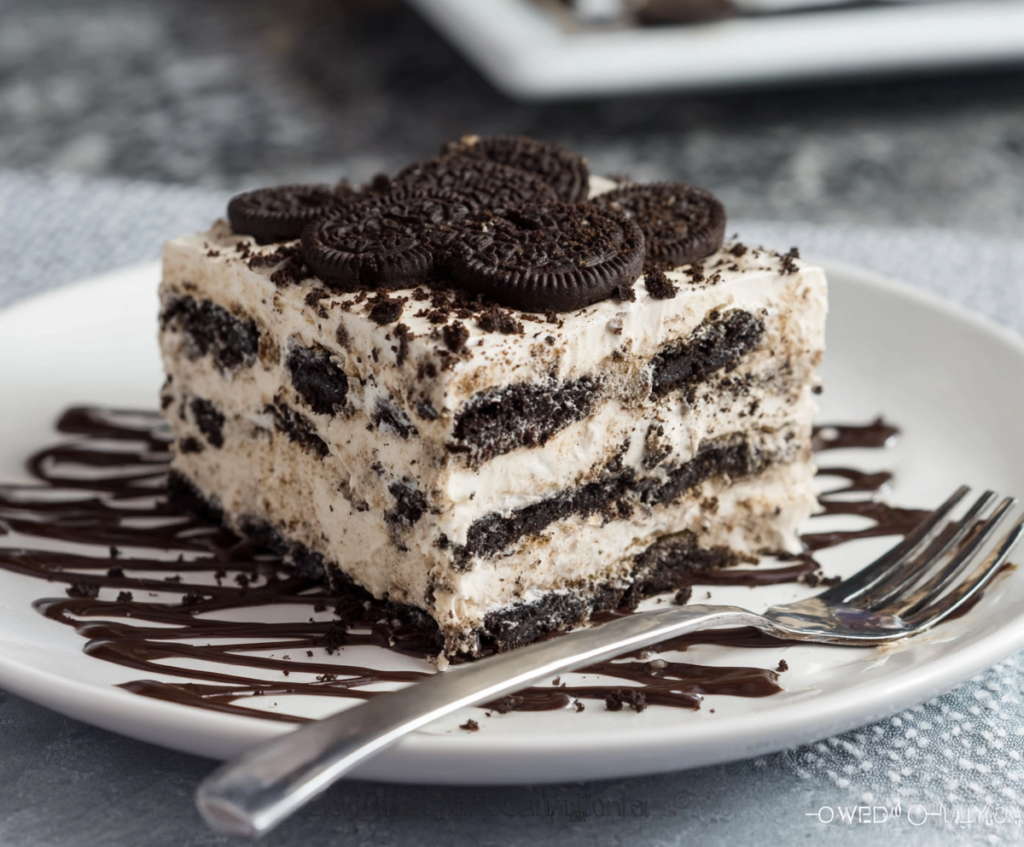
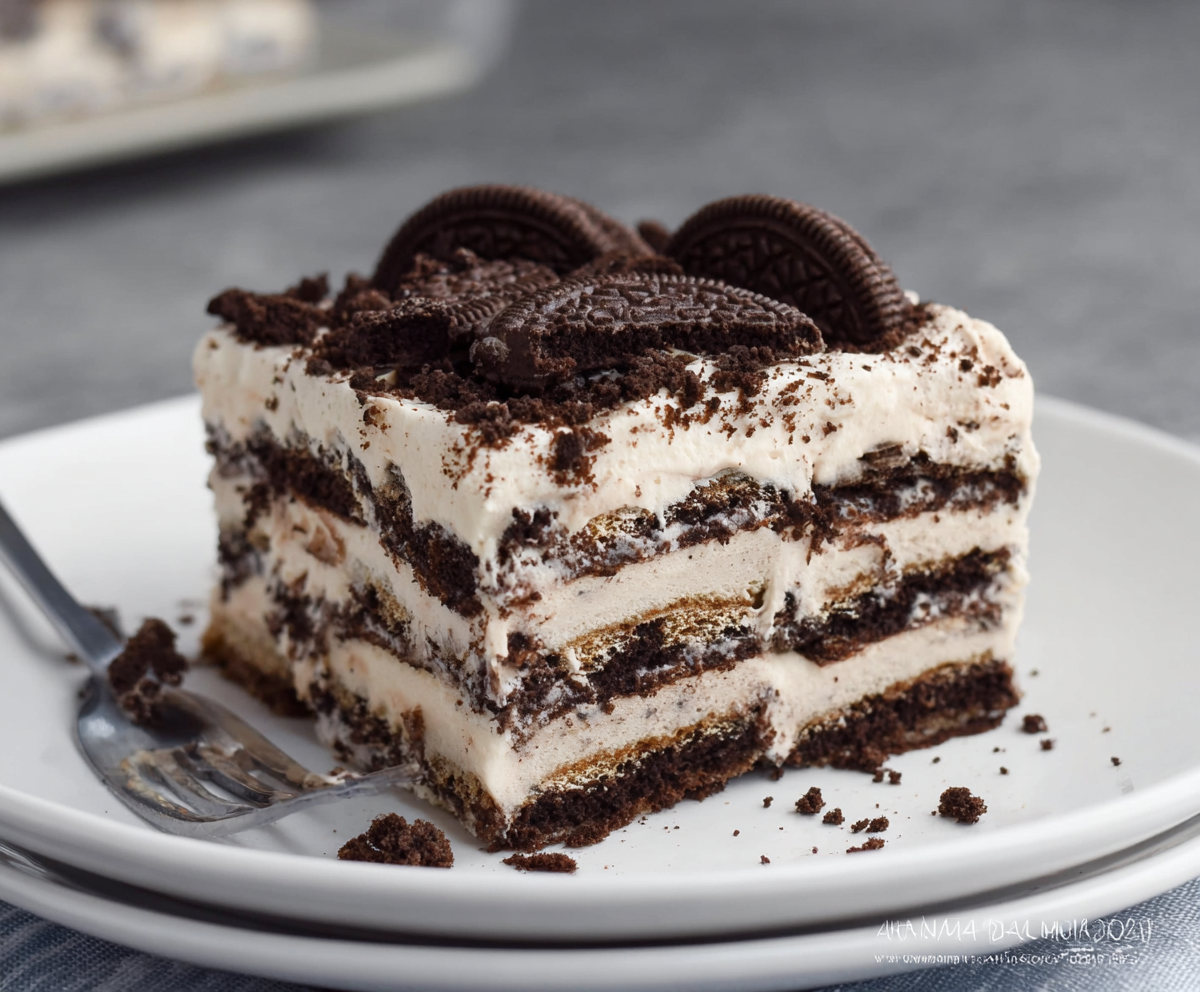
When I serve this cake, I like to add a little extra crushed Oreos on top for a bit of crunch and to make it look pretty. It’s fun, messy, and just the right amount of sweet. I always find myself sneaking an extra slice before anyone else gets to it!
Key Ingredients & Substitutions
Heavy whipping cream: This is what makes your layers rich and fluffy. Make sure it’s cold for best whipping results. If you want a lighter option, you can try using coconut cream, but the texture will be a bit different.
Powdered sugar: Adds sweetness and helps stabilize whipped cream. If you don’t have powdered sugar, you can use granulated sugar but dissolve it first in a little warm water or avoid it for a less sweet version.
Vanilla extract: Brings a warm, gentle flavor to the cream. You can swap this with almond extract or leave it out, but vanilla really helps balance the sweetness.
Oreos: The star of this cake! Classic Oreos work best but you can try other sandwich cookies if you want a twist. For gluten-free, look for gluten-free sandwich cookies with a similar texture.
Chocolate syrup: Optional but great for serving. Use store-bought or homemade chocolate sauce to add a pretty and tasty touch.
How Do You Get the Whipped Cream Perfect for Layering?
Whipping the cream just right is key so it holds the cake layers but stays smooth and soft.
- Start with cold cream and a chilled bowl for faster whipping.
- Beat on medium-high speed until soft peaks form, then add sugar and vanilla.
- Continue to whip until stiff peaks form – the cream should hold a firm peak but not be dry or grainy.
- Stop right when peaks stand tall and don’t droop to avoid overwhipping into butter.
Whipped cream that’s too soft won’t hold the layers well, and whipped cream overbeaten will lose its smoothness. It may take a few tries to find the perfect texture, but once you do, your cake will be creamy and stable!
Equipment You’ll Need
- Electric mixer – makes whipping the cream easy and fast for the perfect fluffy texture.
- Large mixing bowl – roomy enough for whipping cream without splashes.
- 9×9-inch square pan – great size for layering the cake neatly and chilling it evenly.
- Rubber spatula – helps spread the whipped cream smoothly between cookie layers.
- Plastic wrap – keeps the cake covered and fresh while it chills in the fridge.
Flavor Variations & Add-Ins
- Mix in crushed peanut butter cups with the Oreos for a sweet and salty twist.
- Add a layer of sliced strawberries or raspberries between cookie layers for freshness.
- Use chocolate or mint Oreos to change up the classic flavor.
- Stir a bit of instant coffee into the whipped cream for a mocha-flavored cake.
No Bake Oreo Icebox Cake
Ingredients You’ll Need:
- 3 cups heavy whipping cream, cold
- ½ cup powdered sugar
- 1 teaspoon vanilla extract
- 30 Oreo cookies (plus extra for garnish)
- Chocolate syrup for drizzling (optional)
How Much Time Will You Need?
This recipe takes about 15 minutes of prep time and then requires at least 4 hours of refrigeration, preferably overnight, so the Oreos soften nicely and the flavors blend well. The chilling time is key to a creamy, delicious cake!
Step-by-Step Instructions:
1. Whip the Cream:
In a large mixing bowl, mix the cold heavy whipping cream, powdered sugar, and vanilla extract. Use an electric mixer on medium-high speed to whip everything together until stiff peaks form. Don’t overwhip – the cream should be smooth and fluffy.
2. Layer the Cake:
Spread a thin layer of whipped cream in the bottom of a 9×9-inch square pan. Place a single layer of Oreo cookies over the cream. Spread another even layer of whipped cream over the Oreos, covering them completely. Repeat this layering two more times, ending with a whipped cream layer on top.
3. Chill and Garnish:
Gently press the top to compact the layers a little, then cover the pan tightly with plastic wrap. Refrigerate for at least 4 hours, or overnight for best results. When ready, garnish with crushed Oreos and a few whole Oreos on top. You can also drizzle chocolate syrup on the serving plate or over the cake if you like. Slice into squares and serve cold.
Can I Use Frozen Whipping Cream?
It’s best to use cold, fresh heavy whipping cream for the fluffiest texture. If your cream is frozen, thaw it in the fridge overnight and give it a gentle stir before whipping.
How Long Should I Chill the Icebox Cake?
Chilling for at least 4 hours works, but overnight is ideal. This allows the Oreos to soften fully and the flavors to meld together for the creamiest texture.
Can I Substitute Oreos with Other Cookies?
Yes! Any sandwich cookie with a creamy filling works well. You can try chocolate mint Oreos, peanut butter sandwich cookies, or gluten-free alternatives depending on your preference.
How Do I Store Leftovers?
Keep leftover cake covered tightly with plastic wrap or in an airtight container in the fridge. It’s best eaten within 2–3 days for freshness and texture.