

Peanut Butter Blossom Cookies
The first tray comes out of the oven puffed and pale, with just a hint of gold around the edges. That’s the moment to press in the chocolate—not after the…
Tip: save now, read later.
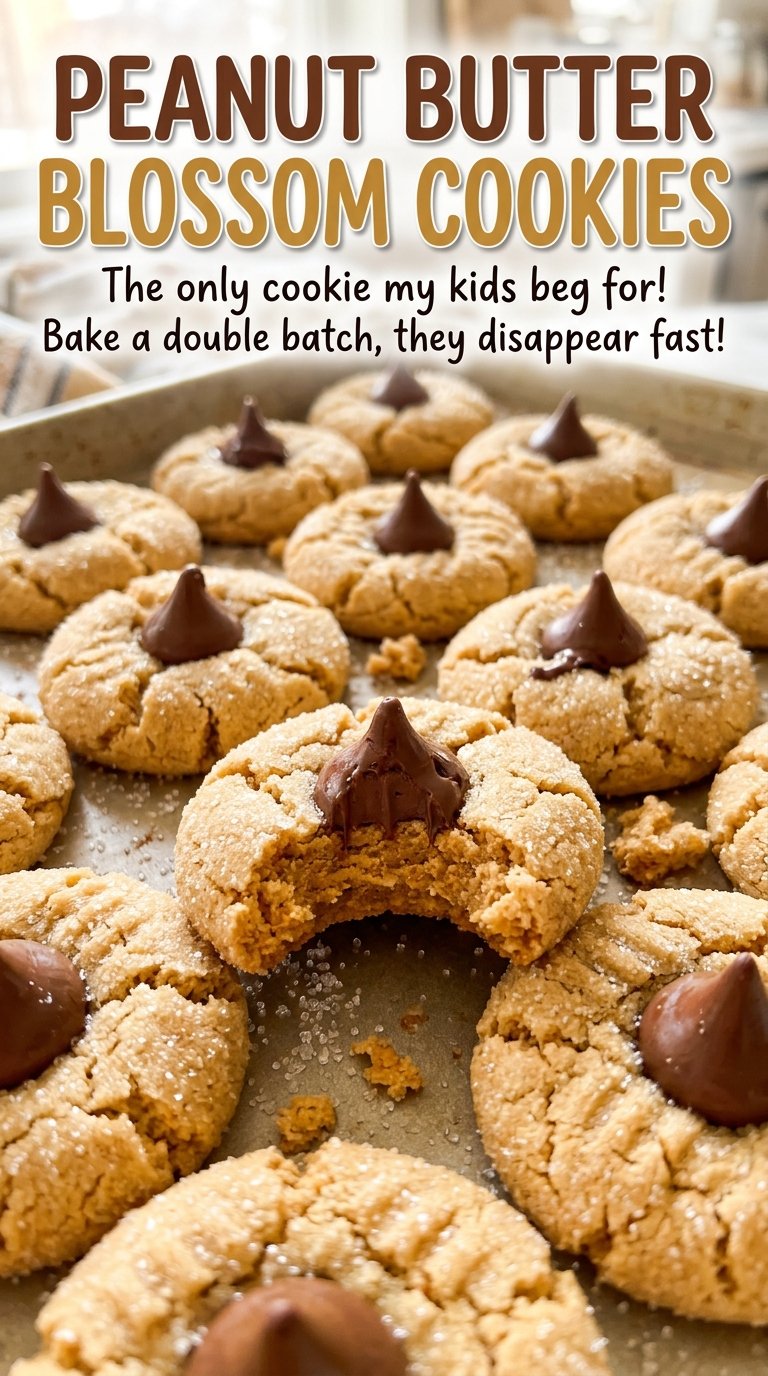
The first tray comes out of the oven puffed and pale, with just a hint of gold around the edges. That’s the moment to press in the chocolate—not after the cookies cool, when the centers have started to set. These peanut butter blossom cookies are soft, lightly crisp from their sugar coating, and finished with a milk chocolate kiss right in the middle.
I like how the dough comes together without a long list of steps: beat the shortening and peanut butter with both sugars, add the wet ingredients, then stir in the dry ones. Rolling each ball in sugar gives the outside a fine sparkle and a little crunch against the tender peanut butter center. The kisses go on while the cookies are hot, so they settle into the center without needing to be baked with the dough. Let the chocolate-topped cookies cool on the pan briefly, and you’ll have neat, soft-centered blossoms ready for the rack.

Kitchen Note
Unwrap all the chocolate kisses before the first tray goes into the oven. The cookies bake quickly, and having the kisses ready means you can press one into every hot cookie without stopping to fuss with wrappers.
Save these peanut butter blossom cookies for a bake day when you want soft peanut butter centers and a milk chocolate kiss in every cookie.
Why the Sugar Roll Is More Than a Pretty Finish
The granulated sugar on the outside does a different job from the sugar beaten into the dough. It gives each ball a thin coating before baking, so the finished cookie has a delicate sugary surface around its softer center. That little contrast is easy to lose if you skip the rolling step or leave bare patches.
Use the remaining sugar in a small bowl and turn each shaped ball until it’s coated all over. The dough should still feel soft; there’s no need to press hard or reshape it after rolling. A light, even coating is enough. If the sugar gathers in thick clumps, tap the excess off before arranging the balls on the sheet.
Keep the dough balls close to the same size, too. The recipe makes 36 cookies, and uniform 1-inch balls help the batch bake at a similar pace. When some are much larger than others, the small ones can be ready while the big ones still look underbaked in the middle.
What the Peanut Butter and Two Sugars Each Bring
- Vegetable shortening — It keeps the dough tender and helps the cookies hold their shape. Butter is a possible one-for-one swap, but it brings a different flavor and can make the cookies spread more; shortening gives the closest result to this version.
- Creamy peanut butter — A smooth, conventional creamy peanut butter blends evenly into the dough. Crunchy peanut butter works in the same amount if you want small peanut pieces in each bite, though the dough won’t feel quite as uniform. Natural peanut butter, especially when separated or oily, is less dependable here.
- Granulated and light brown sugars — The granulated sugar sweetens the dough and coats the outside, while packed light brown sugar adds moisture and a softer texture. Keep the coating sugar separate from the dough sugar so the balls get their own thin layer.
- Egg, milk, and vanilla — The egg binds the dough, milk loosens it enough to mix, and vanilla rounds out the peanut butter. Use a large egg, as specified; a different size changes the amount of moisture and binding in this small-batch dough.
- All-purpose flour, baking soda, and salt — All-purpose flour gives the cookies their structure, while baking soda helps them puff in the oven. Measure the flour without packing it tightly into the cup; excess flour can make the dough stiff and the cookies dry. The salt balances the sweet coating and chocolate.
- Milk chocolate kisses — Unwrap the kisses before baking so they’re ready to press into the hot cookies. Their firm shape makes the familiar blossom center; choose pieces that are intact rather than cracked or misshapen.
From Creamy Dough to Blossoms That Hold Their Shape
Beat the Peanut Butter Base Until Smooth
Heat the oven to 375°F. In a large bowl, beat the shortening, peanut butter, 1/2 cup of the granulated sugar, and the brown sugar until the mixture looks creamy and evenly blended. Beat in the egg, milk, and vanilla next, scraping down the bowl if a streak of peanut butter is clinging to the side. If the mixture looks a little soft at this point, that’s normal; the flour will bring it together.
Stir the Dry Ingredients In Without Overworking
In a separate bowl, whisk the flour, baking soda, and salt so the leavener is distributed through the flour. Add the dry mixture to the peanut butter mixture and stir just until no loose flour remains. Stop once the dough comes together; mixing longer than needed can make the cookies firm rather than tender. The finished dough should be soft enough to shape into balls.
Roll, Coat, and Bake in Even Batches
Pour the remaining granulated sugar into a small bowl. Shape the dough into 1-inch balls and roll each one in the sugar until coated. Arrange 12 balls on an ungreased 18×13-inch rimmed baking sheet, leaving about 2 inches between them; the remaining dough will bake in another batch. Bake for 8 to 10 minutes, until the cookies are puffed and lightly golden at the edges.
Press in the Kisses While the Cookies Are Hot
As soon as a tray comes out, press one milk chocolate kiss into the center of each cookie. The cookie will crack slightly around the chocolate, which is part of the blossom’s look; press straight down and stop once the kiss is seated. Let the cookies cool on the baking sheet for 2 minutes, then transfer them to a wire rack. Repeat with the remaining dough.
Two Smart Ways to Adapt the Dough
A Gluten-Free Batch with a Cup-for-Cup Blend
Replace the all-purpose flour with a gluten-free 1:1 baking flour blend designed to stand in for wheat flour, using the same amount. The dough may feel a little different from the standard version, and the cookies can be more delicate, so handle them gently when moving them from the baking sheet to the rack.
A More Textured Peanut Butter Cookie
Swap the creamy peanut butter for crunchy peanut butter in the same amount. The little peanut pieces give the cookie more bite and a less silky texture, while the chocolate kiss still fits naturally in the center.
Storage and Reheating
- Refrigerator: Store in an airtight container for up to 1 week. The cookies may firm up when chilled; let them come to room temperature before serving.
- Freezer: Freeze completely cooled cookies in an airtight container, with parchment between layers, for up to 2 months. Thaw at room temperature in the container.
- Reheating: These cookies are best at room temperature, so reheating isn’t necessary. Microwaving can soften the chocolate kiss and make it lose its shape.
Questions That Come Up While Baking Peanut Butter Blossoms
Peanut Butter Blossom Cookies
Ingredients
Equipment
Method
- Heat the oven to 375°F.
- Beat the shortening, peanut butter, 1/2 cup granulated sugar, and brown sugar in a large bowl until creamy.
- Beat in the egg, milk, and vanilla.
- Whisk together the flour, baking soda, and salt in a separate bowl.
- Stir the dry ingredients into the peanut butter mixture until combined.
- Pour the remaining 1/4 cup granulated sugar into a small bowl.
- Shape the dough into 1-inch balls.
- Roll each ball in the sugar.
- Arrange 12 dough balls on an ungreased 18x13-inch rimmed baking sheet, spacing them about 2 inches apart.
- Bake for 8 to 10 minutes, until the cookies are puffed and lightly golden at the edges.
- Immediately press a chocolate kiss into the center of each cookie.
- Let the cookies cool on the baking sheet for 2 minutes.
- Transfer the cookies to a wire rack, then repeat with the remaining dough.
