
Red White and Blue Ice Cream Cake
Layers of vanilla, strawberry, and blueberry ice cream turn into a clean, frozen slice that looks festive before anyone even takes the first bite. The cookie crust stays crisp enough…
Tip: save now, read later.
Layers of vanilla, strawberry, and blueberry ice cream turn into a clean, frozen slice that looks festive before anyone even takes the first bite. The cookie crust stays crisp enough to give you contrast against the soft filling, and the whipped topping on top keeps the whole cake from tasting heavy or icy. It’s the kind of dessert people go back for because each layer tastes distinct instead of blending into one sweet blur.
The trick here is patience with the freezer and a little control over how softened the ice cream gets. If it’s too firm, the layers drag and tear the crust. If it’s too melted, the colors start to mix and the cake loses those sharp stripes that make it look special. A short freeze between layers gives you the clean edges that make slicing much easier later.
Below, I’ve included the small details that keep this cake neat when you unmold it, plus a few simple ways to change the cookie base or the topping if you want to work with what’s already in your kitchen.
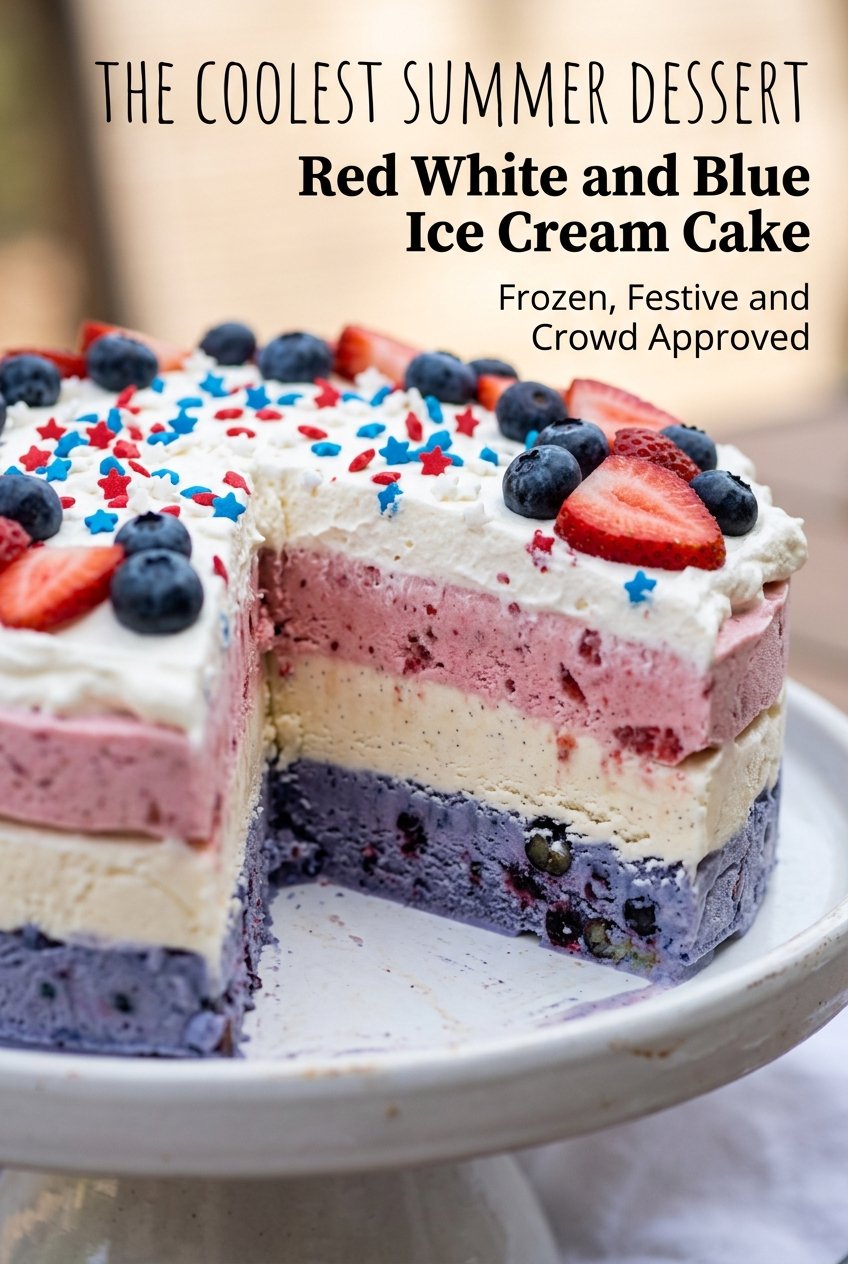
The ice cream layers sliced out so cleanly, and the short freezes between each one kept the colors from bleeding together. Even after sitting out for a few minutes, the crust stayed crunchy under the whipped topping.
Save this red, white, and blue ice cream cake for the kind of celebration that needs clean layers, a crunchy cookie crust, and a no-melt finish.
The Freeze Times That Keep the Layers Clean
The biggest mistake with an ice cream cake is rushing the layering. Each flavor needs time to firm up before the next one goes on, or the layers slump together and the finished cake looks muddy instead of striped. Those short freezes aren’t busywork. They’re what give you that sharp slice where the blueberry, vanilla, and strawberry stay in their own lanes.
Another thing that matters here is the softness of the ice cream when you spread it. You want it pliable, not soupy. A few minutes on the counter is enough for most cartons, and if one flavor gets away from you, tuck it back in the freezer before it goes on the cake. The crust also needs its own chill so it can set before it meets the first layer of ice cream.
What Each Layer Is Doing in This Cake
Vanilla sandwich cookies — These give you a sweet, sturdy crust that holds up in the freezer better than a crumbly graham base. Oreos are too dark and too dominant here, so stick with vanilla cookies if you want the clean look and flavor balance.
Unsalted butter — The butter binds the crumbs into a crust that slices cleanly instead of scattering when you cut the cake. Salted butter works in a pinch, but unsalted keeps the crust from pulling too much attention away from the ice cream layers.
Vanilla, strawberry, and blueberry ice cream — The quality of the ice cream matters more than anything else in this dessert. Choose brands you’d happily eat plain, because once they’re layered, their flavor has to carry through after freezing. Let each one soften just enough to spread without breaking the layer beneath it.
Whipped topping — This gives the cake a smooth finish and helps the berries and sprinkles stick. Fresh whipped cream can be used, but it’s softer and can droop faster once the cake sits out, so whipped topping is the safer choice for a party dessert.
Fresh berries and sprinkles — Add these at the end so they stay bright and don’t bleed into the topping. Pat the berries dry first. Extra moisture on top is what makes decorations slide around once the cake starts to warm.
Building the Cake So the Layers Don’t Smear
Pressing the Crust Until It Holds
Mix the cookie crumbs with melted butter until every crumb looks evenly damp, then press the mixture firmly into the bottom of a parchment-lined springform pan. The crust should feel compact, almost like wet sand packed flat under your palm. If it’s loose now, it will fall apart later when you unmold the cake. A 20-minute freeze gives the butter time to reset so the first ice cream layer doesn’t sink into the crust.
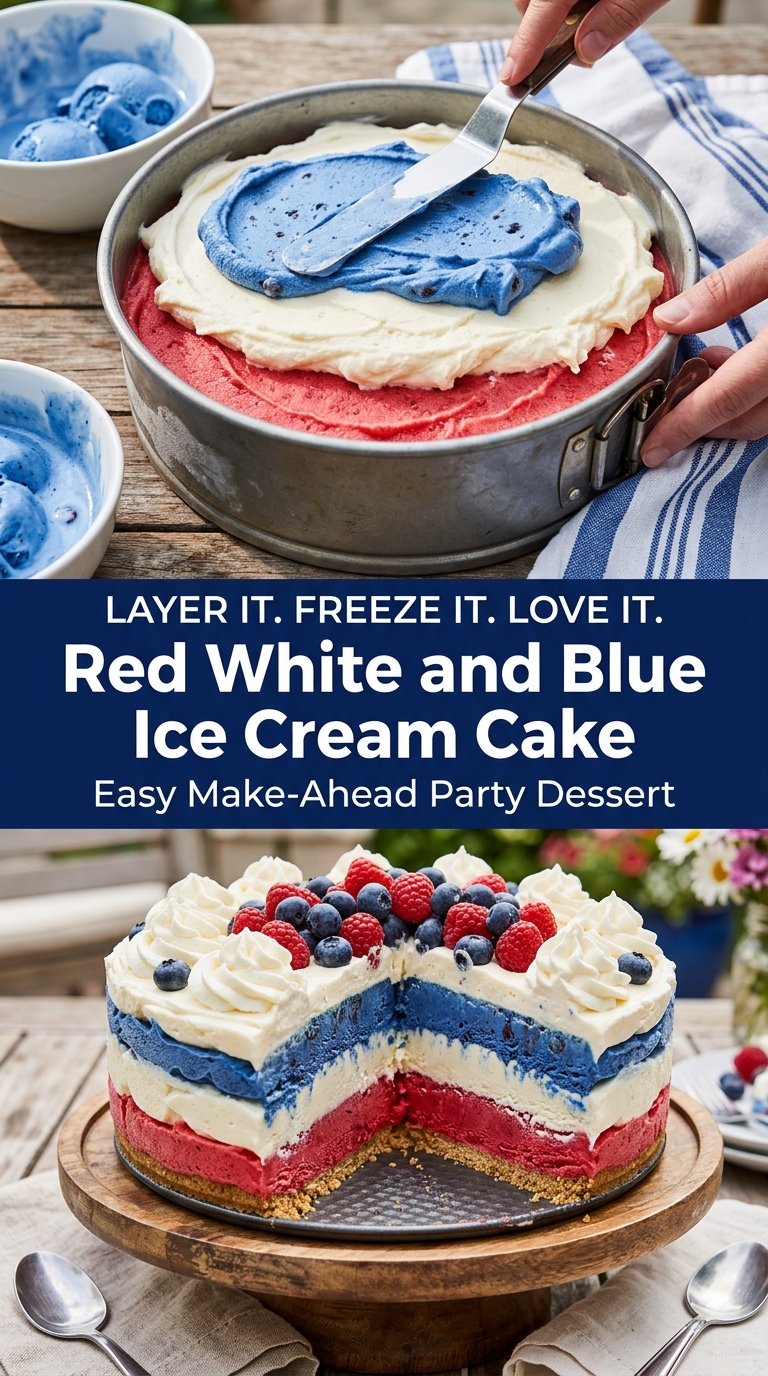
Spreading the Ice Cream in Order
Start with the blueberry layer and work from there, pressing each softened layer gently into place with an offset spatula or the back of a spoon. Spread from the center outward so you don’t drag crumbs up from the crust. If the ice cream starts to lift the layer below it, stop and chill the pan for a few minutes before continuing. That pause is what keeps the stripes clean.
Freezing Between Layers
Give each layer about 30 minutes in the freezer before adding the next one. You’re waiting for the top to lose its gloss and feel firm at the touch, not rock solid. If the surface is still soft, the next flavor will sink and blur the line between layers. Once all three are in place, the cake needs several hours in the freezer so it slices neatly instead of collapsing at the edge.
Finishing and Decorating
Unmold the cake when it’s fully firm, then frost it with whipped topping while it’s still cold. Work quickly so the topping goes on in smooth swipes instead of melting into the surface. Add the berries and sprinkles right away. Once the cake sits out, they won’t hold as well, and the whipped layer can start to soften.
Three Ways to Change the Cake Without Losing the Look
Gluten-Free Cookie Crust
Use your favorite gluten-free vanilla sandwich cookies in place of the regular ones. The crust still packs down well, but some gluten-free cookies are a little more fragile, so press the crumbs firmly and don’t skip the initial freeze.
Dairy-Free Version
Swap in dairy-free vanilla sandwich cookies, non-dairy ice cream, and a coconut-based whipped topping. The texture will be a little softer once sliced, but the layers still hold if you keep the cake frozen solid until serving.
Different Fruit Flavors
Cherry, raspberry, or lemon ice cream can replace one of the fruit layers if that’s what you have on hand. Keep the colors distinct and choose flavors that contrast with the vanilla so the cake still looks striped when you slice it.
Make It Ahead for a Crowd
This cake is an excellent make-ahead dessert. Freeze it overnight, then decorate it close to serving time so the berries look fresh and the whipped topping stays neat. The longer freeze actually helps the slices come out cleaner.
Storage and Reheating
- Refrigerator: Not recommended for more than a short serving window. The layers soften fast and the crust loses its crunch.
- Freezer: Wrap the cake well and freeze for up to 1 week for the best texture. After that, the ice cream can pick up freezer flavor and the topping may start to look a little frosty.
- Reheating: There’s no reheating here. Let the cake sit at room temperature for 5 to 10 minutes before slicing so the knife moves through cleanly instead of cracking the layers.
Questions I Get Asked About This Recipe
Red White and Blue Ice Cream Cake
Ingredients
Equipment
Method
- Line a 9-inch springform pan with parchment paper.
- Mix crushed vanilla sandwich cookies and melted unsalted butter until evenly combined.
- Press the cookie-butter mixture firmly into the bottom of the pan to form a compact crust.
- Freeze for 20 minutes until set.
- Spread softened blueberry ice cream over the chilled crust in an even layer.
- Freeze for 30 minutes to firm up the blueberry layer.
- Spread softened vanilla ice cream evenly over the blueberry layer.
- Freeze for another 30 minutes until firm.
- Spread softened strawberry ice cream over the vanilla layer.
- Freeze for at least 4 hours or overnight until fully set.
- Remove the cake from the pan and frost the top with whipped topping.
- Decorate with fresh blueberries, sliced strawberries, and red, white, and blue sprinkles.
- Freeze until ready to serve.
- Slice and serve.