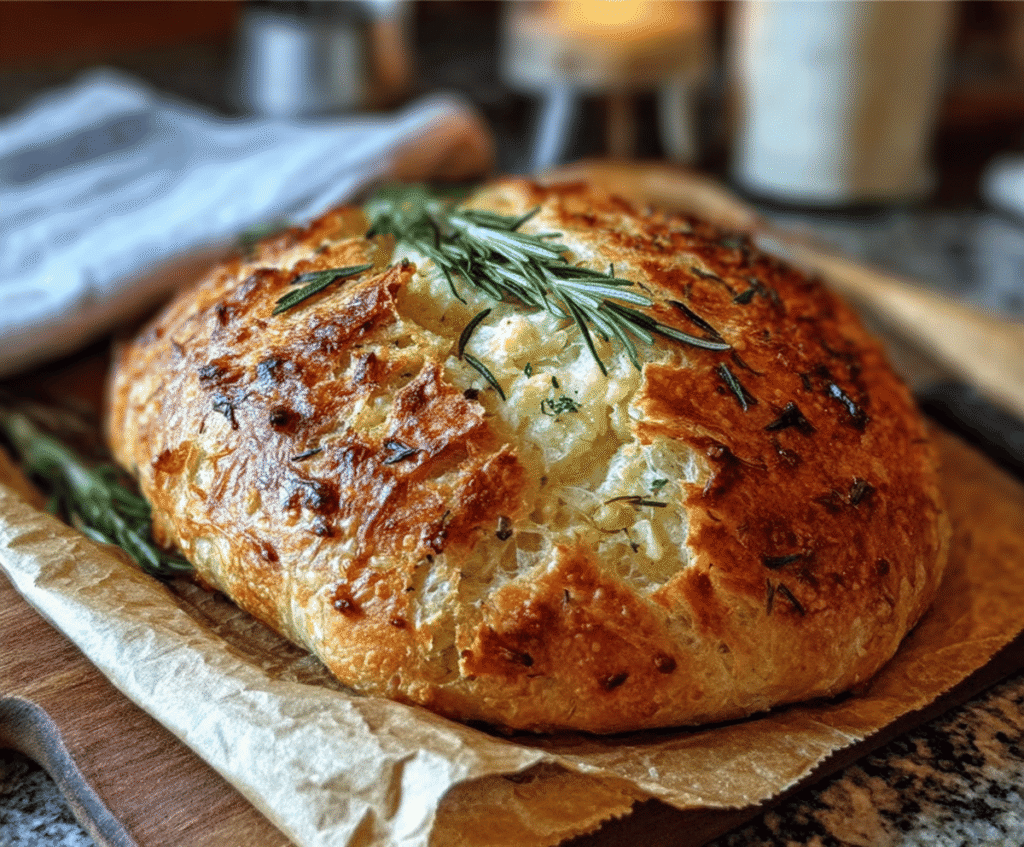
Rustic No-Knead Rosemary Garlic Bread
Rustic No-Knead Rosemary Garlic Bread is a simple and satisfying bread that's packed with fresh rosemary and garlicky flavor. It’s crusty on the outside, soft and chewy on the inside,…
Tip: save now, read later.
Rustic No-Knead Rosemary Garlic Bread is a simple and satisfying bread that’s packed with fresh rosemary and garlicky flavor. It’s crusty on the outside, soft and chewy on the inside, and comes together without any kneading, which makes it perfect for a relaxed baking day.
I love how easy this bread is to make — no fancy equipment or complicated steps, just a bit of patience while the dough rests. The aroma of rosemary and garlic filling the kitchen is always a highlight for me, and it has this wonderful homemade feel without a ton of effort.
My favorite way to enjoy this bread is warm, torn into pieces, and dipped in olive oil or spread with butter. It’s perfect alongside soups, salads, or just on its own as a snack. I always find myself making extras because everyone ends up wanting more!
Key Ingredients & Substitutions
Flour: All-purpose flour works well for a sturdy crust and tender crumb. You can substitute with bread flour for a chewier texture or whole wheat flour for a nuttier flavor, though the bread may be denser.
Instant Yeast: This makes the recipe quick and easy without needing to proof. If you only have active dry yeast, use a bit more and activate it in warm water before mixing.
Rosemary: Fresh rosemary adds a bright, piney aroma. Dry rosemary can be used in a pinch, but reduce the amount to avoid bitterness.
Garlic: Fresh minced garlic gives the best flavor. Roasted garlic is a tasty alternative if you want a milder, sweeter taste.
Olive Oil: Brushing it on before baking helps develop a golden crust and adds richness. You can swap it for melted butter for a softer, buttery finish.
How Can I Make This No-Knead Bread Without Kneading Yet Still Get a Good Texture?
No-knead bread relies on a long, slow rise to develop gluten naturally. Here’s how to get the best texture:
- Mix Thoroughly: Stir the dough until all flour is hydrated, even if it seems sticky and shaggy. This ensures even gluten development.
- Long Rest: Letting the dough rise 12-18 hours at room temp allows gluten to form without kneading. It also deepens the flavor.
- Gentle Folding: When shaping, fold the dough over itself a few times. This helps create surface tension which improves the loaf’s structure.
- Use a Dutch Oven: Baking covered traps steam, helping the crust crisp up while keeping the inside moist and airy.
Patience is key here! The slow rise and gentle handling replace kneading, giving you a classic artisan texture with much less effort.
Equipment You’ll Need
- Large mixing bowl – perfect for mixing and letting the dough rise without spills.
- Wooden spoon or spatula – great for stirring the sticky dough gently.
- Parchment paper – helps transfer the dough into the hot Dutch oven easily.
- Dutch oven with lid – essential for trapping steam to create a crispy crust and soft inside.
- Measuring cups and spoons – needed for accurate ingredient amounts, ensuring good dough consistency.
Flavor Variations & Add-Ins
- Add 1/2 cup grated parmesan or asiago cheese to the dough for a cheesy twist that melts into the bread.
- Mix in chopped sun-dried tomatoes for a tangy, savory burst that complements rosemary well.
- Swap fresh rosemary with thyme or sage when you want a different but still earthy herb flavor.
- Stir in 1/4 cup toasted pine nuts or walnuts for a nice crunch and nutty aroma.
Rustic No-Knead Rosemary Garlic Bread
Ingredients You’ll Need:
Main Ingredients:
- 3 cups all-purpose flour
- ¼ teaspoon instant yeast
- 1 ¼ teaspoons salt
- 1 ½ cups warm water (about 110°F / 43°C)
- 3 tablespoons fresh rosemary, finely chopped (plus extra sprigs for garnish)
- 3 cloves garlic, minced
- 1 tablespoon olive oil (for brushing)
- Coarse sea salt (optional, for sprinkling)
How Much Time Will You Need?
This recipe takes about 15 minutes of active prep time. The dough needs a slow rise for 12 to 18 hours at room temperature, plus another 1 to 2 hours for the second rise before baking. Baking takes about 40 to 45 minutes total. Plan ahead for this relaxed schedule and enjoy the reward of homemade, fragrant bread!
Step-by-Step Instructions:
1. Mix the Dry Ingredients
In a large mixing bowl, whisk together the flour, instant yeast, and salt. This makes sure everything is well combined.
2. Add Water and Flavorings
Pour warm water into the dry mix. Add the chopped rosemary and minced garlic, then stir gently but thoroughly with a wooden spoon or spatula. The dough will be sticky and loose—this is perfect. Cover the bowl with plastic wrap or a clean kitchen towel.
3. Let the Dough Rise (First Rise)
Leave the covered dough at room temperature for 12 to 18 hours. You’ll notice bubbles forming and the dough doubling in size. This slow rise develops great flavor and texture.
4. Shape the Dough
Lightly flour your work surface and turn the dough out onto it. Use floured hands to fold the dough over itself a few times, forming a rough ball. Let this rest for 15 minutes to relax.
5. Prepare for the Second Rise
Line a large bowl or proofing basket with parchment paper dusted with flour or cornmeal. Place the dough seam-side down on the parchment. Cover it and let it rise again for 1 to 2 hours until doubled.
6. Preheat Oven and Dutch Oven
About 30 minutes before the second rise ends, put your Dutch oven with the lid inside the oven and preheat to 450°F (230°C). This gets the pot nice and hot for baking.
7. Bake the Bread Covered
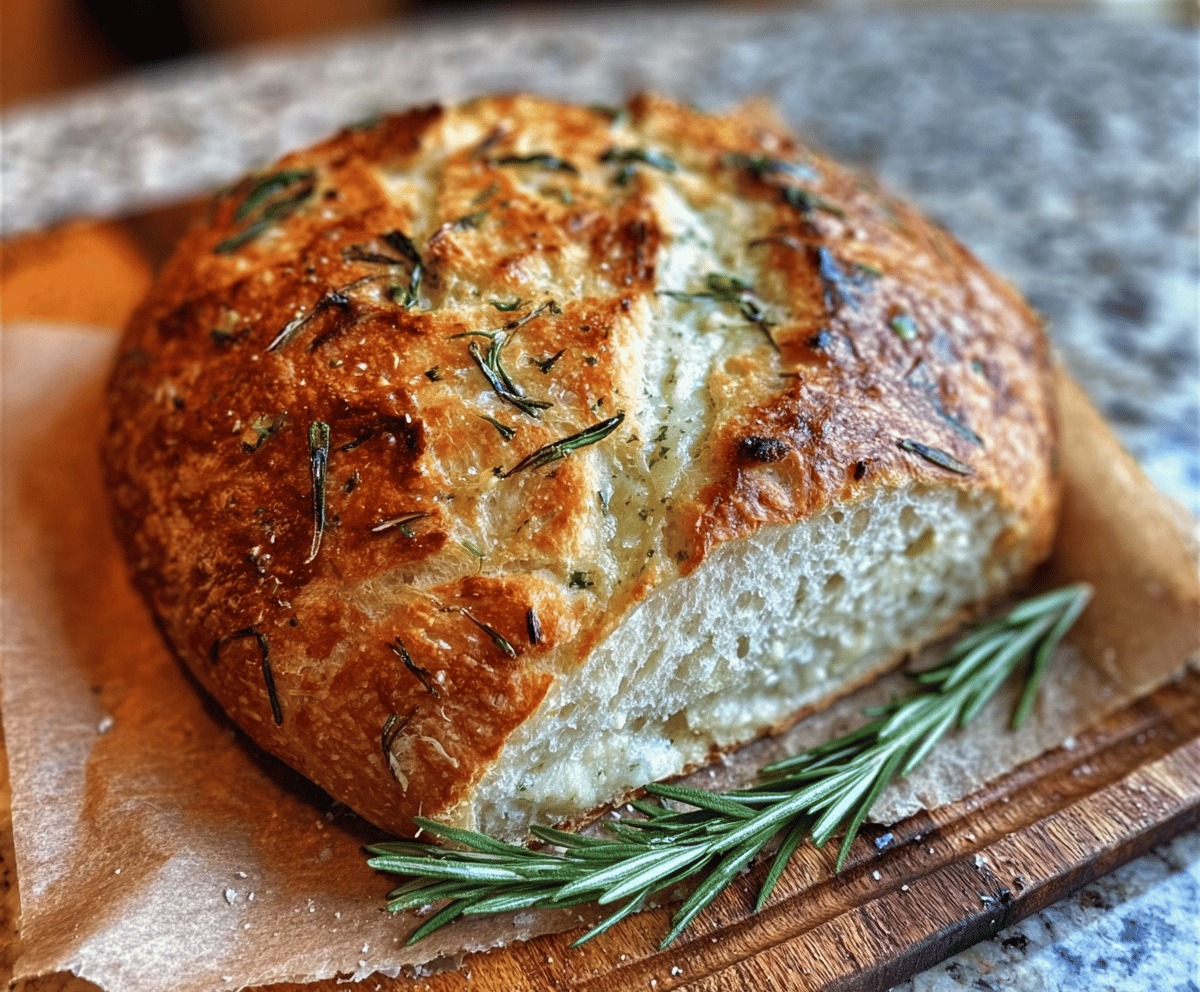
Carefully remove the hot Dutch oven. Using the parchment paper as a sling, lift the dough into the pot. Brush the top with olive oil, and sprinkle extra rosemary and coarse sea salt if you like. Put the lid on and bake for 30 minutes.
8. Finish Baking Uncovered
Remove the lid and bake for another 10 to 15 minutes, until the crust is deeply golden and crusty. This gives the bread its beautiful rustic look and crunch.
9. Cool and Serve
Remove the bread from the Dutch oven and place on a wire rack to cool for at least an hour before slicing. Garnish with fresh rosemary sprigs for a lovely presentation. Serve warm with butter or olive oil for dipping.
Can I Use Dried Rosemary Instead of Fresh?
Yes, you can substitute dried rosemary, but use about one-third the amount since dried herbs are more concentrated. Be careful not to add too much to avoid a bitter taste.
Can I Make This Bread Ahead of Time?
Absolutely! You can prepare the dough and let it rise overnight, then bake it the next day. After baking, store leftover bread in an airtight container at room temperature for up to 2 days.
What If I Don’t Have a Dutch Oven?
You can bake the bread on a preheated baking stone or heavy baking sheet. To create steam (which helps develop a crust), place a pan of hot water on the lower rack of the oven during baking.
How Should I Store Leftover Bread?
Keep leftovers in a paper bag or loosely wrapped in a kitchen towel to maintain the crust. Avoid sealing in plastic, as this softens the crust. For longer storage, slice and freeze the bread; toast slices directly from the freezer when ready to eat.