

Thanksgiving Deviled Eggs Topped with Bacon and Fresh Chives
The saucepan comes off the heat while the eggs are still in hot water, and that small change makes the timing easier to control. I use this gentle approach for…
Tip: save now, read later.
The saucepan comes off the heat while the eggs are still in hot water, and that small change makes the timing easier to control. I use this gentle approach for Thanksgiving deviled eggs topped with bacon and fresh chives: the whites stay tender, and the yolks mash smoothly into a tangy filling instead of turning dry and crumbly. It also frees up the burner while the bacon cooks.
Once the eggs are cool enough to handle, the rest comes together without much fuss. Dijon and a little white vinegar keep the mayonnaise-rich yolks from tasting heavy, while crisp bacon adds a salty crunch against the cool, soft filling. I spoon the mixture into the whites, give the platter time to chill, then add the bacon and chives at the last minute. Every bite has a little tang, a little crunch, and a fresh finish.
Kitchen Note
Let the cold water run over the eggs until they’re cool enough to handle before peeling. Peeling while they’re still warm makes it harder to work neatly around the whites.
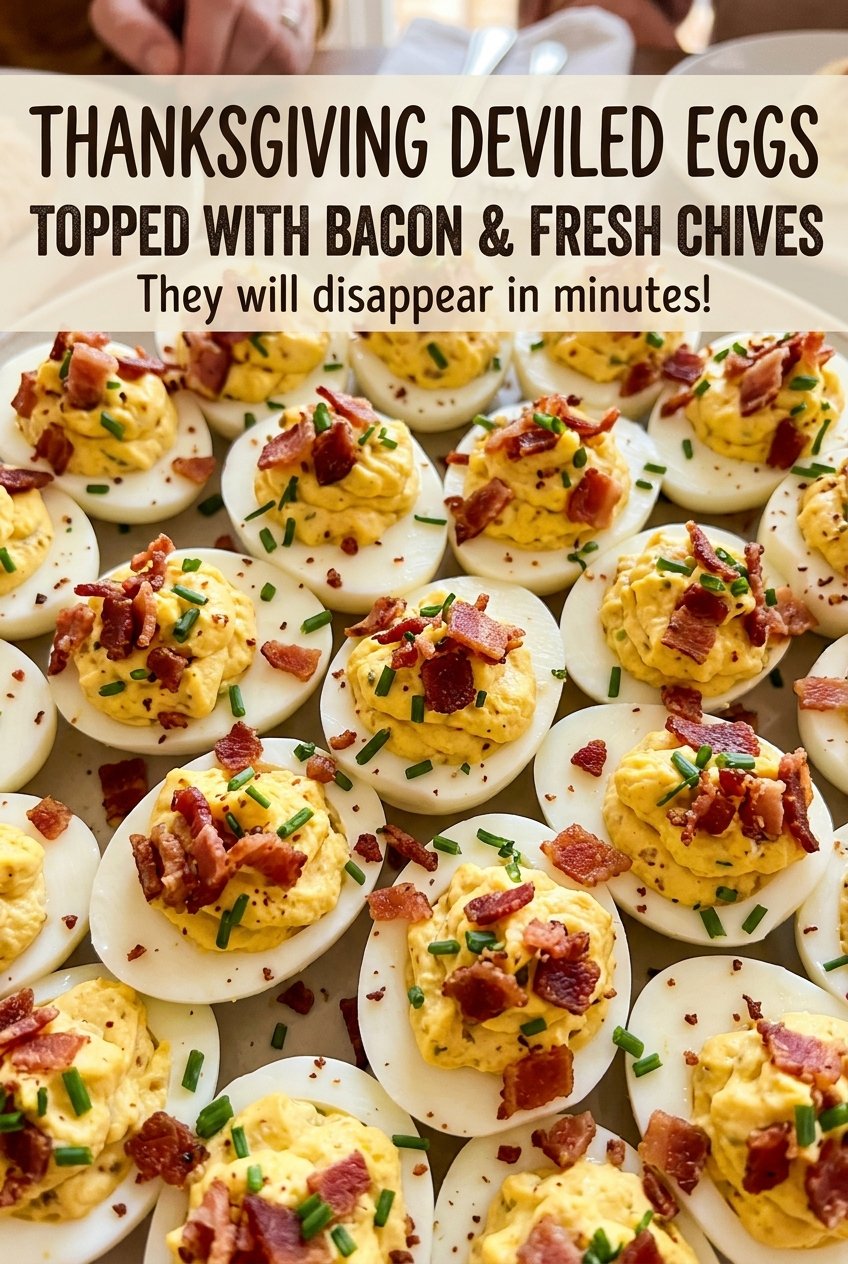
Save these Thanksgiving deviled eggs with crisp bacon and fresh chives for a make-ahead holiday platter with a cool, tangy filling.
Why These Eggs Stop Cooking Before the Timer Starts
Hard-boiled eggs can go from tender to chalky when they keep bubbling away on the burner. Here, the water comes to a full boil, then the covered saucepan comes off the heat for the standing time. The eggs cook gently in the hot water rather than taking continued direct heat. That gives you a consistent window to prepare the filling while the whites stay tender and the yolks remain easy to mash.
The covered pan matters: it holds the heat around the eggs while they stand. Keep the eggs in a single layer and cover them with water before bringing the pan to a boil, so they heat evenly rather than sitting partly above the waterline. Don’t lift the lid during the rest; letting the heat escape changes the conditions inside the pan. This simple, hands-off stretch is especially useful when you’re coordinating a holiday meal and need a reliable batch of eggs for the platter.
What Gives the Filling Its Tang and the Topping Its Crunch

- Large eggs — The whites need to hold their shape as little cups, and the yolks make the base of the filling. Use eggs without cracks so they stay intact as they cook. The yolks mash most evenly when you work them while they’re still easy to break apart, before the mayonnaise and seasonings are fully mixed in.
- Mayonnaise — This gives the mashed yolks their creamy texture and helps the filling hold together. A familiar everyday mayonnaise works well; there’s no need to seek out a specialty version. I don’t replace it with another creamy ingredient here, because that changes both the filling’s texture and its tang.
- Dijon mustard — Dijon brings a sharper, more rounded mustard flavor than a mild condiment would, which balances the richness of the yolks. Use one you enjoy tasting on its own. There isn’t a like-for-like substitute among the other ingredients, so changing it would shift the filling’s character.
- White vinegar — A small amount adds clean acidity without competing with the mustard. Its direct, bright tang is useful in a filling with mayonnaise; a different kind of vinegar would bring a different flavor. Measure carefully so the filling stays creamy rather than tasting sharply sour.
- Bacon — Crisp bacon adds the salty, crunchy contrast that makes the topping stand out against the smooth filling. Regular slices cook in a skillet until crisp, then crumble easily once cool. The exact brand matters less than getting the slices crisp before you crumble them.
- Fresh chives — Chives give the finished eggs a fresh, mild onion note and a little color. Choose fresh-looking bunches with firm green stems; limp chives lose their clean, delicate bite. Chop them shortly before using so the pieces stay bright for the topping.
- Kosher salt and black pepper — These season the yolks without distracting from the mustard, vinegar, bacon, or chives. Mash them into the filling so the seasoning is distributed throughout instead of landing in just a few bites.
From Gently Cooked Eggs to a Chilled, Crisp-Topped Platter
Set the Eggs in Hot Water
Arrange the eggs in a single layer in a 3-quart saucepan and add cold water until they’re covered by 1 inch. Bring the water to a full boil over high heat, then cover the pan and take it off the heat. Let the eggs stand for 12 minutes without lifting the lid. Drain them and run cold water over them until they’re cool enough to handle, then peel.
Mash a Smooth, Tangy Filling
Cut each peeled egg in half lengthwise and lift the yolks into a medium bowl. Mash the yolks with the mayonnaise, Dijon mustard, white vinegar, kosher salt, and black pepper until the mixture looks smooth. If you still see dry yolk lumps, keep mashing before adding the filling to the whites; those bits won’t disappear once spooned in. The finished mixture should be creamy enough to spoon while still holding its shape.
Cook the Bacon Until It Crumbles
Cook the bacon in a 10-inch skillet over medium heat for 8 to 10 minutes, turning it as needed. Look for crisp slices rather than bacon that’s merely browned at the edges; soft pieces won’t give the finished eggs the same crunch. Transfer the cooked bacon to paper towels to drain. Let it cool before crumbling so you can break it into small pieces without burning your fingers.
Fill, Chill, and Finish at the Table
Spoon the yolk mixture into the egg white halves, dividing it among them. Refrigerate the filled eggs for at least 20 minutes so the filling gets a chance to chill. Keep the crumbled bacon and chopped chives off the eggs until just before serving, when they’ll stay crisp and look fresh. Sprinkle both over the chilled eggs, then serve.
Two Easy Ways to Adapt the Bacon-and-Chive Topping
A Vegetarian Chive-Topped Platter
Leave off the bacon and finish the filled eggs with the fresh chives. The filling stays creamy and tangy, with a lighter, fresher finish and no crisp, salty topping. There isn’t a bacon replacement in this ingredient list, so skipping it keeps the change simple and genuinely vegetarian.
Chives Through the Filling and on Top
For chive flavor in every bite, divide the chopped chives between the yolk mixture and the final garnish, using the same total amount. Stir part into the smooth filling, then scatter the rest over the eggs with the bacon. You get a more even, mild onion note while keeping a little fresh green color on top.
Storage and Reheating
- Refrigerator: Store the assembled eggs in a covered container and eat within 3 to 4 days. The bacon topping will soften over time, so the best texture comes from adding it just before serving.
- Freezer: Freezing isn’t recommended. The cooked egg whites can turn rubbery and the yolk filling can become watery when thawed.
- Reheating: These are served chilled, so don’t reheat them. Keep the platter refrigerated until you’re ready to serve.
Questions That Come Up When Making Thanksgiving Deviled Eggs
Thanksgiving Deviled Eggs Topped with Bacon and Fresh Chives
Ingredients
Equipment
Method
- Place the eggs in a 3-quart saucepan in a single layer.
- Add cold water to cover them by 1 inch.
- Bring the water to a full boil over high heat.
- Cover the saucepan and remove it from the heat.
- Let the eggs stand for 12 minutes.
- Drain the eggs and run cold water over them until cool enough to handle.
- Peel the eggs.
- Cut the eggs in half lengthwise and transfer the yolks to a medium bowl.
- Mash the yolks with the mayonnaise, Dijon mustard, vinegar, salt, and pepper until smooth.
- Cook the bacon in a 10-inch skillet over medium heat for 8 to 10 minutes, turning as needed, until crisp.
- Drain the bacon on paper towels and crumble when cool.
- Spoon the yolk mixture into the egg white halves.
- Refrigerate for at least 20 minutes.
- Sprinkle the eggs with the crumbled bacon and chives just before serving.
