
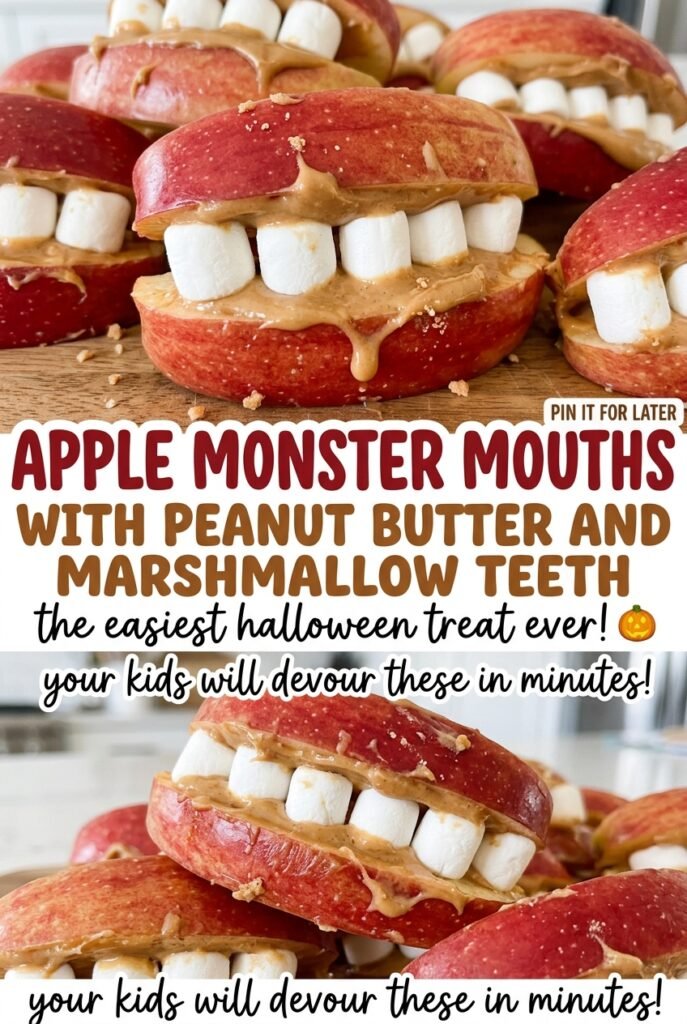
Apple Monster Mouths with Peanut Butter and Marshmallow Teeth
The knife slips around the apple’s curve, and suddenly a plain wedge has a little V-shaped grin. These apple monster mouths are a no-cook snack with crisp apple, creamy peanut…
Tip: save now, read later.
The knife slips around the apple’s curve, and suddenly a plain wedge has a little V-shaped grin. These apple monster mouths are a no-cook snack with crisp apple, creamy peanut butter, and mini marshmallow teeth; the contrast is half the fun. I like that each piece is built from ingredients you can recognize, and there’s no cooking time between cutting the apples and putting them on the table.
The shape comes from cutting the apple into wedges first, then making the notch along each wedge’s rounded edge. That gives the peanut butter a small pocket to sit in, while the marshmallows tuck along the lower edge like teeth. Use a paring knife for the notch and keep the apples whole until you’re ready to assemble, since cut apple looks freshest when served promptly. The finished mouths are playful without needing extra decorations, and the creamy filling holds those little marshmallow teeth in place.
Kitchen Note
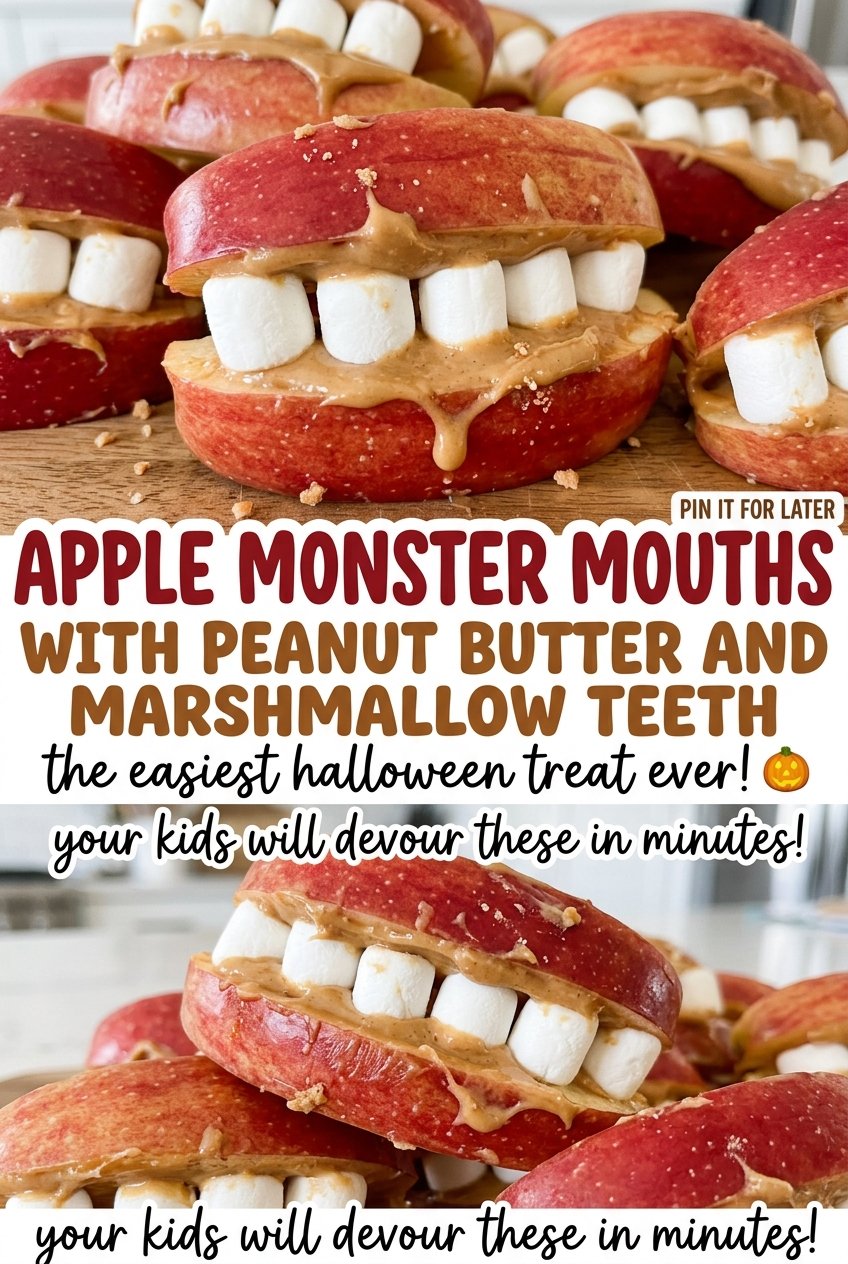
Set the mini marshmallows along the lower edge of the notch, where they look like a neat row of teeth. Press them into the peanut butter rather than onto bare apple so they have something sticky to hold them.
Save these apple monster mouths for a no-cook snack with crisp wedges, peanut butter, and marshmallow teeth.
Cut the Wedges Before You Shape the Mouths
The order of the cuts gives these little snacks their shape. First, each apple half becomes four wedges; then you carve a small mouth into the rounded edge of each one. If you try to shape the apple before dividing it, the later cuts can break up the mouth you just made. Working wedge by wedge also gives you a comfortable piece to hold while you use the paring knife.
There’s a useful balance here: the notch needs to be visible enough to hold the filling, but the wedge still needs to read as one piece of apple. That’s why the cut is a small V rather than a deep opening. The apple supplies the structure, peanut butter fills the gap, and the marshmallows finish the face. Keep that simple order in mind and the pieces look playful without turning into a fiddly project.
This is also why medium apples are practical. They make wedges that are easy to handle and large enough to notch, without making each mouth unwieldy. The recipe makes 8 servings, so the pieces work well as a snack to share rather than a single oversized apple treat.
What Each Ingredient Brings to the Apple Mouths
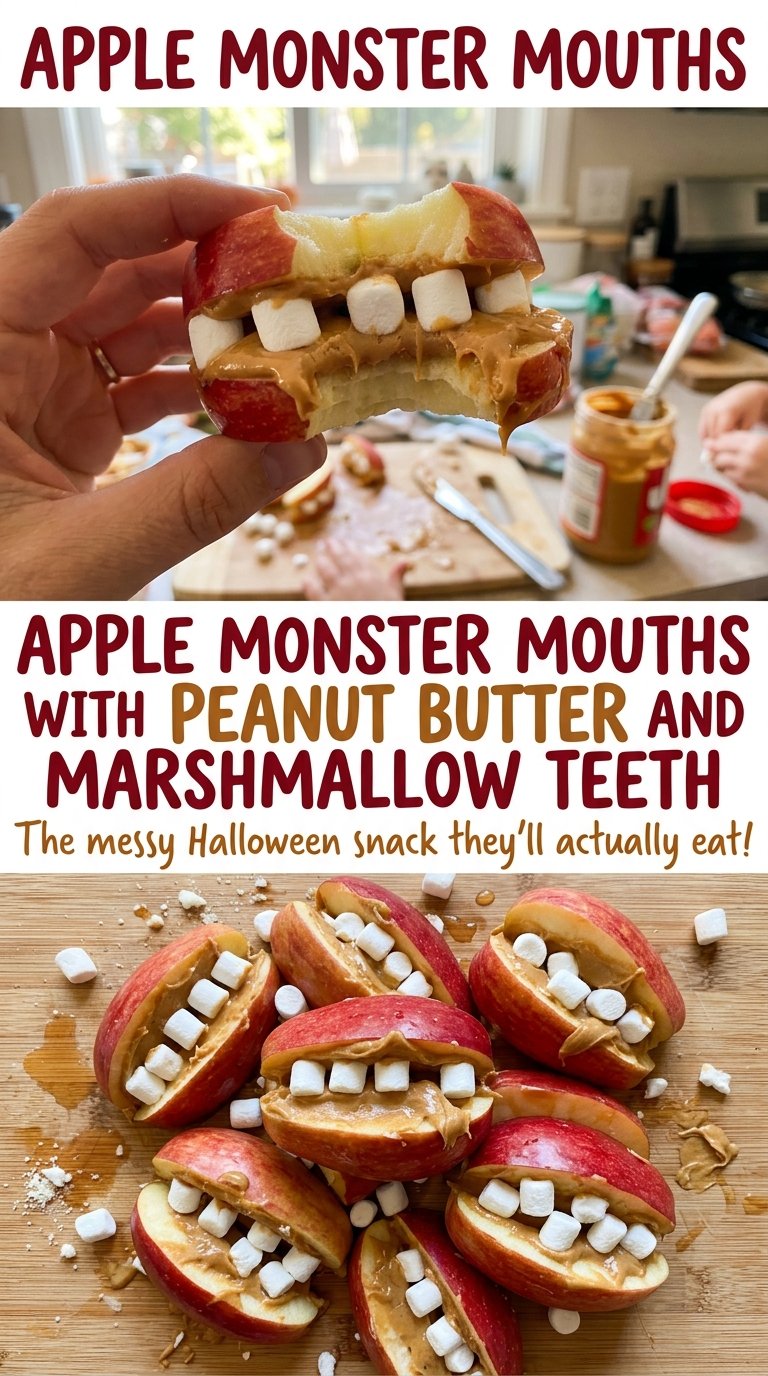
- Apples — Choose apples that feel firm and crisp; a mealy apple is harder to cut neatly and won’t give the same fresh snap. The recipe uses medium apples, washed before cutting. Different apple varieties work, so choose the taste you like, but avoid fruit that’s already soft or bruised through.
- Creamy peanut butter — Its smooth texture spreads into the V-shaped openings and gives the marshmallows a sticky place to sit. A standard creamy peanut butter is easy to work with; there’s no need for an expensive specialty jar. Crunchy peanut butter can replace it in the same amount, but the filling will have little bits and won’t look as smooth.
- Mini marshmallows — Their small size fits along the lower edge of each notch and gives the mouths their little teeth. Any fresh, soft mini marshmallows work; their size matters more than the brand. Full-size marshmallows are too large to sit neatly in these small openings, so there isn’t a clean one-for-one swap.
From Apple Halves to Marshmallow Teeth
Make Even Wedges
Halve and core the washed apples, then cut each half into four wedges. Keep the pieces steady on the cutting board so the wedges have a clean edge and are comfortable to hold. If a wedge is cut unevenly, the notch can still be made, but a consistent shape makes the finished mouths easier to arrange. Work through both apples before moving on to the small detail cuts.
Carve the V-Shaped Openings
Use a paring knife to cut a small V-shaped notch into the rounded edge of each wedge. Stop before the cut goes all the way through; the apple should remain a single sturdy piece. The V only needs to be large enough to make a visible opening for the filling. Cutting too deeply can split the wedge and leave less apple to support the peanut butter.
Fill and Add the Teeth
Divide the creamy peanut butter among the notches and spread it inside each opening. Keep the filling within the cut rather than smearing it over the whole wedge, so the mouth shape stays clear. Press mini marshmallows into the peanut butter along the lower edge of every notch. Serve promptly, while the apple wedges still look freshly cut and the teeth are in place.
Two Ways to Change the Bite Without Losing the Shape
Choose a tart apple for a sharper contrast
Use a firm, tart variety instead of a sweeter apple if you like a brighter bite against the peanut butter and marshmallows. Keep the apples medium and crisp so the wedges still hold their shape when you cut the notches.
Make a peanut-free batch with sunflower seed butter
Replace the creamy peanut butter with the same amount of creamy sunflower seed butter. It fills the notches and holds the marshmallows, with a different, seed-forward taste. For anyone with a peanut allergy, use an option that’s appropriate for their allergy needs.
Storage and Serving
- Refrigerator: These are best assembled and served promptly. If you have leftovers, cover and refrigerate them; the apple may lose its fresh-cut look and crispness.
- Freezer: Freezing isn’t a good fit. Thawed apple wedges soften, and the marshmallows won’t keep their fresh, springy texture.
- Reheating: No reheating is needed. Serve them as a fresh, no-cook snack; warming would soften the apples and marshmallows.
Questions That Come Up While Making Apple Monster Mouths
Apple Monster Mouths with Peanut Butter and Marshmallow Teeth
Ingredients
Method
- Halve and core the apples.
- Cut each half into 4 wedges.
- With a paring knife, cut a small V-shaped notch into the rounded edge of each wedge, stopping before cutting all the way through.
- Divide the peanut butter among the notches and spread it inside each opening.
- Press the mini marshmallows into the peanut butter along the lower edge of each notch and serve promptly.
