
Better-Than-Takeout Orange Chicken
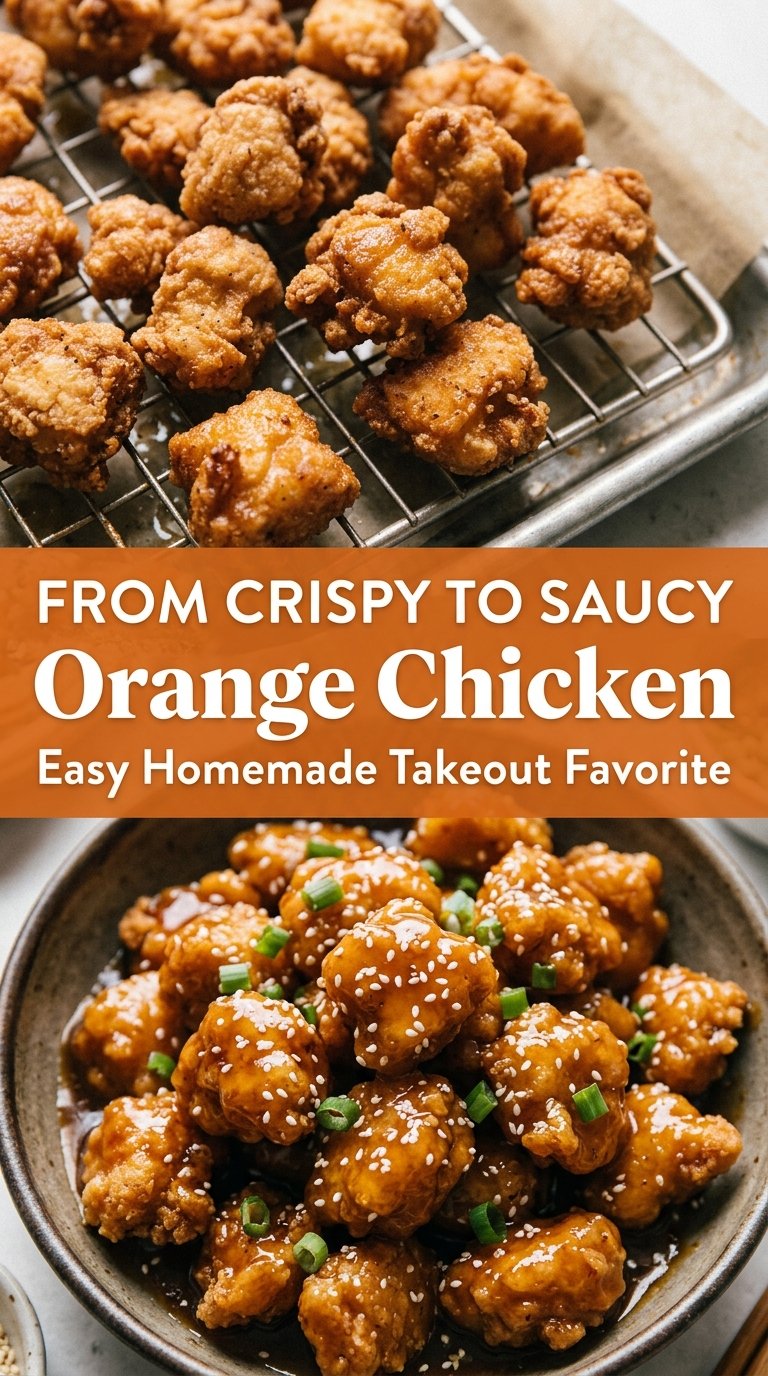
Crispy orange chicken hits that sweet spot between crunchy and sticky, with a sauce that clings to every piece instead of pooling in the bottom of the bowl. The chicken…
Tip: save now, read later.
Crispy orange chicken hits that sweet spot between crunchy and sticky, with a sauce that clings to every piece instead of pooling in the bottom of the bowl. The chicken stays light and craggy under the glaze, and the orange sauce tastes bright instead of candy-sweet, which is what keeps this version in the regular dinner rotation.
The trick is a cornstarch coating over beaten egg, then frying the chicken in batches so the oil stays hot enough to set the crust fast. On the sauce side, orange juice, zest, soy sauce, and a little rice vinegar do the heavy lifting. Brown sugar gives it that takeout-style gloss, but the vinegar keeps it from tasting flat.
Below, I’ll walk you through the exact fry-and-sauce timing that keeps the chicken crisp, plus a few swaps and storage notes so you know what to expect if you want to prep ahead.
The chicken stayed crispy even after I tossed it in the sauce, and the orange flavor was bright instead of syrupy. I also liked that the sauce thickened up fast, so dinner was on the table in under 40 minutes.
Save this orange chicken for the night when you want crisp fried chicken and sticky citrus sauce without waiting on takeout.
The Crispiest Part Happens Before the Sauce Touches Anything
Orange chicken goes wrong when the sauce meets the chicken too early. The crust starts out crisp, then turns soft and heavy before you’ve even gotten the dish to the table. The fix is to fry the chicken until it’s deeply golden, then toss it with the sauce only at the very end, when the sauce has already thickened and looks shiny enough to coat a spoon.
Batch frying matters here too. If you crowd the pan, the oil temperature drops and the coating absorbs oil instead of setting into a crisp shell. You want pieces that look dry and craggy coming out of the oil, not pale and greasy.
- Cornstarch — This is what gives the chicken that thin, crisp shell. All-purpose flour won’t behave the same way here; it makes a softer coating that doesn’t stay as light under the sauce.
- Chicken thighs — Thighs stay juicy through frying and hold up better once they’re tossed with sauce. Chicken breast works, but it dries out faster and needs closer timing.
- Orange zest — This is where the orange flavor turns from generic sweet sauce into something that actually tastes like citrus. Don’t skip it unless you’re replacing it with extra zest from another orange; juice alone won’t give the same punch.
- Rice vinegar — The small amount of acidity keeps the sauce from tasting flat or candy-like. If you don’t have it, use apple cider vinegar, but start with a little less because it’s sharper.
Frying the Chicken, Then Building the Glaze in the Same Pan Feel
Coating the Chicken Evenly
Season the chicken pieces first, then dip them in egg and coat them thoroughly in cornstarch. The egg gives the starch something to cling to, and the rough, dusty coating is exactly what you want before the chicken hits the oil. If the pieces look patchy, press the cornstarch on with your hands so you don’t end up with bald spots that fry unevenly.
Frying to a Deep Golden Crunch
Heat the oil to 350°F and fry in batches until the chicken is golden and crisp, about 4 to 5 minutes. The pieces should look set on the outside and sound lightly crackly when you lift one out. If the oil is too cool, the coating turns heavy; if it’s too hot, the outside browns before the inside is cooked through.
Cooking the Sauce Until It Clings
Combine the orange juice, soy sauce, brown sugar, vinegar, zest, garlic, and ginger in a saucepan, then bring it to a simmer. Stir in the cornstarch slurry and keep cooking until the sauce turns glossy and thick enough to coat the back of a spoon. If it still looks thin, give it another minute; if you add the chicken too soon, the sauce will slide off instead of sticking.
Tossing and Serving Right Away
Turn off the heat, stir in the sesame oil, and toss the chicken in the sauce just before serving. That last-minute toss keeps the crust from going limp before dinner reaches the table. Finish with green onions and sesame seeds, then serve it over rice while the coating still has some crunch left.
Three Practical Ways to Change the Dish Without Losing What Makes It Good
Bake It Instead of Frying
Toss the coated chicken with a little oil and bake it on a wire rack until it’s crisp and cooked through. You won’t get the same shattery crust as frying, but you’ll still get a good bite and the sauce will cling well. This is the best swap when you want less cleanup or don’t want to work with hot oil.
Make It Gluten-Free
Use a gluten-free soy sauce or tamari and keep the cornstarch exactly as written. The texture stays the same because the crispness here comes from starch, not flour. Double-check that your rice vinegar and sesame oil are labeled gluten-free if you’re cooking for someone sensitive.
Make the Sauce a Little Less Sweet
Cut the brown sugar slightly and add a touch more vinegar or orange zest. That gives you a sharper, brighter sauce that leans more citrusy and less sticky-sweet. Don’t cut the sugar too hard, though, or the sauce loses the glossy finish that helps it coat the chicken.
Storage and Reheating
- Refrigerator: Store leftovers for up to 3 days. The chicken will soften as it sits, but the flavor stays good.
- Freezer: It freezes, but the crust won’t stay crisp after thawing. Freeze the cooked chicken and sauce separately if you want the best texture.
- Reheating: Reheat in a 375°F oven or air fryer until hot and the edges crisp up again, then toss with warmed sauce. Microwaving softens the coating fast, which is the main mistake people make with this dish.
Answers to the Questions Worth Asking

Better-Than-Takeout Orange Chicken
Ingredients
Equipment
Method
- Season the chicken thigh pieces with salt and black pepper.
- Dip the seasoned chicken into the beaten eggs, making sure each piece is coated.
- Coat the chicken thoroughly with cornstarch, shaking off excess.
- Heat vegetable oil to 350°F (175°C).
- Fry the chicken in batches until golden and crispy, about 4–5 minutes, then transfer to a paper towel-lined plate.
- In a saucepan, combine orange juice, soy sauce, brown sugar, rice vinegar, orange zest, garlic, and ginger.
- Bring the sauce to a simmer over medium heat, then stir until the sugar dissolves.
- Mix cornstarch and water in a small bowl to make a slurry.
- Stir the slurry into the simmering sauce and cook until thick and glossy, stirring as it thickens.
- Stir in sesame oil until fully combined.
- Toss the crispy chicken with the orange sauce until evenly coated.
- Garnish with sliced green onions and sesame seeds, then serve immediately over steamed rice.