

Cheesy Broccoli and Rice Lunchbox Cups
Cheesy Broccoli and Rice Lunchbox Cups bake up with crisp, golden edges and a soft, cheesy center that holds together when you lift it from the pan. They taste like…
Tip: save now, read later.
Cheesy Broccoli and Rice Lunchbox Cups bake up with crisp, golden edges and a soft, cheesy center that holds together when you lift it from the pan. They taste like a comforting broccoli-cheddar rice casserole, only portioned into tidy little cups that are easy to pack, reheat, and hand out without a mess.
The trick is in the balance. The rice has to be cooked and cooled so it stays fluffy instead of turning gummy, and the broccoli needs just enough steaming to soften without collapsing into the mixture. A little egg and milk bind everything, while sharp cheddar and Parmesan bring enough salt and richness that the cups taste complete on their own.
Below, I’ll walk you through the small details that matter here: how tightly to pack the mixture, why the broccoli should be drained well, and the easiest way to keep the cups from sticking to the pan.
The cups held together perfectly and the edges got that little bit crispy without drying out. I packed them for lunch all week and they reheated better than I expected.
Cheesy Broccoli and Rice Lunchbox Cups are the kind of make-ahead lunch that stays neat, cheesy, and easy to reheat.
Save these broccoli rice cups for packed lunches and easy make-ahead meals
The Difference Between Firm Cups and a Pan of Loose Rice
These cups only work if the mixture can hold together before it goes into the oven. That means the rice needs to be cooled, the broccoli needs to be drained well after steaming, and the cheese has to do more than just add flavor. It helps bind the rice into something that slices and lifts cleanly instead of crumbling into the muffin pan.
The most common mistake is adding too much moisture. Warm rice, wet broccoli, or a heavy hand with milk all push the mixture toward soft and loose. Pressing the mixture firmly into the muffin cups matters too, because compacting it gives the eggs and cheese something to set around as they bake.
What Each Ingredient Is Actually Doing in These Cups
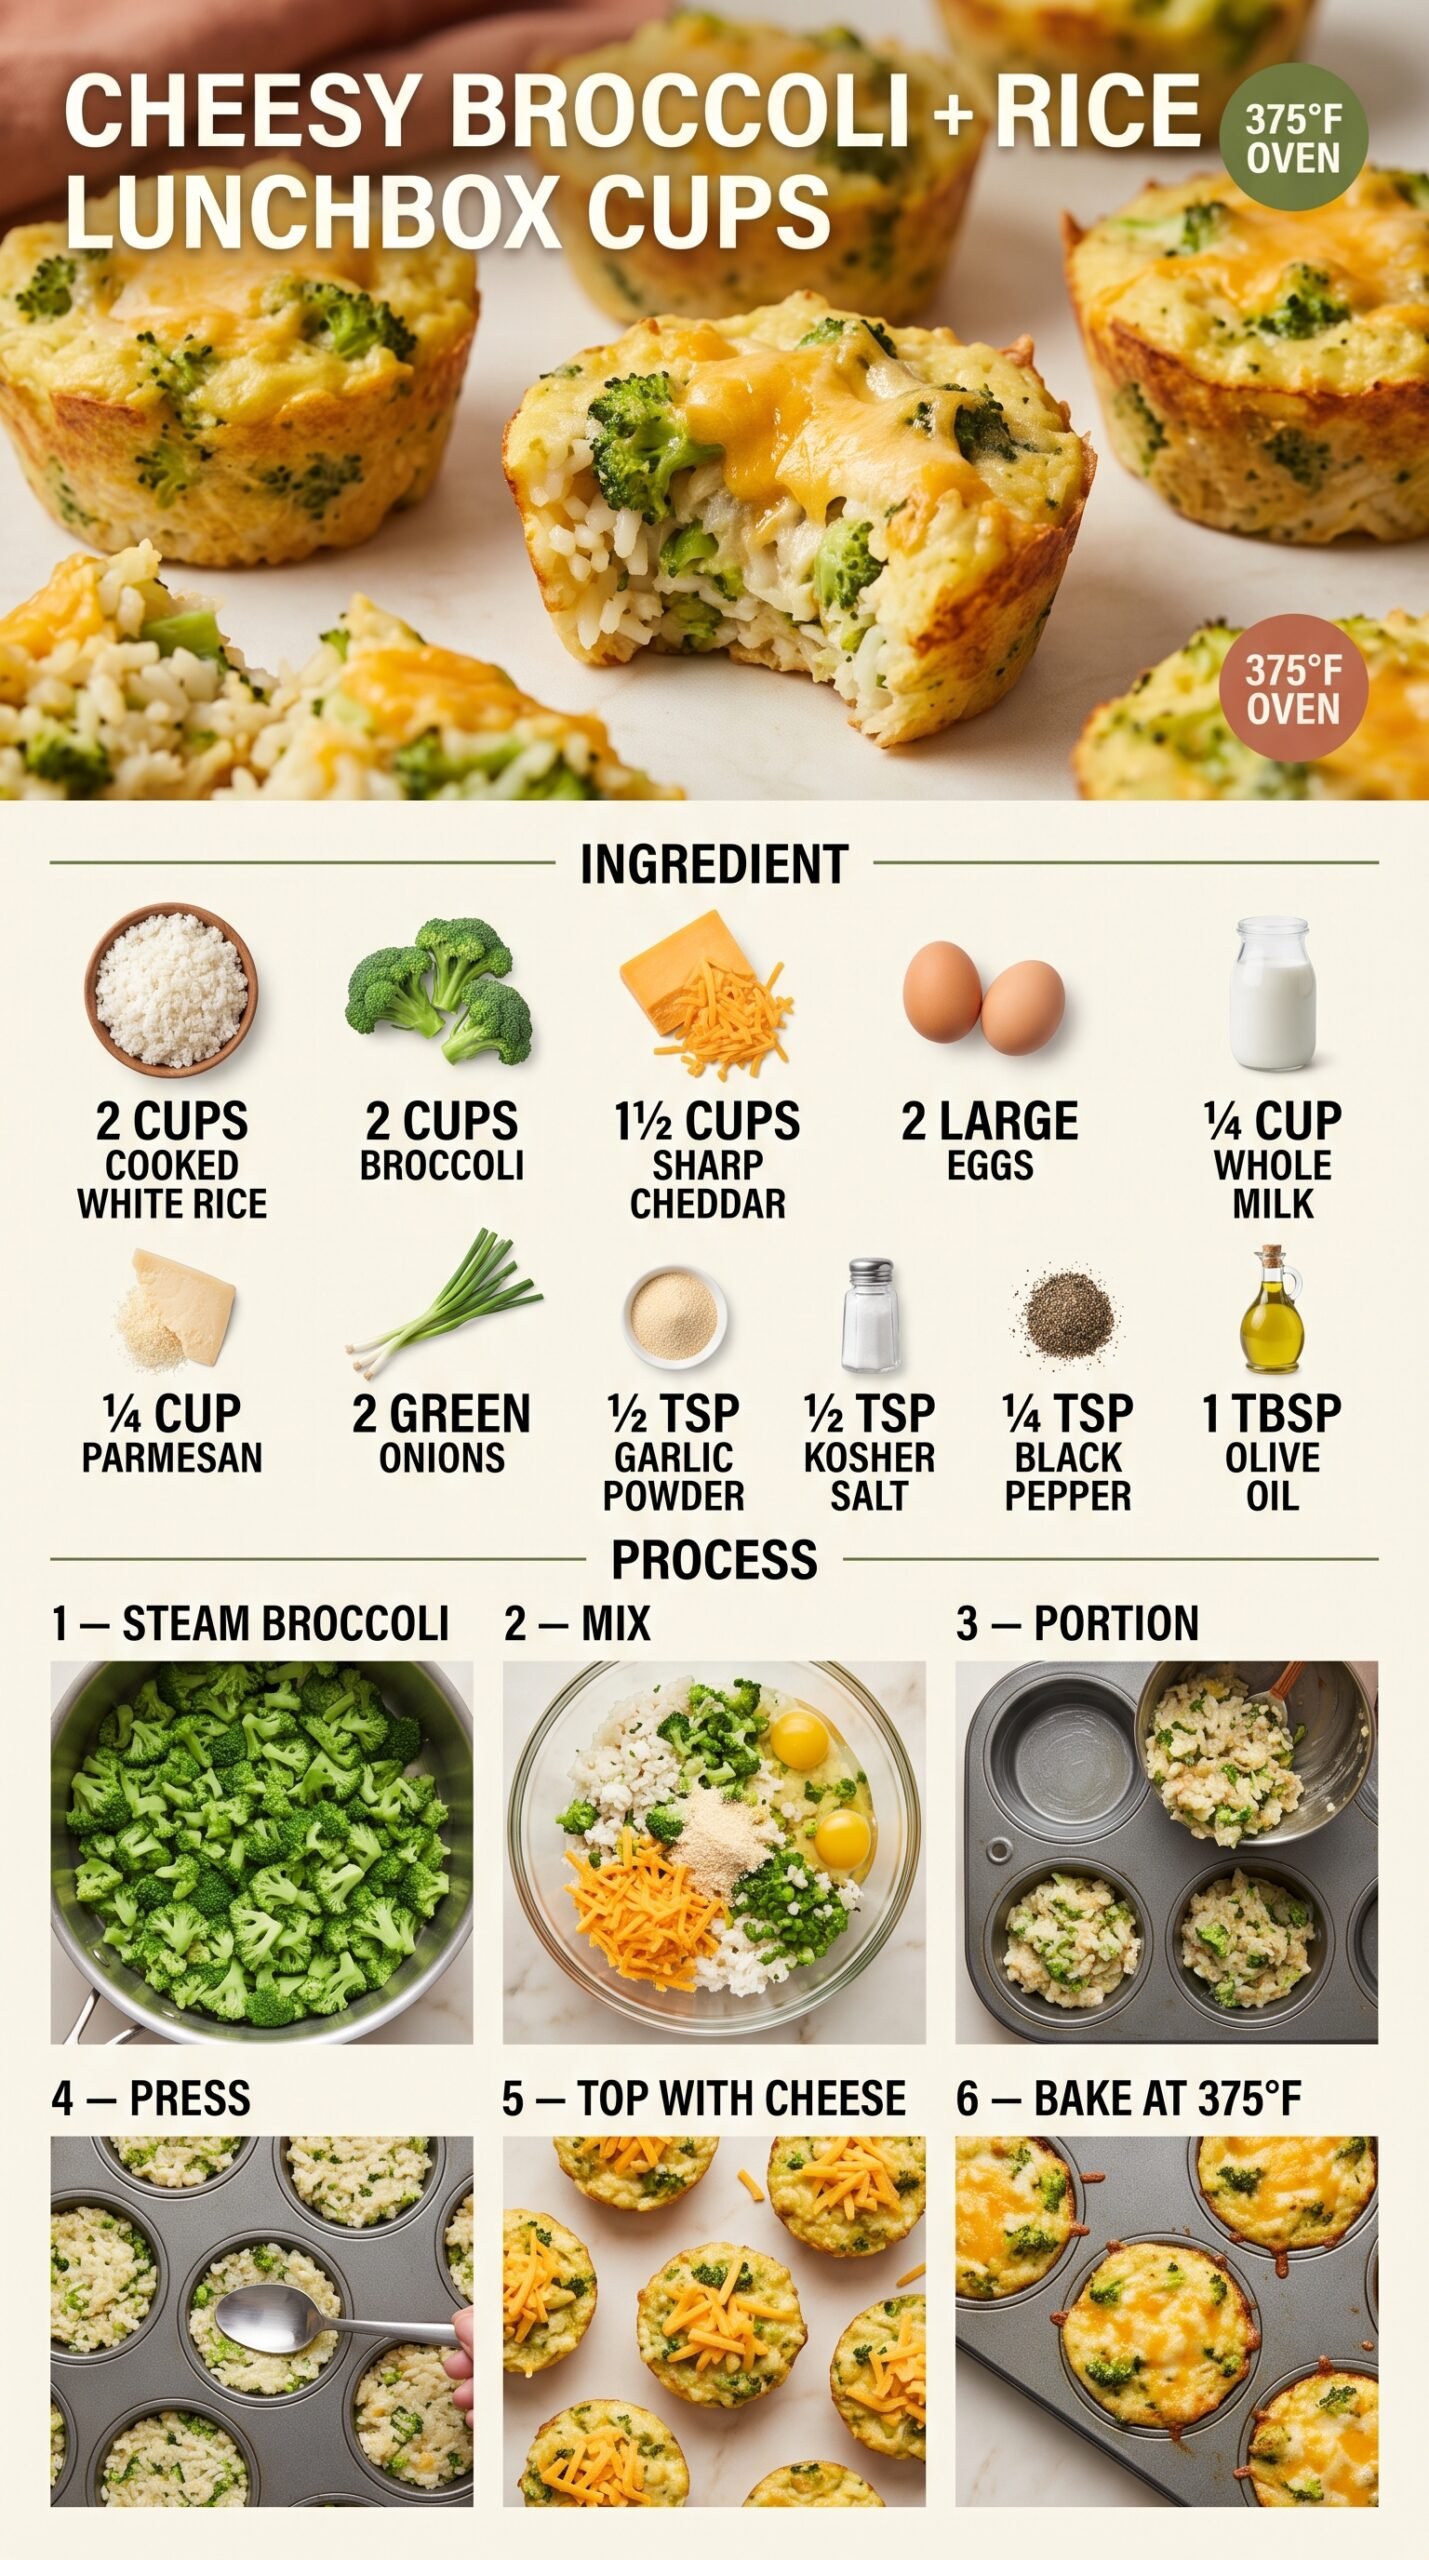
- Cooked long-grain white rice — Long-grain rice stays more distinct after baking, which keeps the cups from turning pasty. Leftover rice works best because it’s dry enough to absorb the egg mixture without going mushy.
- Broccoli florets — Chop them finely so they spread through the cups evenly and don’t poke out in big raw chunks. Steam only until just tender; if the broccoli is soft going in, it’ll fade into the texture and the cups can taste watery.
- Sharp cheddar — Sharp cheddar gives these cups their main flavor and that stretchy, melty center. Pre-shredded cheese works in a pinch, but freshly shredded cheese melts a little better and gives a cleaner texture.
- Eggs and milk — The eggs set the cups, and the milk keeps them from baking up dry and rubbery. Don’t add more milk than the recipe calls for, or the mixture loses the structure that helps it hold its shape.
- Parmesan — Parmesan adds saltiness and a little backbone so the cups taste seasoned all the way through. Grated Parmesan is best here because it disperses evenly through the rice.
- Green onions — They bring a fresh bite that keeps the cups from tasting flat. Slice them thin so they disappear into the mixture instead of creating sharp pockets.
How to Build the Cups So They Release Cleanly
Getting the Broccoli Ready
Steam the chopped broccoli until it’s bright green and just tender, not soft enough to mash with a fork. Drain it well and let the steam escape before it goes into the bowl, because trapped moisture is what makes the cups collapse or turn soggy at the bottom. If your broccoli is still wet, spread it on a towel for a minute and blot it dry.
Mixing the Binder
Whisk the eggs, milk, garlic powder, salt, and pepper first so the seasoning gets distributed evenly. Then add the rice, broccoli, cheeses, green onions, and olive oil. Stir until every grain looks coated and the mixture feels slightly sticky when you press it between your fingers.
Packing the Muffin Pan
Spray the muffin pan generously, especially around the edges and corners. Divide the mixture evenly, then press each portion down firmly with the back of a spoon or your fingers. That compacting step is what gives the cups their shape, and if you skip it, they’ll bake into loose mounds instead of neat little rounds.
Baking Until the Edges Turn Gold
Bake until the cheese has melted and the edges are lightly golden. The tops should look set, and the centers should feel firm when you press them lightly. Let the cups rest in the pan for 5 to 10 minutes before removing them, because they firm up as they cool and release much more cleanly.
How to Adapt These for Different Lunches and Different Diets
Dairy-Free Version
Use a dairy-free shredded cheddar-style cheese and skip the Parmesan, then add an extra pinch of salt and a little more garlic powder for depth. The texture will still hold, but the flavor will be a little less sharp and a little more mellow.
Gluten-Free by Default
This recipe is naturally gluten-free as written, as long as your cheese and seasonings are certified gluten-free. That makes it an easy lunch option without any extra changes.
Swap the Vegetable
Finely chopped cauliflower, peas, or small-diced cooked carrots can stand in for the broccoli. Keep the pieces small and dry, because larger or wetter vegetables break up the structure and make the cups harder to release.
Turn Them Into a Side Dish
Bake the mixture in a lightly greased small baking dish instead of a muffin pan if you don’t need individual portions. The flavor stays the same, but you’ll lose the crisp edges and the neat lunchbox shape.
Storage and Reheating
- Refrigerator: Store in an airtight container for up to 4 days. The edges soften a little, but the cups stay intact.
- Freezer: These freeze well. Cool completely, wrap individually, and freeze for up to 2 months. Thaw in the refrigerator before reheating for the best texture.
- Reheating: Warm in the microwave in short bursts or in a 350°F oven until heated through. Don’t blast them on high for too long, or the eggs can turn rubbery while the centers are still cold.
Questions I Get Asked About These Lunchbox Cups

Cheesy Broccoli and Rice Lunchbox Cups
Ingredients
Equipment
Method
- Preheat the oven to 375°F. Coat a standard 12-cup muffin pan thoroughly with nonstick cooking spray so the cups release cleanly.
- Steam the chopped broccoli for 3–4 minutes until bright green and just tender. Drain well and allow it to cool slightly so it doesn’t loosen the rice mixture.
- Whisk the eggs, milk, garlic powder, kosher salt, and black pepper in a large bowl until combined. The mixture should look uniform and lightly speckled.
- Add the cooked rice, broccoli, 1¼ cups cheddar, Parmesan, green onions, and olive oil. Stir until evenly distributed and the rice mixture holds together when pressed.
- Divide the mixture evenly among the 12 prepared muffin cups. Press each portion firmly into the pan so the cups keep their shape after baking.
- Sprinkle the remaining ¼ cup cheddar over the tops. Bake at 375°F for 20–25 minutes until the cheese melts and the edges turn lightly golden.
- Rest the cups in the pan for 5–10 minutes before removing them. Run a thin spatula or butter knife gently around each cup and lift them carefully out of the pan.
- Cool before packing into lunch containers. Let them cool fully so they set in the center and don’t steam up the container.
